Wildman Rocketry Extreme Wildman
Wildman Rocketry - Extreme Wildman {Kit}
Contributed by Mike Caplinger
| Construction Rating: | starstarstarstarstar |
| Flight Rating: | starstarstarstarstar |
| Overall Rating: | starstarstarstarstar |
| Published: | 2011-06-02 |
| Diameter: | 4.00 inches |
| Manufacturer: | Wildman Rocketry |
| Style: | Sport |
 Brief
Brief
The Extreme Wildman is a 4-inch-diameter 100-inch long 75mm MMT all-fiberglass 3FNC kit. I bought one during Wildman Rocketry's "Black Saturday" sale right after Thanksgiving 2010 (1/3 off!) with the idea of using it for my NAR L3 flight.
Components
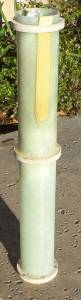
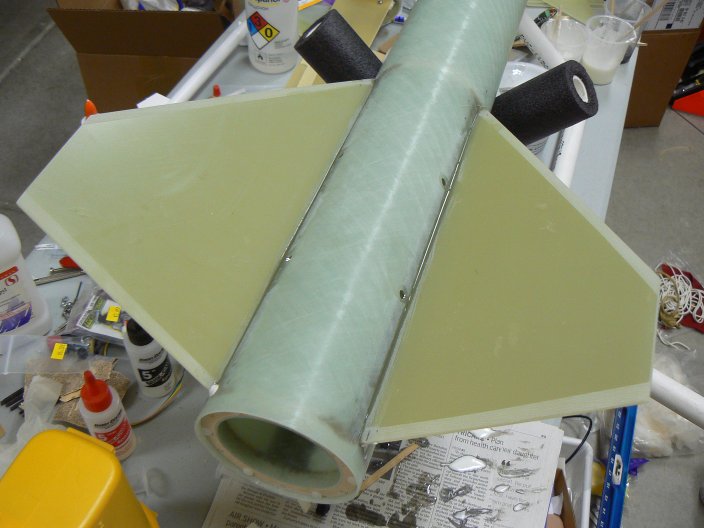
The kit is quite complete. The tubes are all G12 filament-wound fiberglass-epoxy composite, and the fins and bulkheads G10 fiberglass-epoxy composite flat stock. The centering rings are 1/2" baltic birch. The nose cone is a 5:1 von Karman made of gelcoated fiberglass, with an aluminum tip. The kit also includes Kevlar flat strap and tubular nylon for the recovery harness, and a complete set of hardware (nuts, washers, welded eyebolts, all-thread for the avbay, quick-links, plastic rivets and shear pins.) All you supply are parachutes, electronics/avbay sled, motor retainer, and rail buttons.
Construction
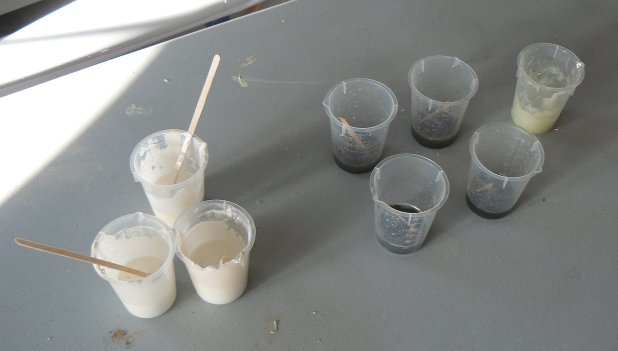
 The instructions on the Wildman web site are clear and concise, and I followed them almost exactly. I used US Composites 635 thin epoxy resin with 3:1 medium hardener for all structural bonding. Additives were used to increase strength and/or viscosity as needed: 1/4" chopped fiberglass strand (centering rings to MMT), milled fiberglass (internal fillets), colloidal silica (recovery strap), and 3M microballoons (external fillets). The US Composites worked great and it's considerably cheaper than West Systems.
The only additions I made were that on the advice of my L3CC mentor I made sure the kevlar strap was masked from epoxy above the top CR so there would be no sharp bends in it (strap can break if it has stress concentrators.) I also epoxied a 1/4-inch birch plywood ring into the nose cone base. The G10 bulkplate is attached to this ring with three 6-32 socket-head cap screws into T-nuts, so that a small G10 sled for tracking electronics can be accessed inside the nose cone.
I used an Aeropack flanged motor retainer. You should note that with a 3-inch MMT and 4-inch airframe there is very little space to get the inserts Aeropack gives you to attach the retainer into the aft centering ring. I ended up using aluminum pop rivets bonded into holes in the CR instead. A glue-on Aeropack might be a better choice.
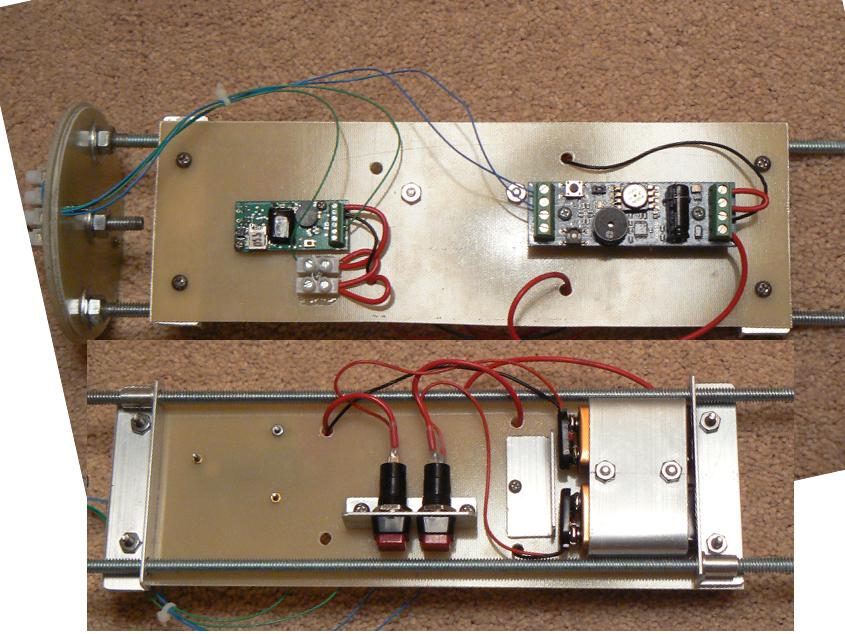
The avbay is very large, so I had no difficulty fitting my electronics (Featherweight Raven2 and Missileworks RRC2 Mini) into it. I used Radio Shack pushbuttons accessed through a vent hole for arming.

I used small rail buttons (1010 rail) and they were perfectly adequate.
 Finishing
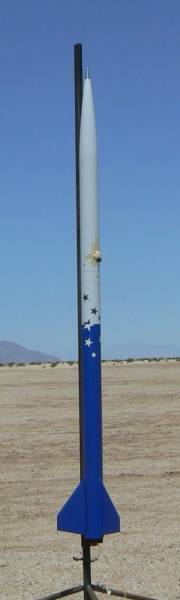
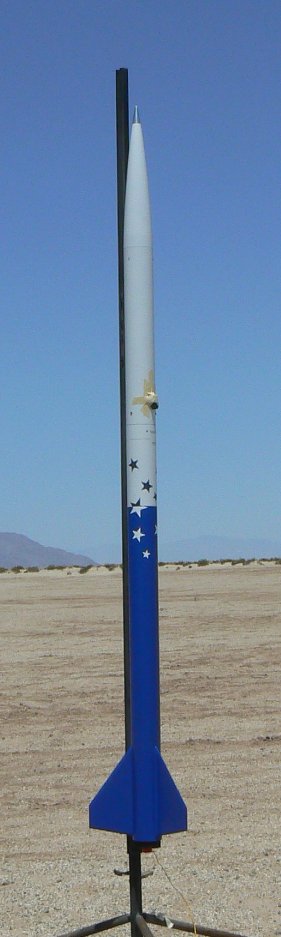
 The fins are pre-beveled and with fiberglass there is no filling to do. For the test flight and my L3 cert, I simply flew the rocket in its unpainted state. After the L3 I shot it with Rustoleum Painter's Touch primer followed by gloss white and deep blue. The white yielded the best spray paint job I have ever done, but I had to wet-sand the blue and recoat because the first time around it was fairly dusty. Seems like I am still not getting consistent results with Rustoleum. I finished up with some stars hand-cut from Monokote trim sheet.
Dry weight of the rocket (no motor) is a bit under 15 pounds. With the M1297 the pad weight was about 25 pounds.
Flight
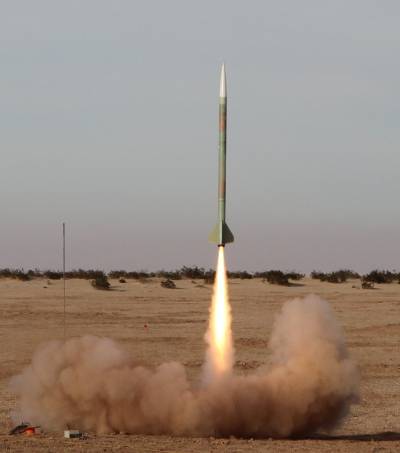
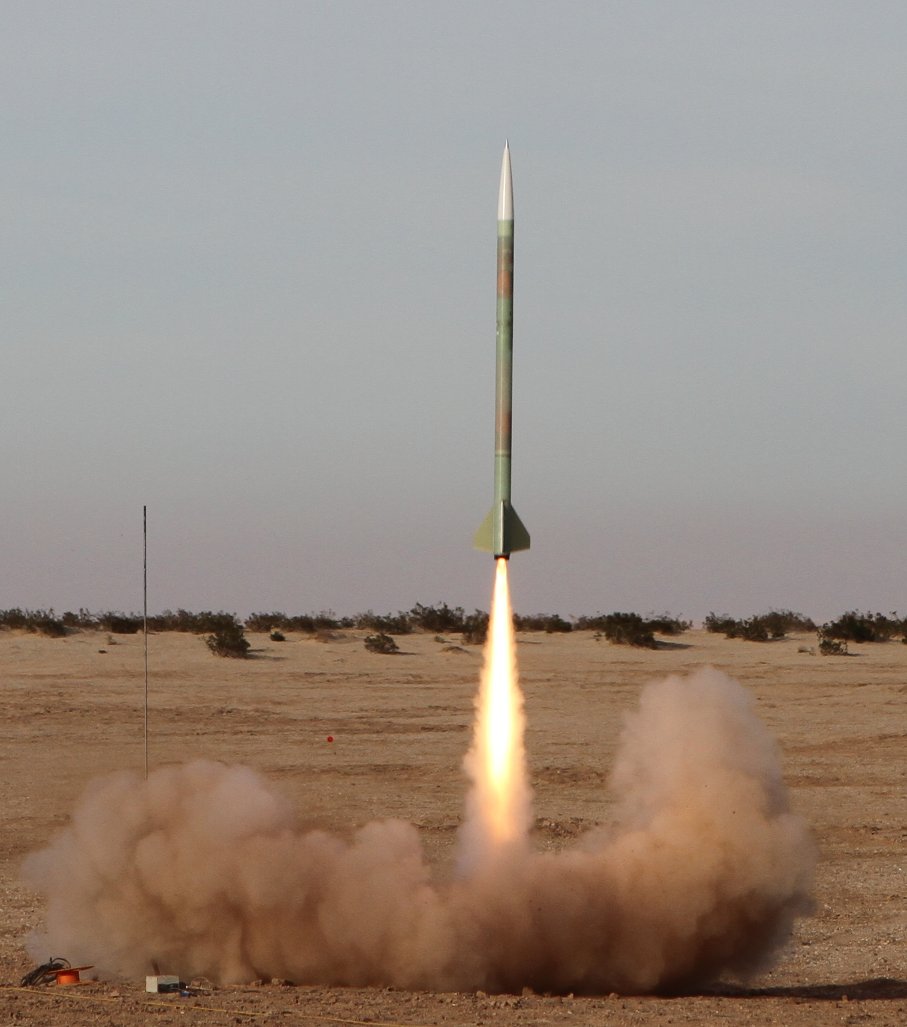
The first test flight was on a CTI Pro75 2G K1085 White Thunder motor. The ascent was arrow-straight and everything worked perfectly. Two months later I flew my L3 on an AT M1297, and again had a great flight (went to 12700 feet and broke mach). Definitely no stability concerns with this rocket!
Recovery
The kit comes with no parachutes. After a lot of research I bought a SkyAngle Classic II 60" chute for the main, and a 24" SkyAngle CERT-3 drogue.
The drogue worked well; I attached it about 10 feet from the upper section of the rocket and the descent was stable with the booster below the upper section all the way; descent rate on the drogue was about 65 fps. With the C60 the descent rate on main ended up a little faster than I wanted (25.3 fps for my L3 flight) but the next larger size would be hard to fit in the upper section of the rocket. If I had it to do over I might try a conventional chute such as a Top Flight Recovery PAR-84.
I used a 12x12" nomex chute protector for the main, but this is really too small for such a large chute despite the small diameter of the airframe (I got some scorching of the main), so going to at least 18x18" is advisable.
I used 2.7g of BP for the apogee deploy and 2.2g for the main. This worked fine with my recovery gear.
In my opinion the quicklinks provided in the kit were a bit wimpy, so I used larger ones in most places.
Summary
After working on a couple of complex projects (a three-stage rocket and a very-high-altitude 54mm diameter) with so-far disappointing results, I decided that a "simple" L3 flight might be a good way to relax. This kit made that a reality. If you're looking for a 4-inch 75mm all-fiberglass rocket the Extreme Wildman is a great choice; it's light enough to fly well on Js or small Ks and will really rip on an M.
 |
 |
Flights

|
|