Welcome
Welcome to RocketReviews.com (formerly EMRR).
RocketReviews.com is the home of almost 5000 reviews of rocketry kits and products. Written by visitors to RocketReviews.com like you, the reviews cover everything from low-power model rocket kits to high-power rocket motors.
The site's Flight Log allows you to record and share your rockets and their flights. The Builds feature helps you document your rocketry projects.
At RocketReviews.com, you'll also find a large collection of rocketry resources such as a list of rocketry clubs, and large libraries of OpenRocket design files and Rocksim design files. A number of rocketry tools and calculators are available to help you design, build, and fly your rockets.
As you explore RocketReviews.com, you'll also find a number of fun things such as a huge library of rocketry videos and a collection of photo albums.
 |
 |
Featured Review
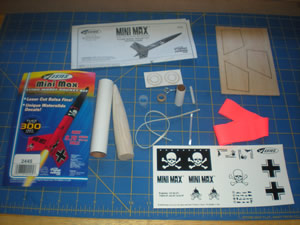
Estes Mini Max
Manufacturer: Estes Diameter: 0.9800 inches Length: 9.7500 inches Skill Level: 1 Style: Sport

Construction Rating: 
Flight Rating:
Overall Rating:
Contributed by Duane Boldt

Brief:
Smaller version of Estes' classic Der Red Max kit. It has a balsa nose cone, waterslide decals,
streamer recover and is powereed by Estes 13mm Mini Motors. The model was built and the review submitted as part of the
2010 EMRR Challenge for the "Hit List" component.
Construction:
- 1 - 13mm Engine Mount Tube
- 1 - Estes Engine Hook
- 1 - Mylar Hook Retainer
- 1 - 13mm Engine Block
- 2 - Laser Cut Centering Rings
- 1 - 5" BT-50 Body Tube
- 3 - Laser Cut Balsa Fins
- 1 - Launch Lug
- 1 - Screw Eye
- 1 - Balsa Nose Cone
- 1 - Elastic Shock Cord
- 1 - Streamer
- 1 - Waterslide Decal Sheet
 The
quality of this kit was very good. I had purchased two kits for the "Hit List" part of the EMRR 2010
Challenge. Both arrived from http://JonRocket.com in great condition. The parts were very good quality. I especially
liked the quality of the nose cone and fins.
The
quality of this kit was very good. I had purchased two kits for the "Hit List" part of the EMRR 2010
Challenge. Both arrived from http://JonRocket.com in great condition. The parts were very good quality. I especially
liked the quality of the nose cone and fins.
As with all Estes’ kits I have built, the instructions were very clear and easy to follow. They had plenty of illustrations for first time modelers.
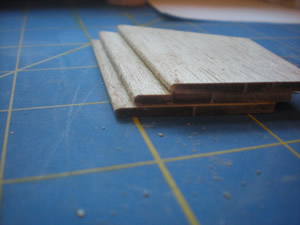
First is sanding the fins. The instructions show my preferred method. Sand each side of the fin sheet before removing the fins. Then cut them out and "stack" them when sanding the edges. This helps to keep them uniform. The leading edges were rounded and the root and trailing edges left squared.

The motor mount is then assembled with the motor tube, two centering rings, an engine hook and Mylar hook retainer. This was pretty straight forward.

Tube marking is them done with a cut-out marking wrap and lines extended with a door jam or other angled marking tool.
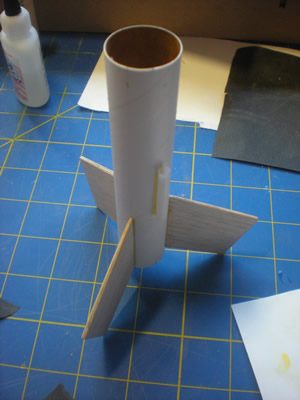
The three fins are then glued on and aligned. A fin alignment guide is provided, printed on the instruction sheet.
The body tube is then marked for the launch lug attachment and the lug is sanded and glued on.
The motor mount is then glued into the body tube flush with the end. This is a change from many other Estes kits. Many glue in the motor mount before attaching the fins.
The instructions then call for screwing in the eyelet to the balsa nose cone. There was no mention of gluing in the eyelet in the instructions.
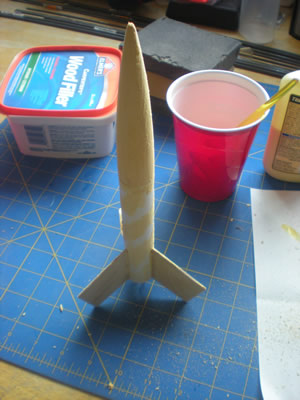
I sanded the nose cone, filled it with Elmer's Wood Filler, and sanded again.

For the eyelet, screwed the eyelet in the center of the nose cone base and then unscrewed it. I epoxied it in the hole and spread some epoxy around the base. With larger rockets, I would have epoxied in a harder wood dowel for mounting the eyelet.
The shock cord attachment uses the standard three-fold Estes method. The folded, glued mount is then glued in the top of the body tube far enough down not to block the base of the nose cone when inserted.
I prefer to use Kevlar® cord attached to the motor mount, but stuck to the instructions for this review.
Finishing:
The balsa fins and nose cone were very good quality and were easy to sand smooth and finish.
Fillets were applied to the fins and launch lug and let to dry.
The instructions called for filling and sanding the nose cone and fins. I did this and also filled the body tube spirals at the same time.
I filled the spirals on the body tube for this stock Mini Max and decided to not fill the spirals on the modified Mini Max to show the difference.
Filling in the spirals does make a difference...
I used cheaper ColorPlace primer and paint from Wal-Mart with very good results. It's about 1/3 the cost of the Krylon they sell and I often get better results with the cheaper one. Both brands are made by the same company.
The waterslide decals are applied last. After they had dried for a day, I painted Future floor wax over them with a fine, flat paint brush to seal and protect them.
Construction Rating: 5 out of 5
Flight:
We flew three flights on Estes A3-4T motors. All flights were nice and straight despite the wind
we had that day. This is a great flying little rocket.
Recovery:
Recovery was great on all three flights with the provided streamer. No damage at all.
Flight Rating: 5 out of 5
Summary:
I had fun building both this unmodified Estes Mini Max and a modified version. Both flew great
on the A3-4T motors. I highly recommend this kit.
Overall Rating: 5 out of 5
Browse our database of about 4,300 reviews of rocketry kits and other products.
Sponsored Ads


 - Ancient Prophecy - Unlimited Edition - Rare")


 - Number Hunters - 1st Edition - Super Rare")

, Launch Pad/ Controller, Glue, Four AA Batteries, and Two Engines")
|
|