| Construction Rating: | starstarstarstarstar_border |
| Flight Rating: | starstarstarstarstar_border |
| Overall Rating: | starstarstarstarstar_border |
Brief
This is a Semroc retro-repro of the Estes Scrambler originally designed by Bill Simon in 1968. It's basically a stretched version of the 3x18 clustered Astron Ranger with a clear payload tube to accommodate an egg. The Semroc kit offers a few convenient upgrades--an ejection baffle and laser-cut fins.
Components
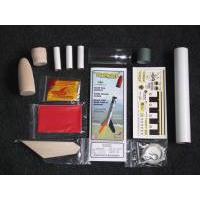
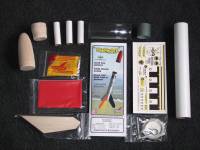 Parts were excellent quality and include:
- Balsa nose cone
- Balsa transition/adapter
- BT-60 body tube
- Laser-cut balsa fins (3)
- 18mm motor tube assy (3x, tube, metal hook, motor block)
- Cluster centering ring
- Baffle kit
- Elastic shock cord
- Plastic chutes (2)
- Waterslide decals
Construction
The instructions are well written with decent illustrations. Though building a cluster can be tricky, Semroc has made this about as simple as possible, and the skill rating of 2 is a fair assessment. Overall, I had less than an hour in construction, with a couple hours of prepping and finishing.
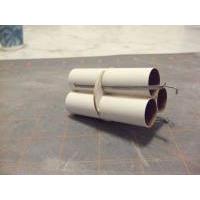
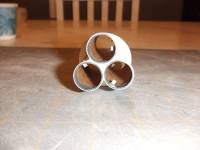 The motor mount consists of 3 18mm tubes, metal hooks for retention, and coupler-style centering rings for blocks. Each tube goes into a section of the main centering ring, though there's a neat trick to it--the centering ring has a larger, solid outer band and an interior section with three wedges to wrap around the motor tubes. When pulling the centering ring from the laser-cut sheet, keep it intact (outer and inner sections together). This allows for easy alignment and orientation of the motor tubes while gluing. Once the tubes are set, tack the inner wedges to the tubes. After everything's dry, you can then remove the outer ring from the assembly, and the resulting assembly fits perfectly inside the BT-60. Before gluing it in, though, plug the tiny gap in the center between the 3 tubes with some wadding and glue (or dog barf, or even the laser-cut section if you didn't already throw it out as I did...). Semroc even made sure there were slight notches for the hooks, which helps make sure the tubes are oriented in such a way that all three hooks pull away without interference, making motor loading/unloading quick and easy.
The BT-60 gets marked for fins and launch lug via a template on the instruction sheet.
The baffle is a relatively light duty design, consisting of a coupler section about 2" long and a single baffle disk (fiberboard with some holes). The disk goes on the forward end of the coupler, so a good glue joint is essential (or a good fillet when placing in the tube) to prevent it from blowing out the front of the rocket. The baffle also serves as the shock cord anchor point--slip the elastic through a slot on the disk and glue/knot to the other side. The completed baffle assembly is then glued into the body tube about 4-5" back from the forward end.
Fins are precut, just needed a light sanding before tacking on with CA then applying wood glue fillets.
Launch lug needs a small wood standoff due tot eh larger diameter payload tube. The supplied lug is 1/8", which in my opinion is a bit wimpy for a 3-motor cluster, especially if carrying an egg payload. At that weight and with that much thrust, a 3/16 would be a much better choice. 1/8" rod is just going to whip too much.
The payload is a simple assembly of a balsa transition adapter, the clear tube, and a balsa nose cone. Mine were very tight fitting, needed a light sanding to fit. If you're going to fly this with payloads, you'll need to consider how to keep everything together here. A friction fit could work, though external tape would be a better idea. If you're worried about the appearance, consider using a couple small screws through the payload tube into the cone and transition.
 Finishing
For the paint scheme on this, I set the clear payload tube aside and taped the nose cone shoulder to the transition forward shoulder, then shot everything with a couple coats of primer. I'd pre-treated balsa with Fill N Finish and filled spirals with a smearing of wood putty. After sanding away most of the primer, I then followed up with two coats of gloss white.
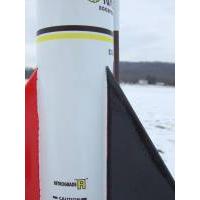
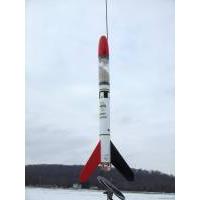
After allowing a day for curing, I masked off to paint one fin and the nose cone red. I then masked that fin, set the nose cone aside, and masked off the transition (upper half) and painted the 2 remaining fins and upper transition gloss black.
I wound up hand painting the cone and transition shoulders gloss black, though a strip of black tape would do just as well behind the clear tube.
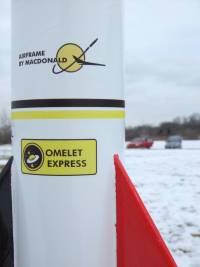
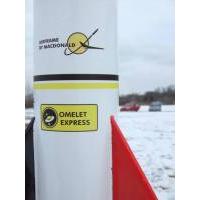
This has a number of somewhat zany decals offering plenty of opportunity to give the model a somewhat customized decorating scheme. I found the decals easy to work with and apply, though would note that the yellow is very thin, so really only works against a white background. I'd also note that one of the yellow/black stripe decals is way too long for the body tube, needs to be trimmed to fit properly with minimal overlap.
Flight
This is a 3-motor cluster, so prep is not exactly simple. Thanks to the alignment of the motor hooks, securing the motors was easy. I'd normally use Quest Q2G2 igniters for clusters, which fire instantly and have longer leads, but stupidly left them behind. Instead, I went with standard Estes igniters, twisted in parallel hookup. Using a Pratt launcher powered by my car's battery, ignition was quick and I successfully fired all 3 C6-5's. The Scrambler, complete with a fresh egg in the payload, was on its way.
The flight was fairly straight, maybe a slight weathercock in the 8-10 mph winds. The -5 delay was perfect, just after it had arced over.
Recovery
Recovery is intended to be two-part, with the payload bay coming down under a 16" chute, and the main body under a 12" chute. This struck me as a bit backward, given the wieght of the 3 motors, but I went stock. I was also worried about whether or not the lower (main body) chute would deploy, as I've been burned a few times by the lower chute getting left behind in the tube while the upper chute deploys. I overthought this a bit, and tucked the lower chute into the last fold of the upper chute, hoping that would help pull it out without tangling. It must have tangled, though--the payload went zipping off to one side while the main body was coming down under a single bright red chute--the chute intended to support the payload.
My main body drifted and drifted, landing about 25 feet up in a pine tree, where a buddy of mine had been tracking it the whole way (thanks, E.B.!). I stubbornly climbed up tp retrieve it, coming down with a fresh pine scent about me. We marched back trying to find the payload, eventually spotting it just inside a line of trees flanking the field. In another sign of rotten luck, the thing came down and struck the trunk of a fallen tree rather than hitting the snow, and the egg had no chance. The Scrambler lived up to its name on this flight...
Summary
For folks nostalgically fond of the original Scrambler or even the Astron Ranger, this kit certainly has a lot of appeal. It's well designed, flies fine, and the clear payload tube is a neat feature. Personally, I'd prefer to fly my eggs on less risky single motors, but I do enjoy the occasionaly wow factor of seeing the multiple plumes and smoke of a good cluster. I'd think about bringint it down tethered together, though.
 |
 |
Flights
 |
 |
Sponsored Ads
 |
 |






Bill Eichelberger (October 23, 2012)
What? No pictures of the carnage?