Bigger Big Daddy Akavish
By Roger Smith
2013-07-21
 The Big Daddy Akavish is one of a series of spider-like rockets which my wife, Bracha, and I have built and flown. It all started some years ago when the Spacecoast Rocketry Association had a "aniimal themed rocket" competition at one of their launches. Bracha uses a variation of the song "Itsy Bitsy Spider" to teach children a few words of Hebrew. She substitutes a Hebrew word for some of the English words - such as "akavish" for "spider." So, it occured to me for us to build a spider-like rocket for the contest.
The first Akavish was a small, D-engine powered rocket with crooked legs acting as fins. We took too long building the rocket, so it was not available for entry into the SRA contest. Instead, it first flew at a NEFAR launch. It whipped off the launch, did two loops, then crashed into the ground. After that, we reinvented the Akavish as a Sputnik-like rocket.
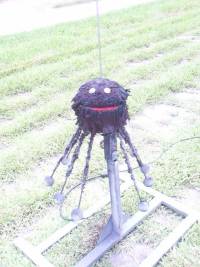
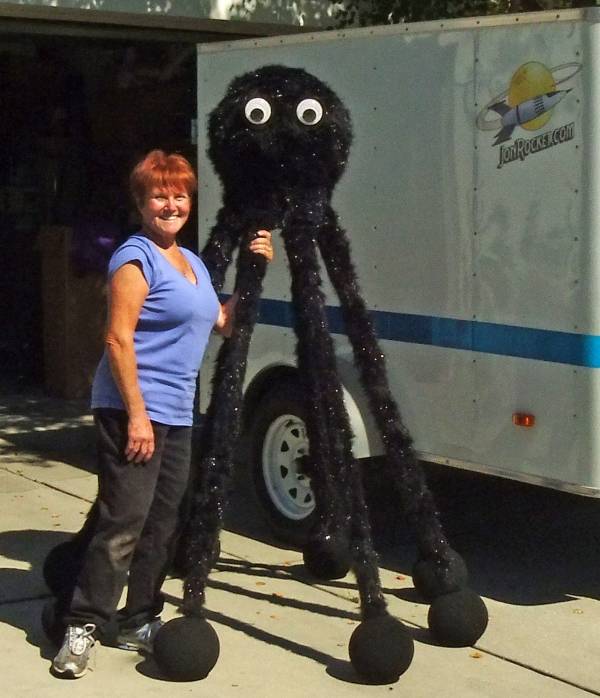
This Akavish stood about 18" tall and flew well on G motors. We built two more Akavishes of the same size (which looked much better than the one pictured above!) before creating the almost four-foot tall Big Daddy Akavish.

The Big Daddy Akavish has flown many times at NEFAR and TTRA launches. It's even appeared in a national TV program.
Last November, our launch of the Big Daddy Akavish went astray when a hole opened up in the side of the Aerotech motor. Hopping back on the horse, we launched the Akavish in March on a CTI motor and ... the motor came apart resulting in a rather hard landing for the furry rocket.
Since a spider-themed rocket should have eight legs, not three, we decided a rebuild was in order.
We decided to make the new Big Daddy Akavish a little bigger.
Getting Started
2013-07-22
The fuselage of the Akavish is made from 11.4" diameter tubing from Public Missiles Ltd. I cut a section about 16" long using my table saw.
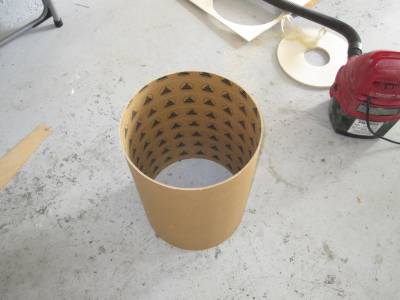
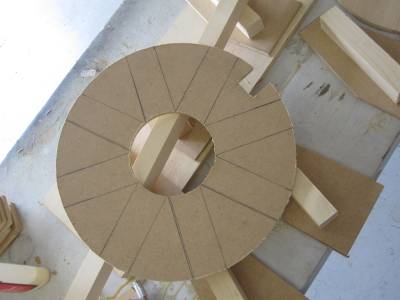
Next, I used my plunge router and Jasper Cutting Guide to create a couple of center rings from 1/4" thick MDF.
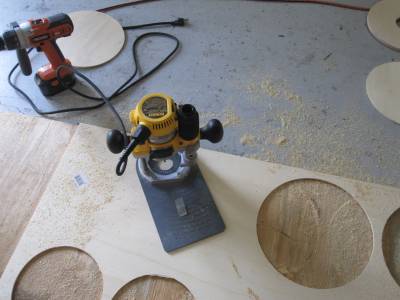
The center hole is sized for a 4" motor tube.
I started to glue one of the rings into the tube before I realized that I shouldn't do that yet.
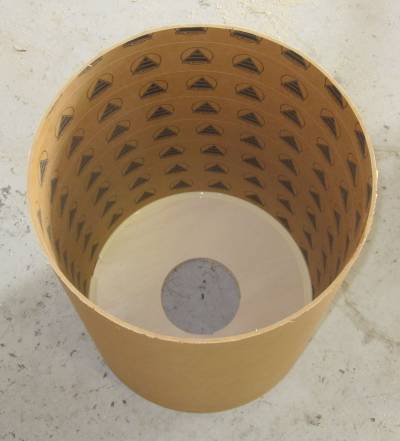
Fortunately, I realized my mistake before the glue dried.

Internal Structure
2013-07-22
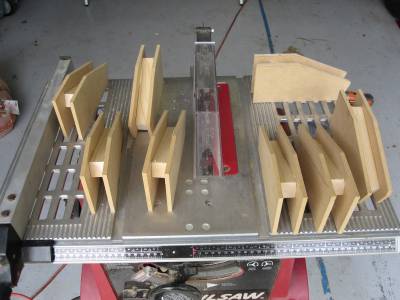
Next, I cut out 16 pieces from the MDF to use to create the structure inside the Akavish. These form the sides of the parts that hold the legs.
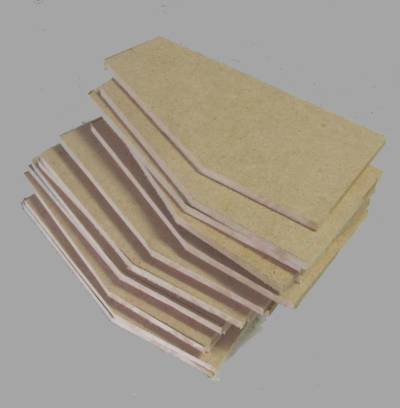
I drew the pattern for the pieces on the wood then cut it with the table saw. After cutting all sixteen pieces, I used the belt sander to ensure that they were all the same size and shape.
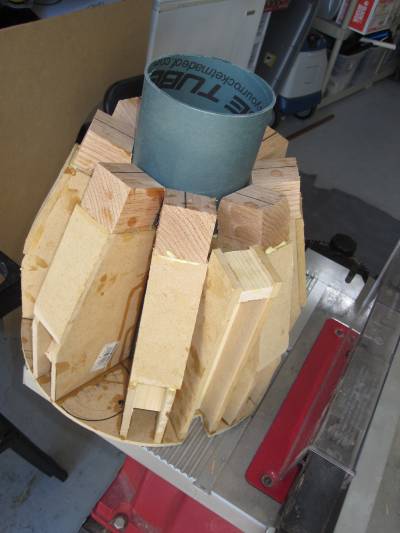
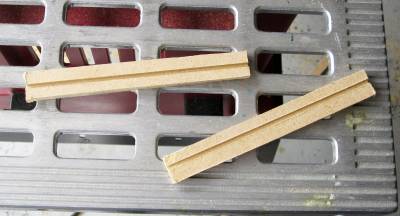
Next I cut a 1" square dowel into about 6" lengths.
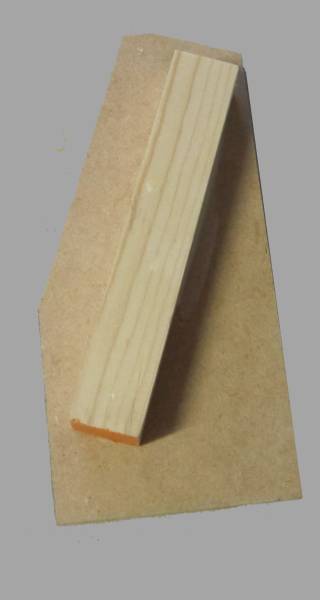
These pieces are each glued between two sides forming a channel for the leg.
These leg-holders will attach to the bottom centering ring and the motor tube.
I cut up a 1 1/2" square dowel to create eight cubes. Into each cube, I drilled a hole then used a tap to create a thread in the hole.
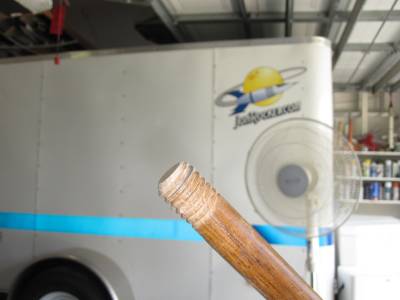
I used a die to add threads to eight long mop handles.
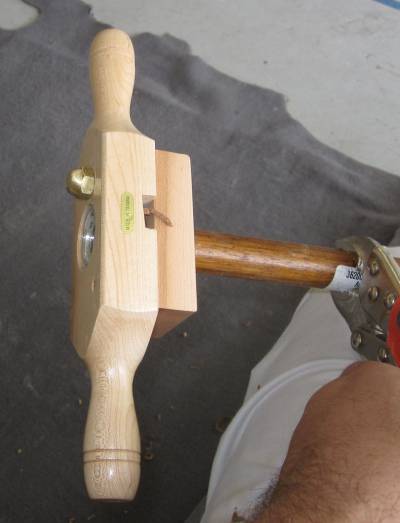
This created a thread that fits into the holes in the cubes.
The cubes are attached to the top of a channel allowing a leg to be screwed into place.
Cool. huh?

Rail Button Attachment
2013-07-22
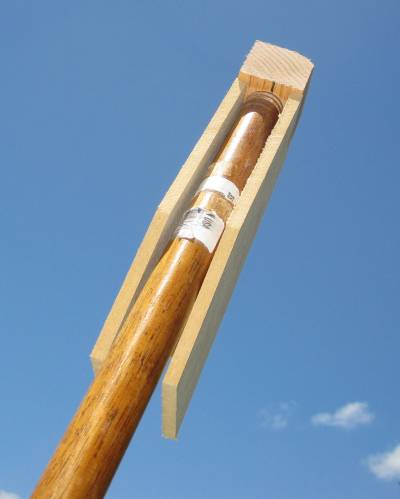
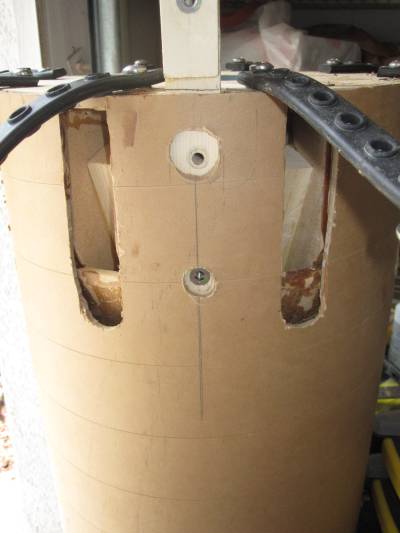
I made a little box that will go into the rocket. A square dowel with rail buttons on it will slide into the box.
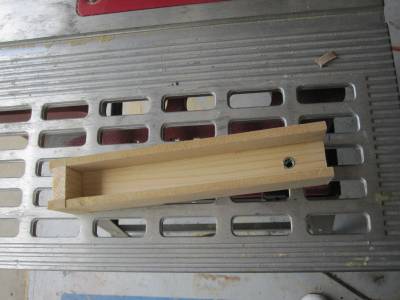
The lower centering ring has a notch cut into it for the rail button holder to pass through.

Assembling the Inside
2013-07-22
I assembled the internal pieces, adding covers to the channels for the legs and gluing everything to the lower centering ring and motor tube.
I added some strips of fiberglass over all the edges to reinforce the bonds.

Altimeter Mounting
2013-07-23
Obviously, this rocket is not going to have a standard electronics bay, so I had to devise a different way to mount the altimeter.

I used the table saw to rip two strips of wood and to cut thin slots in each of them.
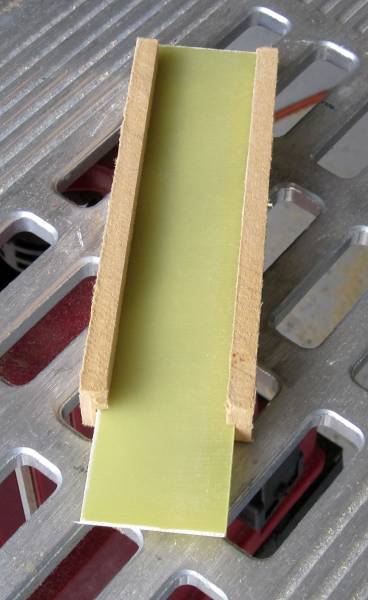
A piece of G10 slides into the slots.
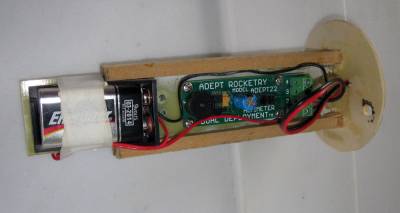
I mounted the altimeter and a battery holder on the piece of fiberglass.
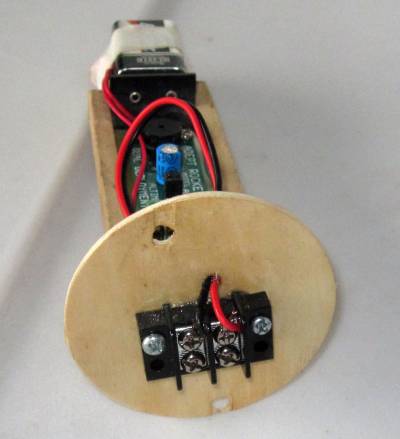
I attached the altimeter sled to a bulkhead. On the other side, I added a terminal strip where the e-match for the ejection charge will be hooked up.
Assembling the Fuselage
2013-07-23
I cut holes in the bottom of the bodytube for the legs. I used a reciprocating saw to cut out the slots. It worked okay, but left rough edges. I installed a toggle switch between two of the holes. It'll connect to the altimeter. Then, I glued the insides into the body tube.
Then I added the top centering ring. The altimeter slides into a hole in the ring and is secured with a couple of wing screws.

Aha! Now It's Starting to Look Like ... Something
2013-07-24
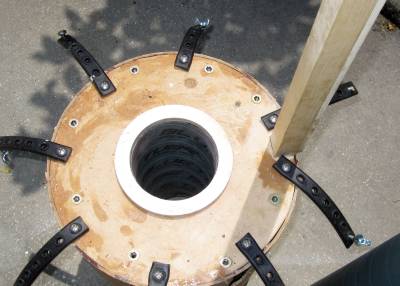
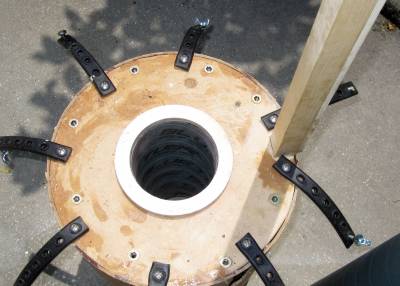
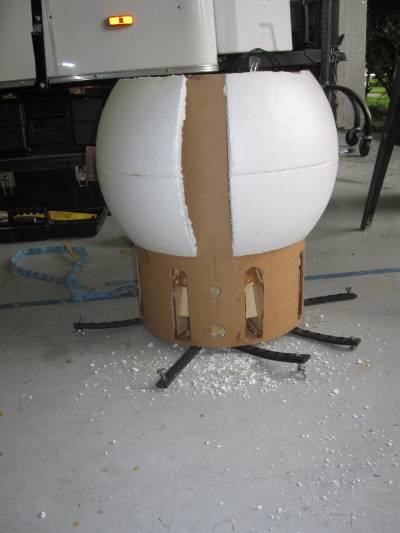
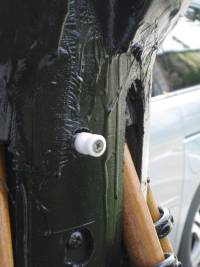
I realized a while ago that the way I have the legs attached isn't going to work by itself. The legs are going to take some punishment on the way up and, especially, when the rocket lands. So, I tried out some ideas for reinforcing the attachment. Most of the ideas were too complicated. Then, while getting something out of our trailer, I noticed the rubber "tarp straps" that I use like bungee cords to hold things in place. Aha!
The rubber straps help hold the legs in place while offering a little springiness. I had to order more wing screws. I only had a couple left. You can also see how the "rail button mount" slides into the body and is attached with a bolt. Being able to take the rocket apart will make it much easier to transport.
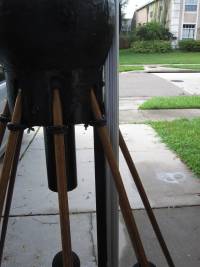
Okay ... I guess that it is finally time to test fit the body and legs and see what it looks like ....
Oh my, it's a little bigger than I had imagined. :-)

Rail Buttons
2013-07-27
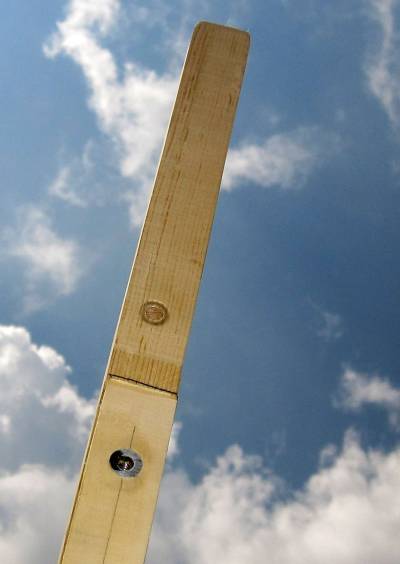
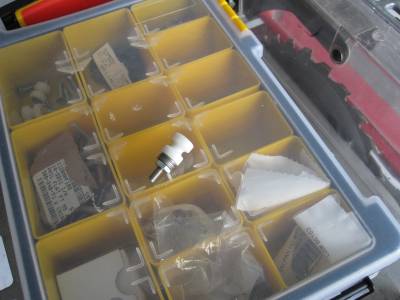
Today, I added rail button attachments. First I marked the center line on the rail button holder. Then, using the drill press, I drilled small holes on the line. The small holes helped ensure that the larger holes I later drilled were right on the center line. I screwed threaded inserts into holes using a hex wrench.
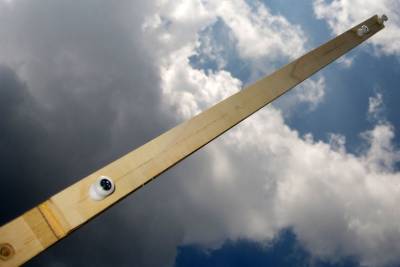
The rail buttons screw into the threaded inserts and are removable.
I included a rail button attachment on the top of the board so that, when it is installed in the rocket, I can add a rail button on the side of the body tube. I'll have to use a longer screw and add some washers to make the rail button align with the others.

Motor Mount
2013-07-27
A unique problem for the Akavish is how to handle motors of different lengths. The previous Big Daddy Akavish solved the problem in a simple way. I just let the motor hang out the back of the rocket and I wrapped tape around it to keep it in place. For the new Akavish, I'm doing something a little more elegant.
First, I added a thick centering ring around the 98mm motor tube on the bottom of the body of the rocket.
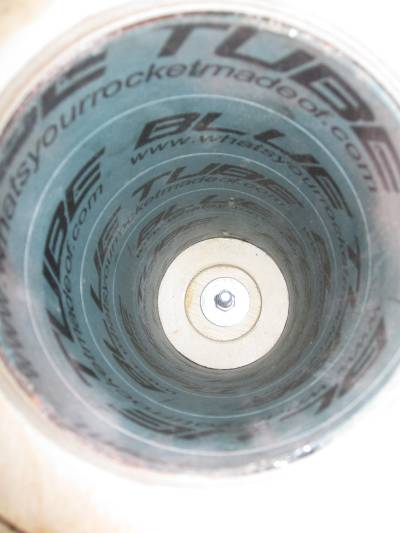
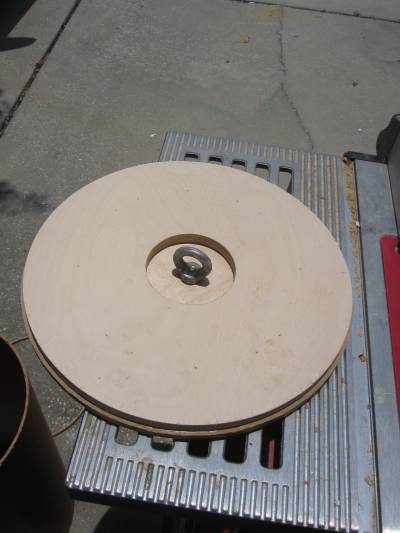
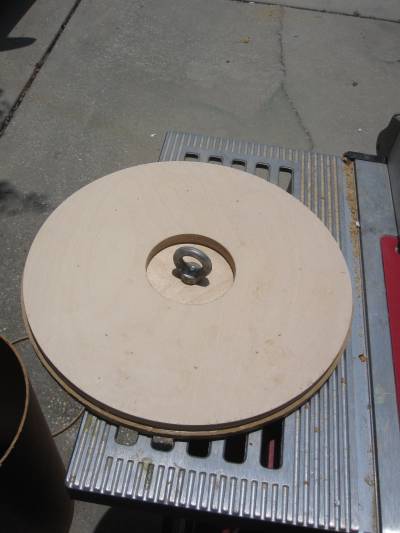
On the other end of the motor tube, I added a thick bulkhead that has a 3/8" screw eye through it.
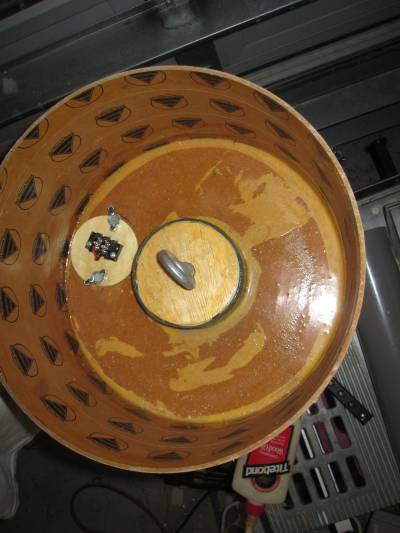
On the other side of the bulkhead, inside the tube, the bolt end of the screw eye is visible. The motor will screw onto the bolt.
For a 98mm motor, I will cut a length of 98mm tubing. The tube will slide over the motor. The motor will be inserted into the motor mount and the tube will slide into the centering ring on the bottom of the rocket. I'll just screw in the motor and it'll hold the tube in place.
For a smaller motor, such as the 75mm motor I plan to use, I'll construct an adapter. I made one for the CTI 75mm 3-Grain case I have.
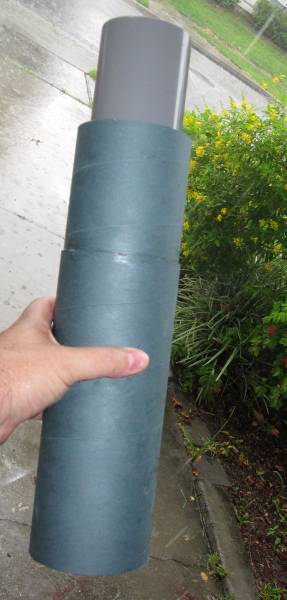
The adapter consists of a 75mm motor tube and centering rings inside a 98mm tube. At the top of the 98mm tube is a coupler.
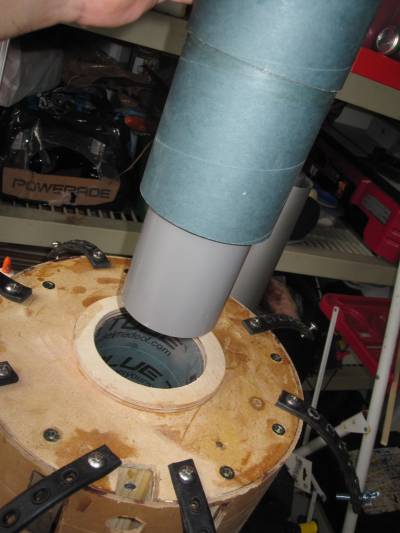
The adapter slides into the motor tube. The motor will be inserted in the adapter then screwed into the bolt at the top of the motor tube.
The Head
2013-07-27
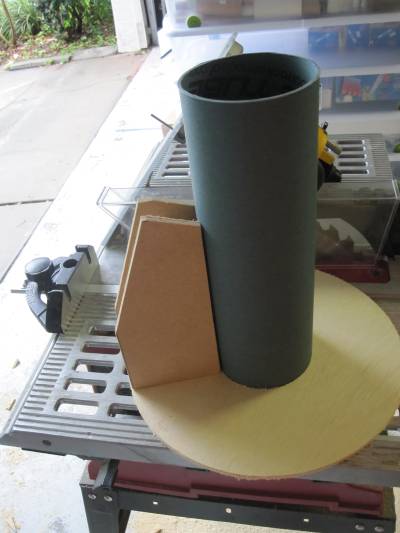
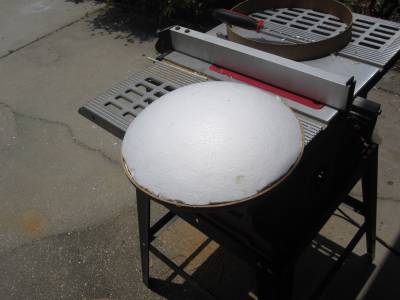
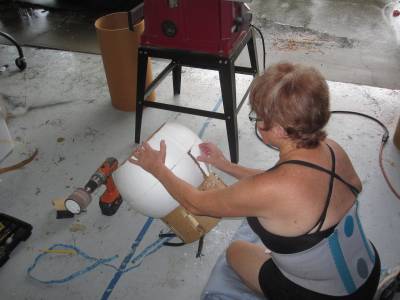
The head of the Akavish is a large foam ball. It comes in two hollow halves. To fit over the body, we had to cut a 12" hole through the ball.
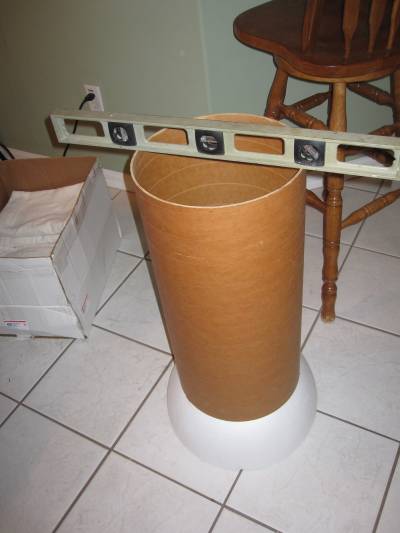
A sat each half ball on the floor then placed a section of the 12" tubing on the top of the half ball.

I used a level to make sure the tube was centered then used a pen to draw a circle where the tube met the ball.
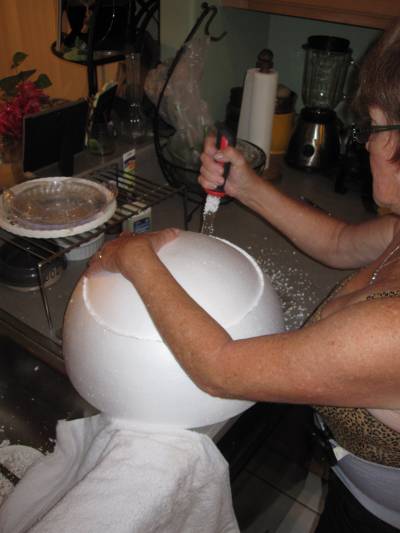
Bracha used a drywall saw to cut the ball halves on the lines.
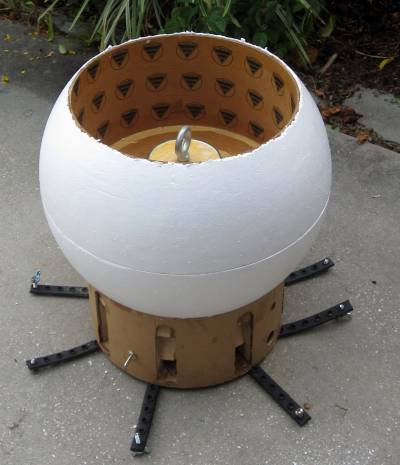
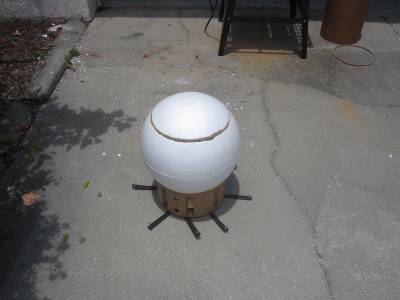
The two halves of the ball were glued together and then glued onto the body tube.
Nose Cone
2013-07-28
For the nose cone, we used one of the pieces cut out of the foam ball. I started with a couple of center rings that I had in my big box o' rings. I added a lip around the larger ring by cutting a thin piece of the body tube and gluing it in place. I added a screw eye (actually an eye nut) into a smaller centering ring which I clued on the back of the larger ring.
On top of the rings, I glued the foam piece.
In place, it looks pretty good.
Making Room for the Launch Rail
2013-07-28
Next, we had to make room for the launch rail.
Bracha cut a slot in the side of the foam.
I'll clean up the edges a little before we cover the foam with fiberglass.

Maybe Not So Big?
2013-07-30
Looking at the size of the new Akavish's head, I think the rocket won't look right if it's 6 1/2 feet tall. Our previous Big Daddy was a little less than 4' tall with a 12" diameter head. This one has a 16" diameter head, so it probably should be about 5 to 6' tall. We'll wait until the last minute, though, to decide if we're going to cut the legs shorter.
Fiberglass
2013-08-10
We covered the foam parts with a couple layers of fiberglass. We used light fiberglass cloth cut into small strips and applied it like paper mache. I didn't take any photos because it was rather messy. Since everything will be covered with paint and fur, we didn't go overboard trying to be neat.
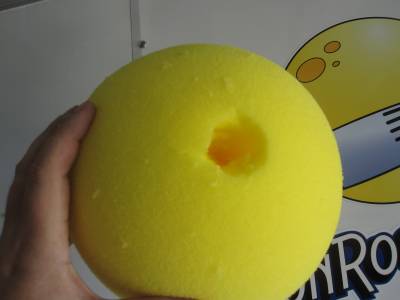
Feet
2013-08-10
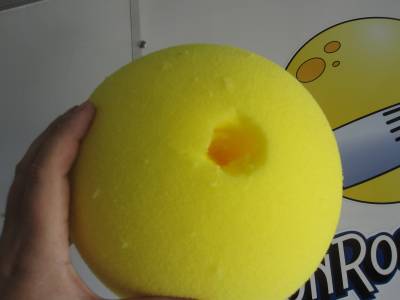
We bought 10 "uncoated foam balls" to use as feet. These are similar to the balls we used as feet on the previous Big Daddy Akavish. But, at 8" in diameter, they are bigger and they are made of a different kind of foam.
I used the drill press to carefully cut a hole in each ball.
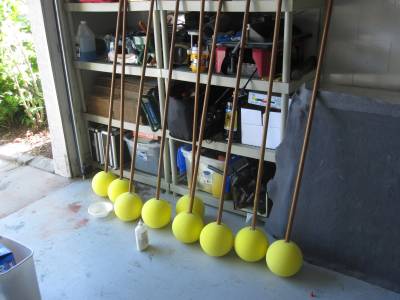
We finally made the big decision and cut 9" off of each leg. This will bring the overall height of the rocket to about 6 feet.
After cutting the legs, we sanded the end to help the glue adhere. Then we glued a ball to the end of each leg. Bracha then filled the gaps at the tops of the holes with glue and left-over foam pieces.

We now have nine legs (eight and a spare) ready for paint and fur!
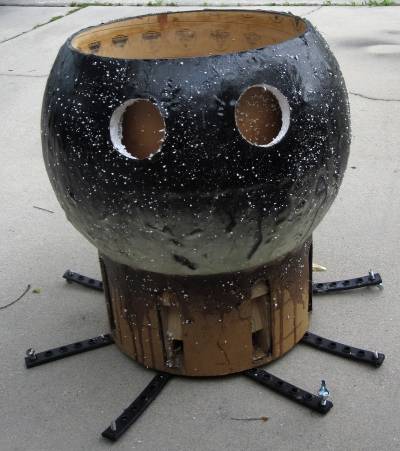
Holey Akavish, Batman!
2013-08-22
Although Bracha keeps reminding me that real spiders don't have big Muppet eyes, all of our Akavishes have. And, this one is no different.
Then we glued two half foam balls into the newly formed eye sockets.
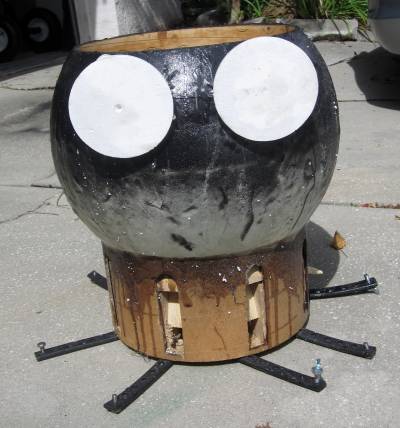
Finally, we covered most of the rocket with black paint.
And ...
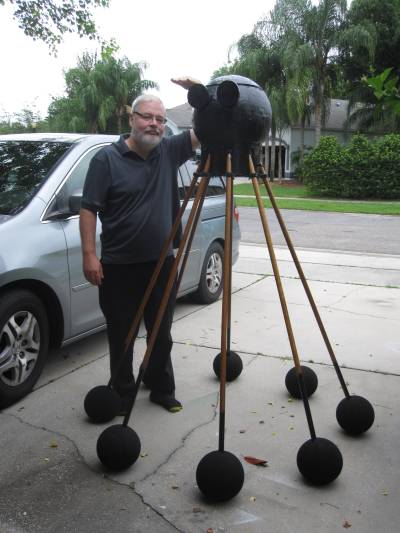
It's still taller than me!

Fur and Away
2013-09-28
or ... A Bridge Too Fur ... no? ... The Hunger Games: Catching Fur?
Anyway ... here's an update on our progress building the Big Daddy Akavish Mark II.
Bracha and I spent some time in fabric stores and looking online to find the perfect faux fur to cover the new Big Daddy Akavish. We were happy to find some black fur with silver tinsel that looked like the fake fur we had originally used on the first Big Daddy Akavish. We really liked it because it sparkled in the sun and glowed red as it reflected the flame from the rocket motor.
We ordered two yards of the fake fur and, once it arrived, our dog, Oscar Pendragon, examined it.

With Oscar's approval, Bracha began to cover the Akavish's head with the fake fur. She came up with a cool idea for fitting the flat fabric to the curved surface of the Akavish. She turned the fake fur over, fabric side up, and layed it over the sphere of the Akavish's head. She pinched the fabric into pleats so that it fit the curves. She pinned the pleats together and removed the fur. She sewed the fabric along the pleats then turned the fur inside out. It then fit the Akavish's head just right!
We used spray adhesive to attach the fur to the head and ... with the addition of a couple of giant googly eyes ... we have an Akavish head!


Rail Buttons II
2013-10-20
The top rail button screws in after the square dowel "rail button holder" is inserted into the rocket. It needs a stand-off to line up with the other rail buttons. I created the stand-off using a nut and a few washers.

With the top rail button in place, I tested the alignment using a 1515 rail.
The fit is perfect. The rail slides smoothly up and down on the rail buttons.
He's Got Legs ... (8)
2013-10-20
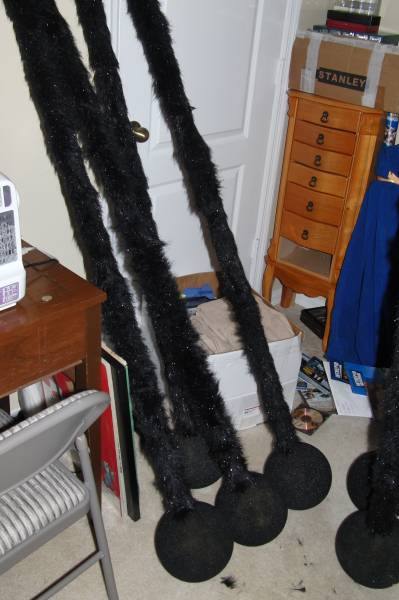
Bracha finished covering the legs with fur.

Bracha sewed the fur into tubes - inside-out to hide the seam. We turned the tubes right-side out then slid them onto the legs. We used multiple tubes per leg because it's almost impossible to turn one right-side out if it's length is longer than about 24".
The fit of each tube on the leg is tight enough that no adhesive is needed.
Counting Down ....
2013-10-31
We're getting close to the first launch. Bunnell Blast 2013 is less than two weeks away. We're finishing up just a few things.
I realized that the square dowel that holds the rail buttons is closer to the nozzle of the motor than I had thought it would be. So, I cut a peice of aluminum and screwed it onto the dowel to protect it from the heat and flame of the motor.
Then we assembled the rocket for the first time since covering it with fur.

With most of it finished, I weighed the rocket. It's 28 pounds (without the motor, motor tube, rail button dowel, parachute, and shock cords). Less the motor, the lift-off weight should be under 35 pounds. That's less than I thought it would be as we started the project, but still a lot heavier than the original Big Daddy Akavish.
Bracha's doing some work on the parachute and shock cords. I'm going to do a quick test of the altimeter. And, this weekend, we plan to do a ground test to check out how well the recovery system deploys.
After that, it's off to Bunnell and ... 3 ... 2 ... 1 ....
Ground Tests
2013-11-03
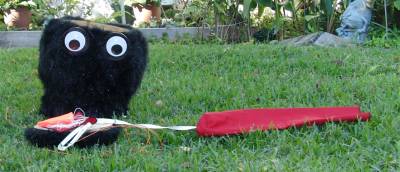
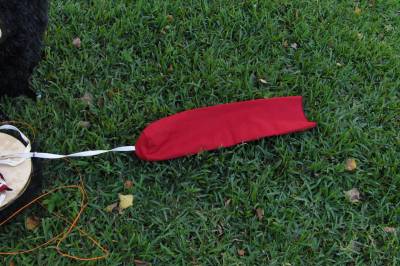
Bracha crafted a beautiful parachute deployment bag out of a Top Flight Parachute protector and some tubular nylon.

The bag is tubular in shape because it wraps around the motor tube inside the body tube. We tested it by stuffing the parachute in carefully. Then Bracha held onto the parachute's shroud lines while I gently tugged on the cord attached to the deployment bag. The bag pulled easily away from the parachute. The parachute ended up laying on the ground perfectly.
We attached the deployment bag's cord to the screw eye in the top of the Akavish. A 30" Top Flight parachute is also attached via a short shock cord. We made the shock cords from 9/16" tubular nylon. I actually sewed some of the loops on the ends, but, of course, Bracha reviewed my work.
I loaded three grams of powder into an ejection charge holder. I ran the wire under the electronics bay bulkhead and out a screw hole on the bottom of the Akavish's head. I spliced another length of shooters wire on the end. Then I loaded the deployment bag (with the parachute in it) on top of the ejection charge. I laid the shroud lines and the smaller drogue 'chute on top. Then I put the top of the Akavish's head in place. Stepping back, I counted down from three and touched the ends of the wires to a 9V battery's terminals.
The ejection seemed a bit anemic, so we tried again with 4.5 grams of powder. We also added a parachute protector on top of the ejection charge to keep the soot off Bracha's beautiful parachute bag. I forgot to start the video, but this time the top went a little higher and the small parachute came out.
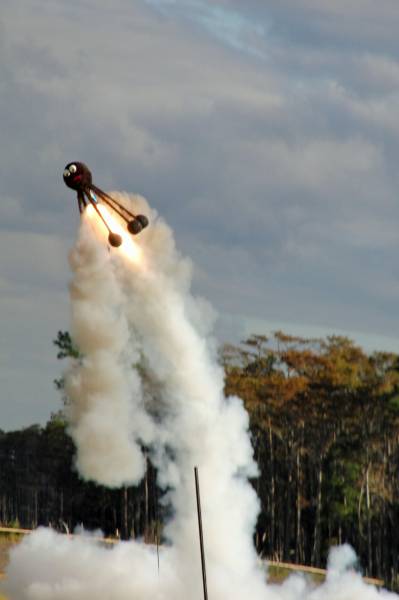
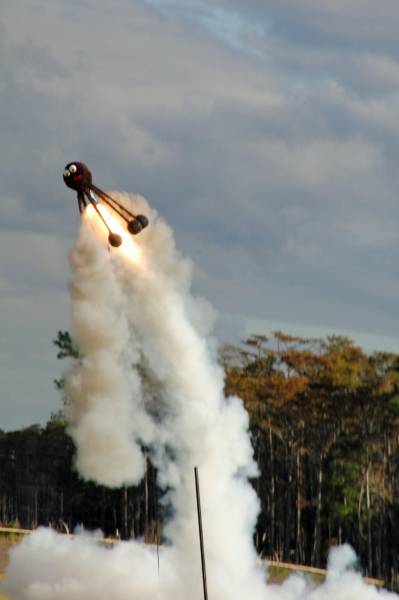
Success!
2013-11-09

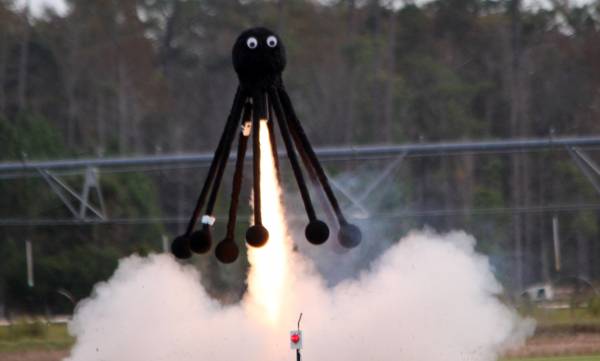
Video of the Bigger Big Daddy Launch
2013-11-20
 |
 |