| Construction Rating: | starstarstarstar_borderstar_border |
| Flight Rating: | starstarstar_borderstar_borderstar_border |
| Overall Rating: | starstarstar_borderstar_borderstar_border |
| Diameter: | 0.74 inches |
| Length: | 15.37 inches |
| Manufacturer: | Custom Rockets  |
| Skill Level: | 2 |
| Style: | Contest, Payload |
 Construction:
Parts included:
- 1 18mm ID tube
- 2 part nose cone it splits in half along the horizontal axis and is held together with a mylar ring
- 3 Die cut fins
- elastic shock cord
- Engine stop ring (no hook)
- 12 inch parachute.
First off the quality of the kit was mixed. The body tube was the same. The Fins were die cut out of a very lightweight but somewhat flimsy balsa. Had to use the Xacto to get them out but they worked fine and even survived the tragedies that were to follow, so aside from higher surface roughness (even after sanding) they worked fine.
The nose noseconecone was the most interesting part of the rocket. It separates in the middle and is held together by a mylar ring. You put the “cargo” in the nose and then put the top on and clamp them together via the ring.
One strike is that the hole your supposed to put the shock cord through is WAY too small. It had to bore it out and really work it to get the cord through. The cord itself is more like elastic than rubber band. The body tube seems pretty standard. Though its very narrow (18mm inside diameter). This was to keep the weight down but it is also the source of many of the rockets problems.
The chute seemed sturdy but you do have to assemble it. You cut it out of a square and then stick the little hole reinforcement stickers on it. Then poke holes in them and tie the cord. They provided two lengths of cord from which to cut 3 lengths of chute. Your supposed to cut the cord in half and use it I guess. I did and the length of the cord seemed a bit on the short side. I was also skeptical of the chute being big enough to land an egg safely.
The launch lug gets set on an offset piece of balsa to account for the wide nose cone. The narrow body tube proved problematic when fitting the engine block. This rocket has no engine hook and is thus a friction fit. The only thing keeping your engine from shooting up the tube is that engine block.
The only thing keeping it from shooting out the back is the friction between the engine and the tube. Getting the friction right is a challenge, too much and you can’t get the engine in, too little and you have problems. Masking tape is your main tool.
Finishing:
I painted the rocket yellow and back to my own tastes. One gotcha on painting is to make sure you mask off the
recessed area at the top/bottom of the nose cone parts which they are joined together by the mylar ring. The tolerances
are too tight on the ring to accommodate the paint.
Construction Rating: 3 out of 5

 Flight:
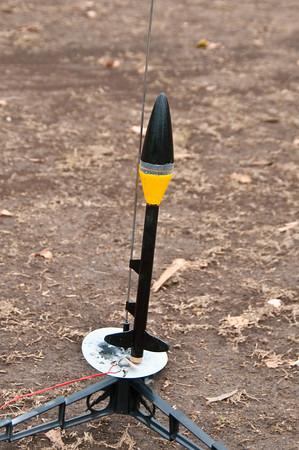
After it was assembled we went out to launch it. According to the instructions your supposed to put your egg in a
plastic bag in case of disaster, but where’s the fun in that. So we got an egg that was just the right size,
mounted it up and secured it with the mylar ring. The launch was without event, I was surprised at how high the rocket
went given its payload. However at ejection things went terribly wrong. There were two issues.
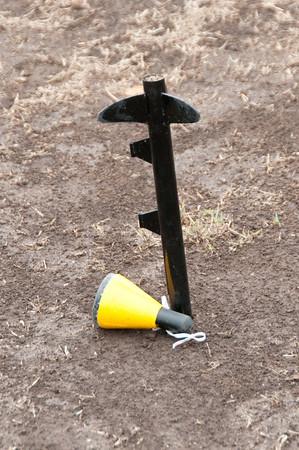
The body tube is so narrow compared to chute size that its packed in their very tight. That combined with the fact that it’s a friction fit caused it to eject the engine and NOT deploy the chute. But the real fun was what happened to the nosecone. The shock of the ejection was more than the mylar ring could handle and the nosecone separated ejecting the egg!. So nose cone parts, egg and rocket come streaming down. The egg was a gonner with a classic splat, the rocket sunk into some mud about an inch but was unharmed.
We decided to fly it again without an egg using an A8-3 to see what would happen. Made sure that there was plenty of friction between the engine and body tube. The launch did not go as expected. The rocket only got 30-40 feet into the air and started to tumble over (later learned it is not stable without cargo), then the ejection charge fired and it blew up. I got the friction right but the chute was packed too tight in that little body and the force had nowhere to go so it blew the back half of the rocket apart. The nose cone also separated again. This rocket was a gonner.
Recovery:
Good Flew straight but the parachute is too tightly packed in the small body and the mylar ring doesn't hold it quite
well enough by itself.

Flight Rating: 2 out of 5
Summary:
Pros
- Cheap
- Easy enough to build
Cons
- Requires fitting and strapping to flight right.
Overall Rating: 2 out of 5
Other:
If I were to do it again I’d have to carefully mange the chute and the friction as well as using tape (not the
mylar ring) to secure the nosecone together. I had pretty much written this rocket design off until I realized that
actually this rocket is unique and can be used for things that no other rocket can. The fact that it can launch and
then on ejection safely eject its cargo into free-fall is unique to my knowledge. What else can send an egg up a couple
of hundred feet in style and then have it come down with a satisfying Splat. You could load those little green army men
with parachutes into the nose cone and have an airborne assault on your park. You can experiment with all sorts of
cargo and recovery methods that you could not do with your cargo trapped in the rocket. I very well may buy this rocket
again just for this purpose. If I do I will make one modification though, instead of the supplied parachute I’ll
switch it to a streamer recovery that doesn’t have to be packed so tight. Tempted to try and fit an engine hook on
it as well.
Other Reviews
- Custom Rockets Elite By Ken Johnson
A lightweight, minimum diameter egg lofter with an efficient aerodynamic design. The kit comes in the typical "hanging bag" style package. As such, it doesn't protect the kit from any damage incurred in shipping, and this one was indeed damaged in shipment, though I couldn't tell until the package was open. The kit featured a length of 18mm tubing, a very unusual plastic nose cone, a ...
- Custom Rockets Elite By Mark Fisher
Now this is an egg lofter! Custom has trimmed the weight and size of its new Elite down to the bare essentials required to get an egg as high into the air as possible. The light-weight payload section with its power series nose cone (often mistakenly called "parabolic") is its most prominent feature and is reminiscent of the old Nova Egg Cone once found on Apogee's Hydra . The minimum diameter ...
 |
 |
Flights
|
|
L.S. (November 1, 2000)
KRE (June 9, 2003)
T.T. (September 24, 2009)
|
|
D.K. (August 1, 2000)