Custom Rockets Stealth Interceptor
Clone - Stealth Interceptor {Scratch}
Contributed by Bill Eichelberger
| Construction Rating: | starstarstarstarstar_border |
| Flight Rating: | starstarstarstarstar_border |
| Overall Rating: | starstarstarstarstar_border |
| Published: | 2013-05-02 |
| Manufacturer: | Clone |
 Brief
Brief
The Stealth Interceptor was a cool, Centuri-esque space fighter from the early days of Custom Rockets. I picked mine up when my brother in law and I stopped in a local hobby shop to pick up extra motors for NARAM 43 back in 2001. The Custom kits stuck out from the normal Estes and Quest kits that lined the walls of the store, differing in both size and age, and I picked it up as something to work on in the hotel room at night. (They also had the Dynamic Carrier and Satellite Drone which I should have also bought, but tracked down later.) The SI had a rough life due to an unfortunate tendency to catch the access road on recovery, and the iffy performance of the Mylar parachute, so it eventually needed a rebuild.
Components
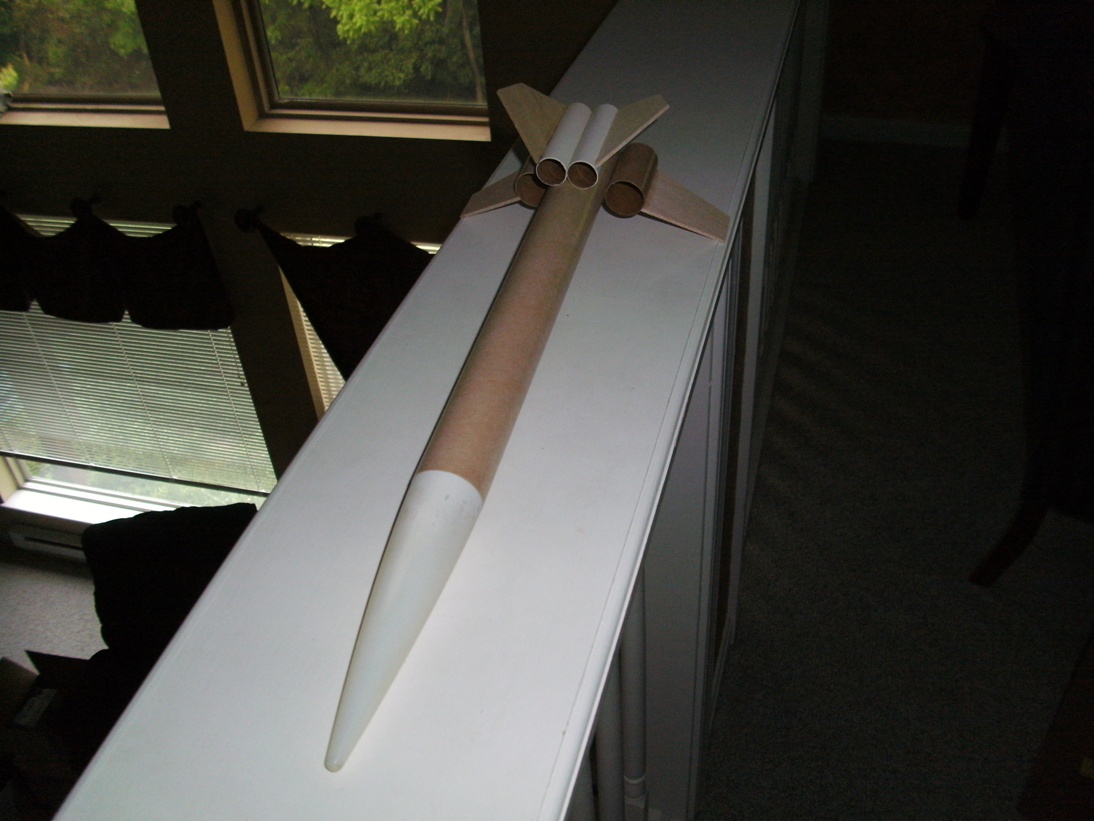
- 12" BT-55 main body tube
- (2) 1.85" BT-50 lower decorative tubes
- (2) 2.75" BT-20 upper decorative tubes
- PNC-55 nose cone
- 3/32" balsa stock
- 18mm engine mount
- screw eye
- canopy pattern
- decal sheets
- 18" mylar parachute
Construction
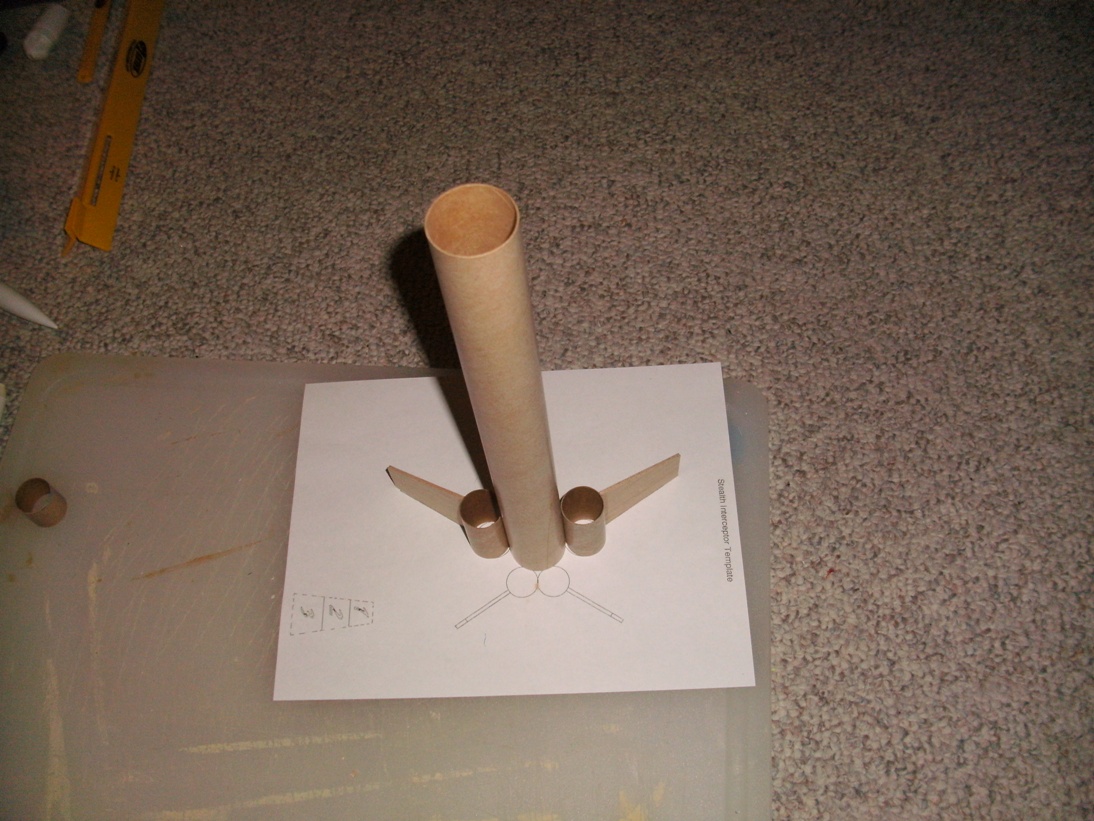
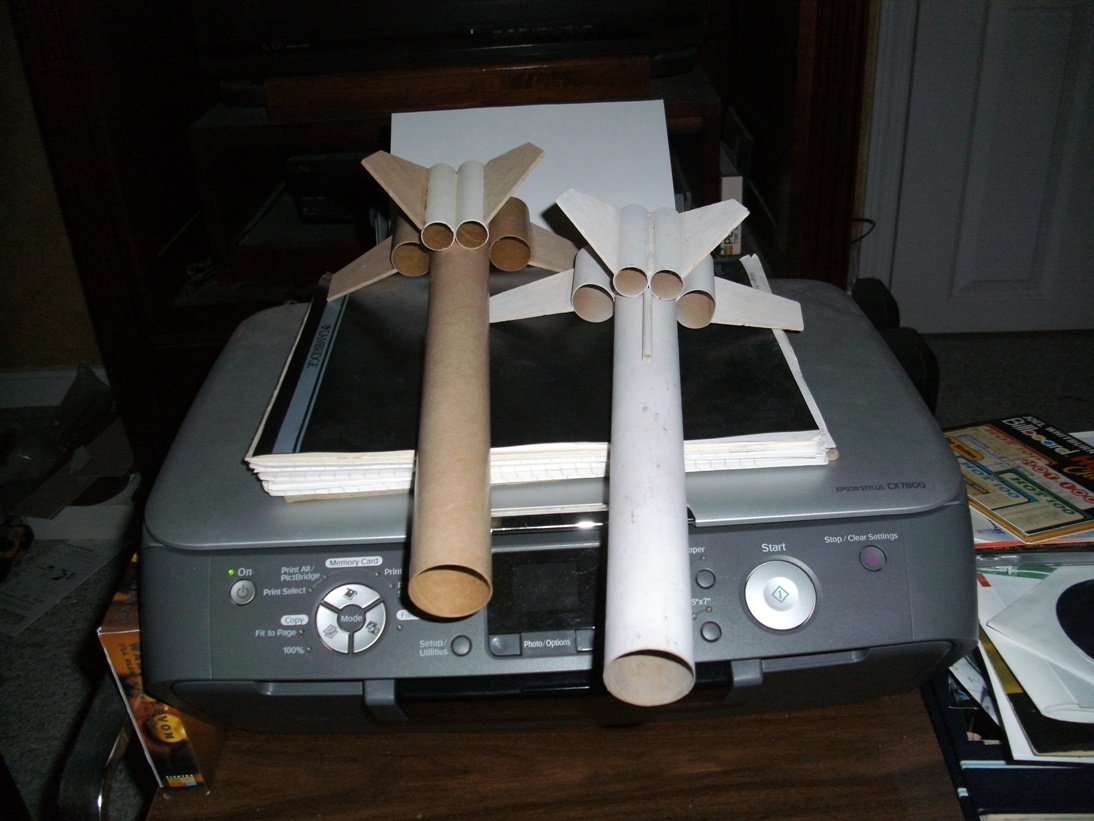
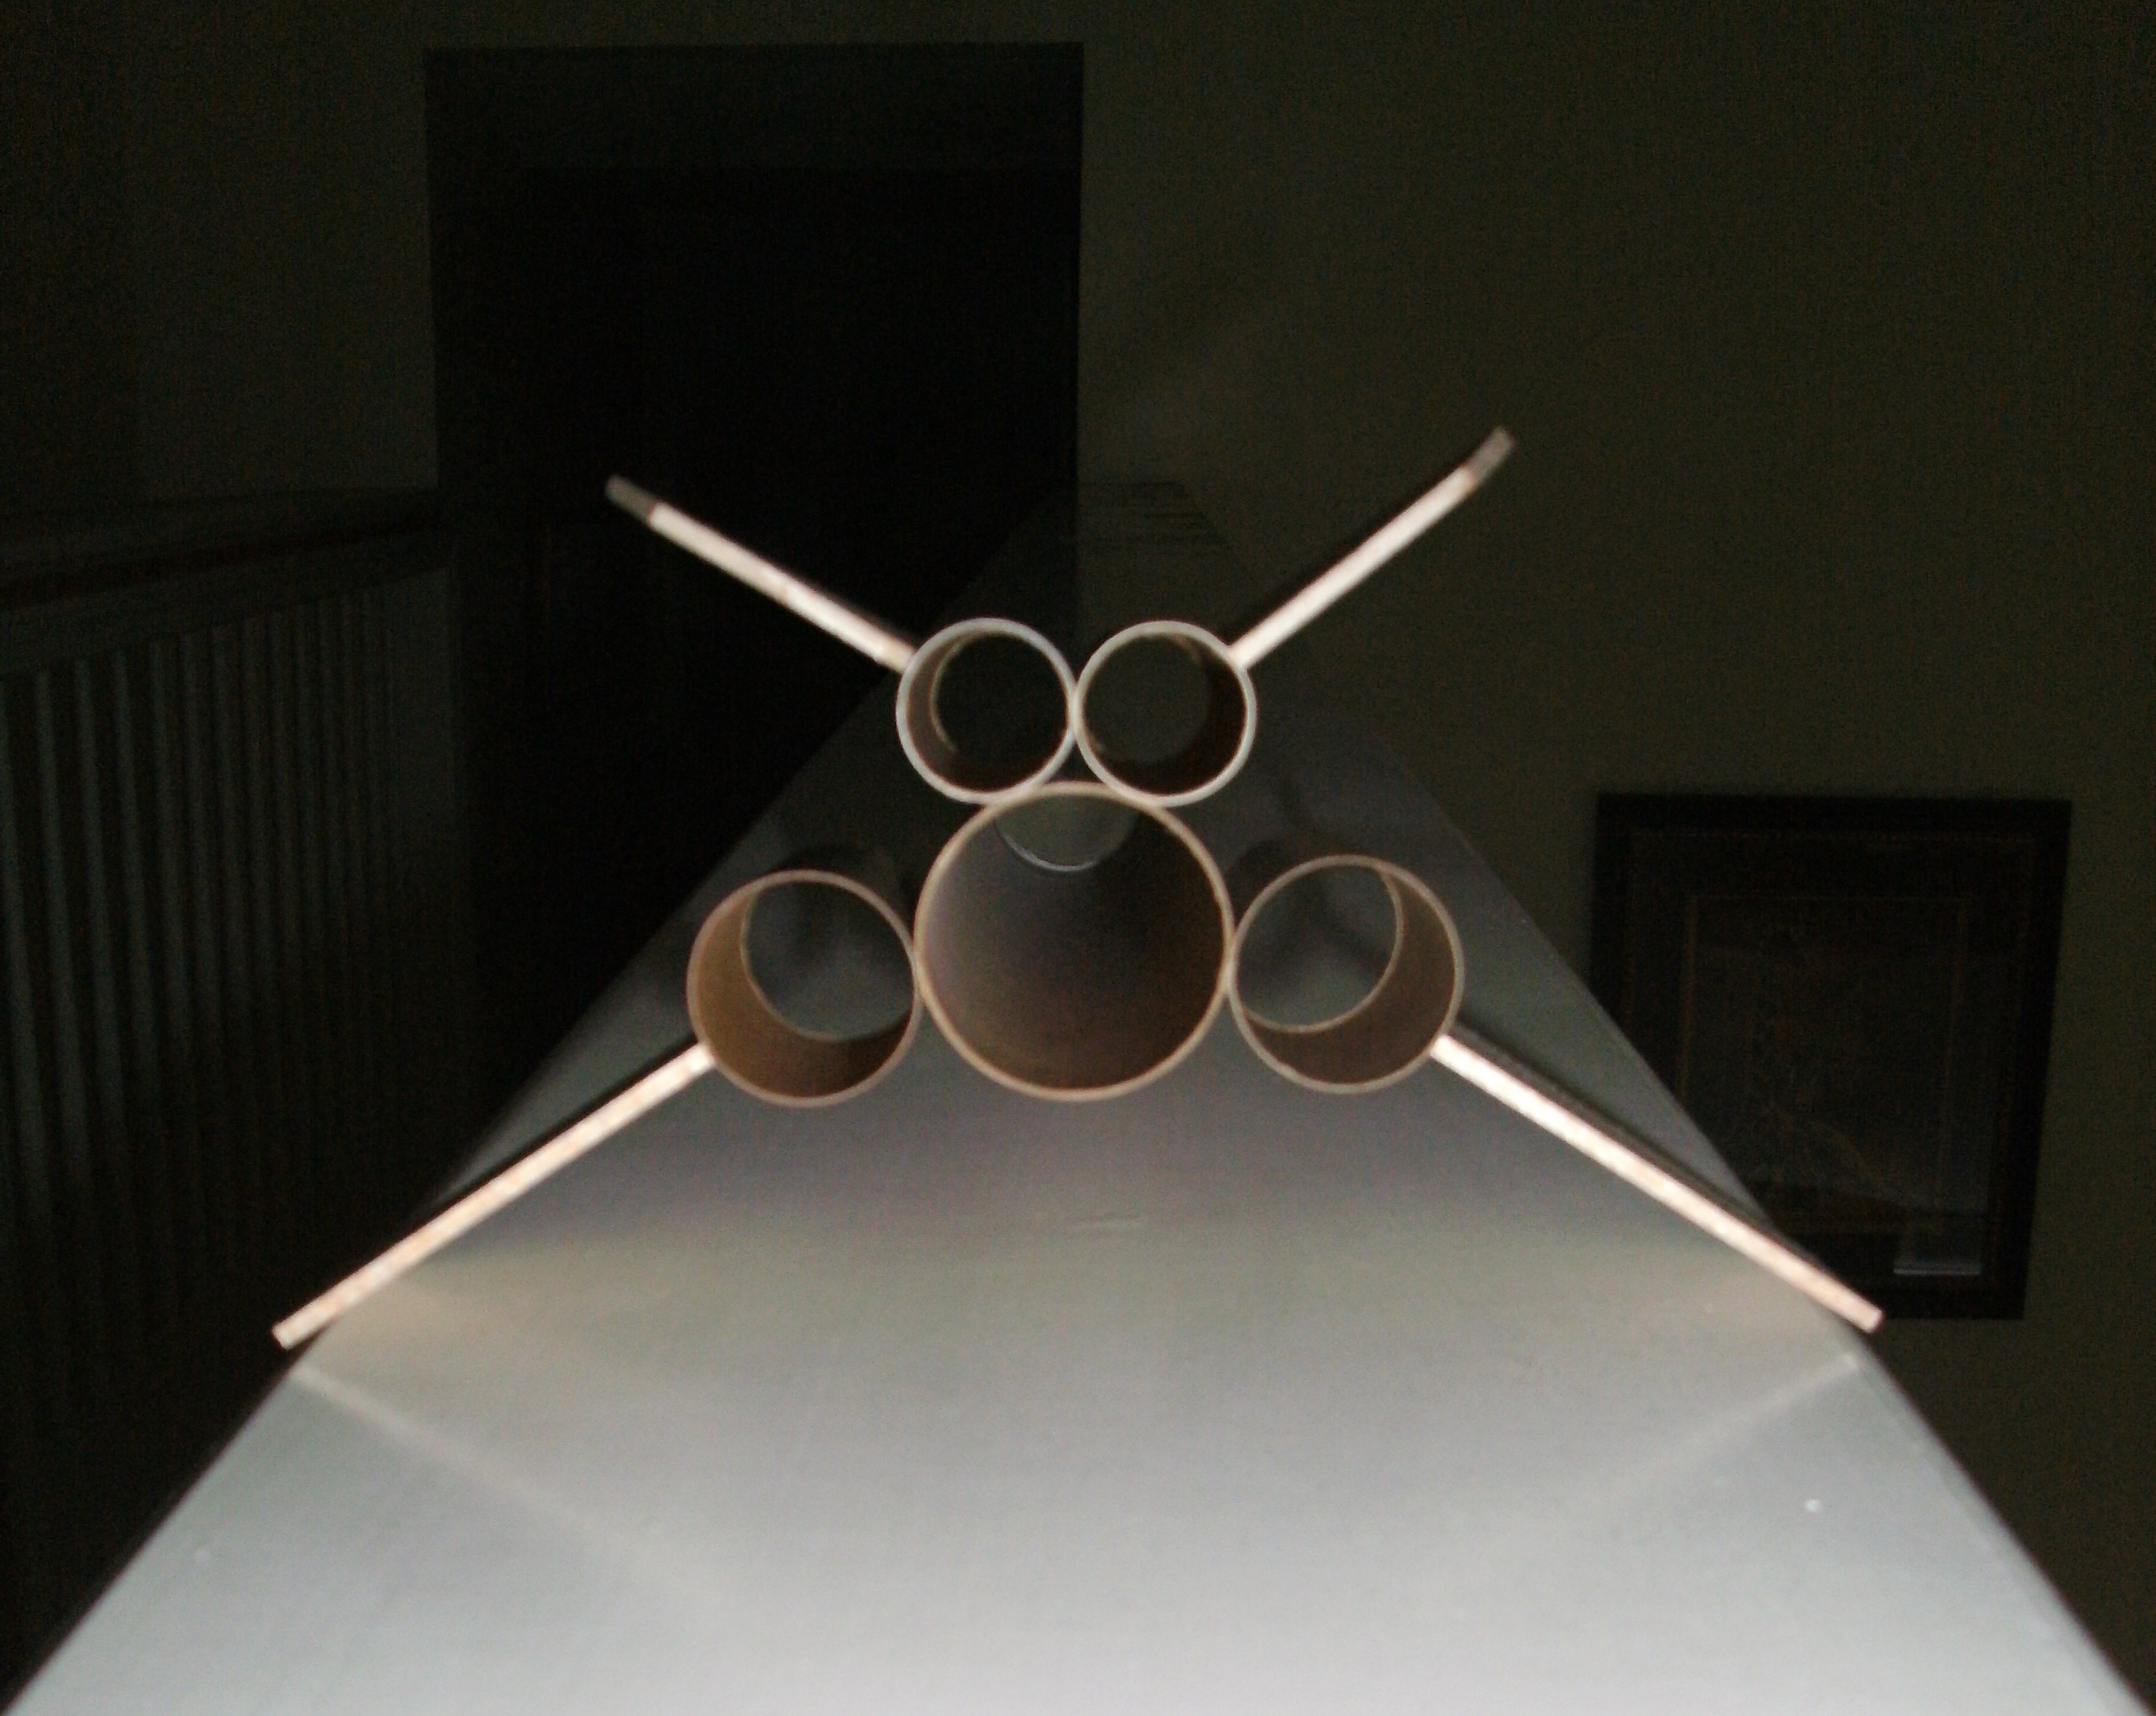
Like a lot of the early kits from Custom Rockets, the Stealth Interceptor had a distinct personality, with nothing else on the market coming close to it for the combination of good looks and simple construction. I built the original as a 24mm bird, which was great for the large spaces I was flying on back then. After I'd flown that one to death, I reused the nose cone as a starting point for an 18mm clone. The multitude of tubes and fins sticking out and creating drag make it a perfect bird for B6-4 Field on the namesake motor.
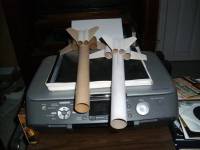
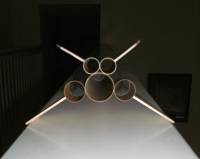
The build itself was fairly straightforward, with the lone oddity being the need for the template to align the outboard tubes and fins. The instructions tell you to complete this after gluing the engine mount in place, but it can be most easily accomplished if the outboard tubes are attached first. The rocket can be stood on end directly on top of the provided template if the motor hook is not in the way.

Finishing
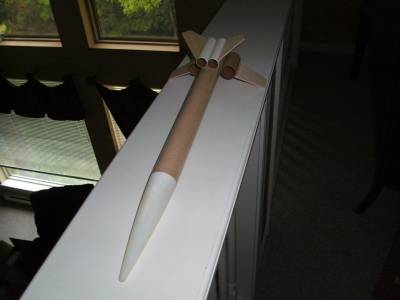
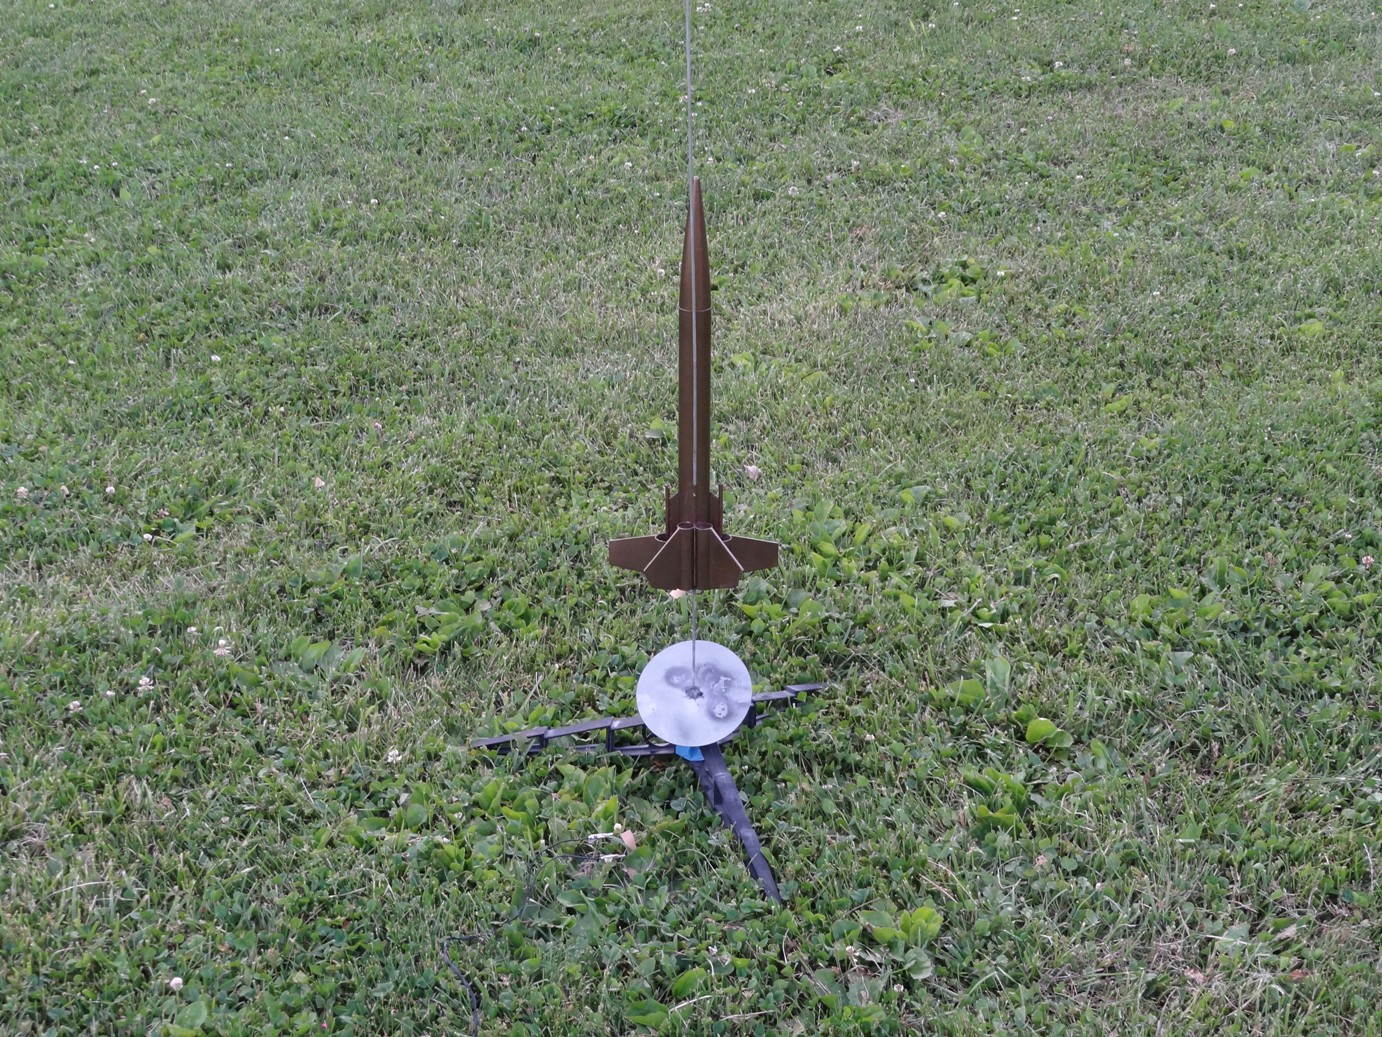
My original kit was an oddity in that it didn't contain the cardboard canopy, so it went without. I've since printed one off from a template another rocketeer supplied, and I'm not convinced that it adds anything to the rocket, so this one will also do without. I attempted to finish the rocket in the catalog color scheme, and after the Fill & Finish, sanding and priming, I shot the whole rocket with Krylon Bronze Metallic paint. The results are pretty dark. Also contained are a couple of red fin decals and a canopy decal that I'm not using, but might in the future if I decide to repaint it in a lighter color.
Flight
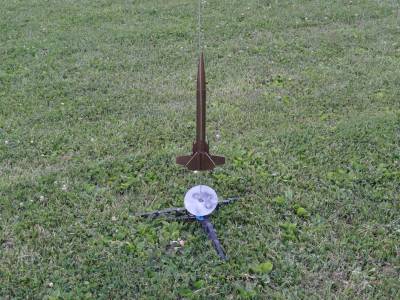
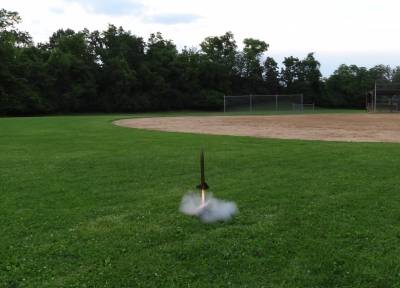
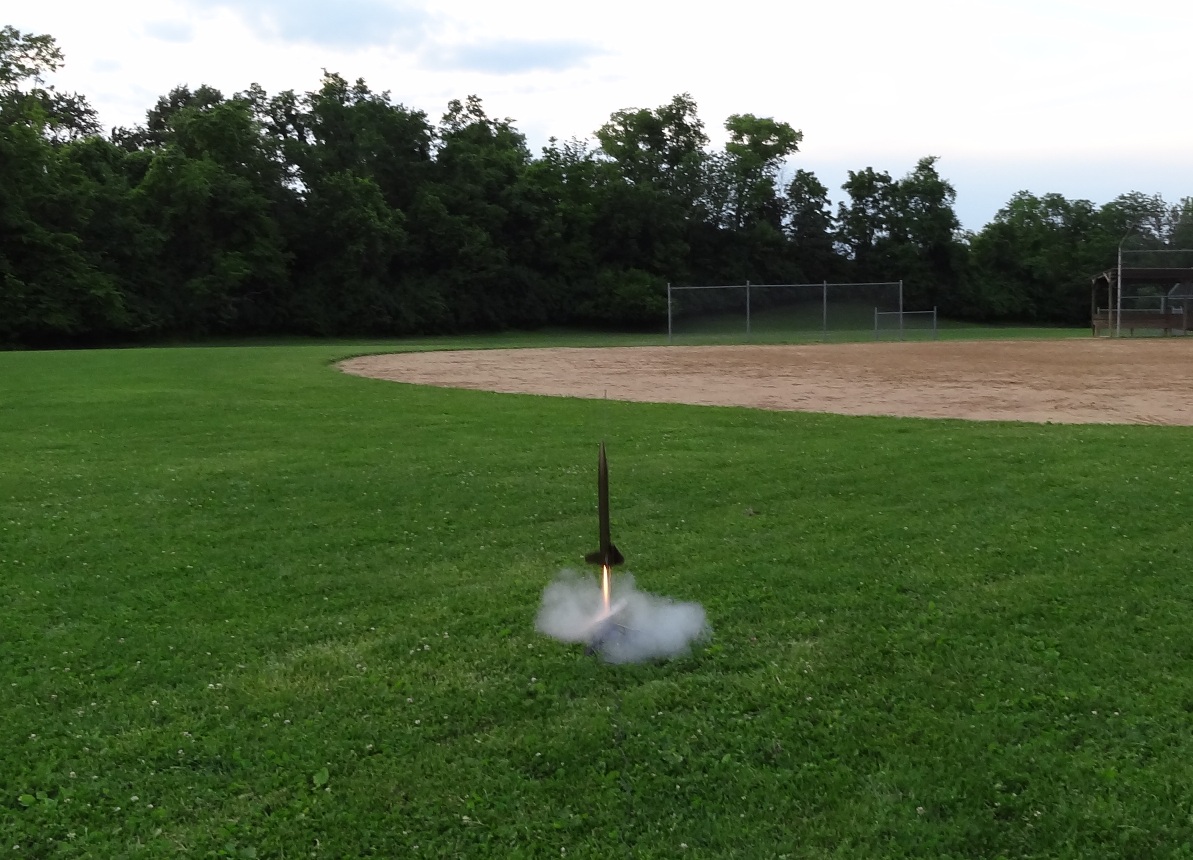
The Stealth Interceptor proved to be a great flier in both 24mm and 18mm versions. I built the original as a 24mm bird because the fields I was flying on back then were big enough to handle the extra altitude. This came with some perils as the extra height meant that the recovery would be from quite a bit higher, and the Mylar parachute wasn't the most reliable. As a result, the rocket suffered some damage from parawad recoveries, most of which was confined to the "decorative tubes". I rebuilt the rocket recently as an 18mm version, which makes it a much more flight friendly bird for my current field. Loaded with a B6-4 for the opening of the 2012 flying season at B6-4 Field the S.I. turned in a more than respectable performance flight-wise. Recovery was something of an adventure as it caught an early-evening breeze that took it swiftly toward US 27. I was far enough away that all I could do was stand and watch the impending carnage, but the rocket landed a mere five feet from almost certain doom.

Recovery
Recovery in the original kit was handled by a Mylar chute, and handled badly. The Custom Mylar might have looked nice and shiny, but when it came to actually doing something other than acting as a parawad, it was a miserable failure. I eventually swapped in a nylon chute. Chute performance has improved markedly.
Summary
Pros: Cool sci-fi design. Water-slide decals as opposed to the stickers of today's Custom kits.
Cons: The Mylar chute is good for a flight or two, if that. Swap this out first thing.
Related Products

 |
 |