| Construction Rating: | starstarstarstarstar |
| Flight Rating: | starstarstarstarstar |
| Overall Rating: | starstarstarstarstar |
| Published: | 2010-08-25 |
| Length: | 19.50 inches |
| Manufacturer: | Dr. Zooch  |
| Skill Level: | 3 |
| Style: | Scale |
Brief:
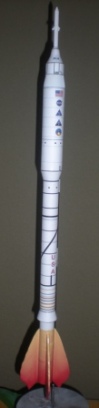
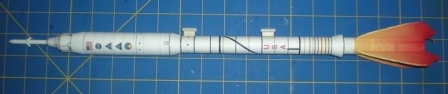
Great flying, single stage Ares I-X ant-scale model with parachute recovery.
Construction:
- 1 - 7.75" T-20 body tube
- 1 - 3.75" T-50 body tube
- 3 - 1.oo" T-20 body tubes
- 1 - 3.oo" T-20 motor mount tube
- 1 - pre-weighted balsa nosecone
- 3 - CR2050P centering rings
- 4 - LAS nozzles
- 1 - snap swivel
- 1 - crew eye
- 1 - motor clip
- 1 - LAS dowel
- 1 - T520P motor block ring
- 1 - 1/8" diameter launch lug
- 1 - sheet balsa wood stock
- 1 - ntrash bag parachute
- 1 - shock cord
- 1 - sheet sticky dots
- 1 - Kevlar®
leader line
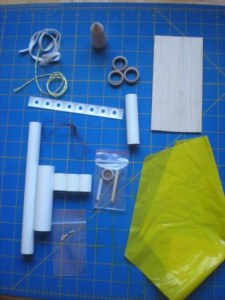
- 1 - poly coated shroud line stock
- 9 - 9 pages 8.5"x11" instructions
As with all Dr. Zooch kits, the instructions are well detailed and very humorous to read. This adds to the enjoyment of building a Dr. Zooch kit.
This is the second kit I have build from Dr. Zooch, the first being the Space Shuttle, Return to Flight model.
The build was pretty straight forward for most parts and the special building steps are well documented with good detail.
Most Dr. Zooch kits use many wraps. I highly recommend using white glue like Elmer's as opposed to yellow carpenter's glue. You rocket will turn out much better.
1. The first step involves marking the body tubes with either a door jam or angled piece of metal. I use lengths of angled aluminum from the local hardware store.
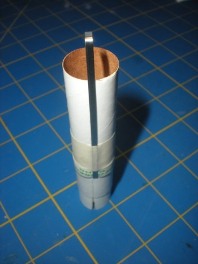
2. The section is making the ACM. This involves making you own tube couplers and also building the transition piece that looks similar to a motor mount.
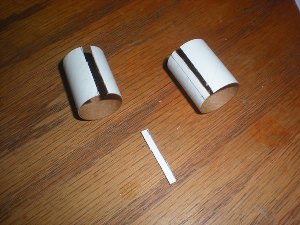
3. When the motor mount is complete, you continue on with the motor mount and building the rest of SRB stage.
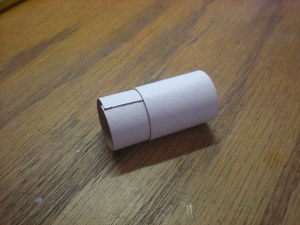
4. Next you build a typical motor mount with the addition of another homemade tube coupler.

5. You then apply the wrap to the SRB. Make sure to follow the instructions and only apply the glue to the outside edge of the wrap. Make sure to apply the glue to the NON-PRINTED side of the wrap.
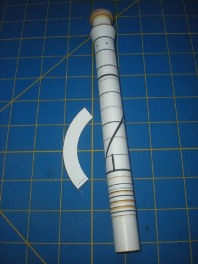
6. The SRB skirt is made and applied next. Follow the instructions for reinforcing the skirt with the sanded centering ring glued inside of it.
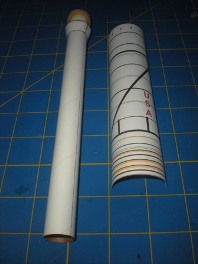

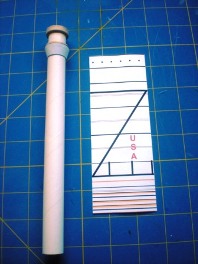
7. the upper stage wrap is then applied using the same technique as the previous wrap.
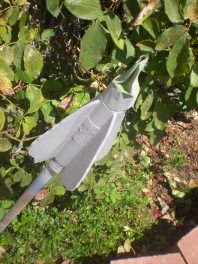
8. The "flame fins" are next and end up working very well.
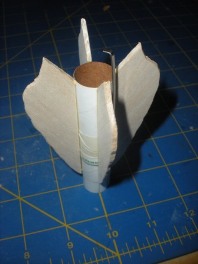
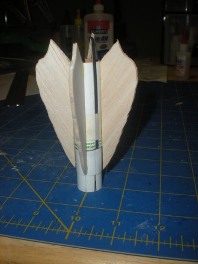
9. The wrapped upper stage is the glued on top of the SRB section. The flame fins follow and the balsa stand offs are built up and used to offset where the launch lugs will be glued on.
10. I then filled, sanded, primed and painted flat white the spacecraft/capsule nosecone. There is a small wrap for this part that is applied after the paint has dried. The pointed top of the capsule is filed down flat to glue the dowel one.
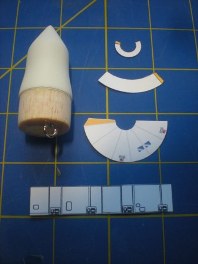
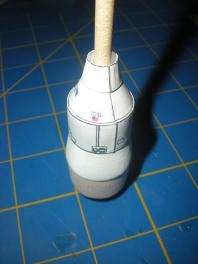

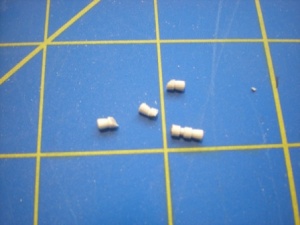
A couple skirts and transitions are formed from cardstock cutouts provided on a preprinted sheet. the little wooden nozzles are also glued on in this part. I also primed and painted flat white the dowel and nozzles.
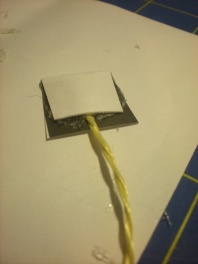
11.The recovery system is next... A screw eye is installed in the base of the nosecone. The Kevlar® is mounted inside the top of the body tube and then attached to the elastic shock cord.
12. The trash bag parachute is then assembled and attached to the screw eye.
That completes the fairly easy construction of the Ares I-X kit.
Finishing:
The finishing really is quite simple given the use of wraps in the kit. Onlt the spacecraft
and escape tower are painted flat white. The flame fins are the only other paints parts.
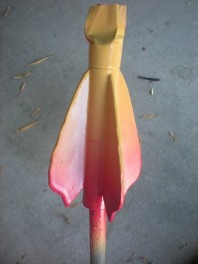
I first primed and sanded the flame fins. Then I painted them all yellow. I faded some ColorPlace "Fire Red" paint over this to give it the "flame" look.
Construction Rating: 5 out of 5
Flight:
I made three flights to test the rocket. The first was on an A8-3 motor and then 2 flights on
B6-4 motors.
All flights were very good with ejection hapneing exactly at apogee.
Recovery:
The trash bag parachute worked great and we didn't have any damage on the "A" and
two "B" motors.
Flight Rating: 5 out of 5
Summary:
Overall, I rate this kit a FIVE. I just really like the neat way that Dr. Zooch puts these kits
together. They look great and they fly good, too!
Overall Rating: 5 out of 5
 |
 |
Flights
|
|