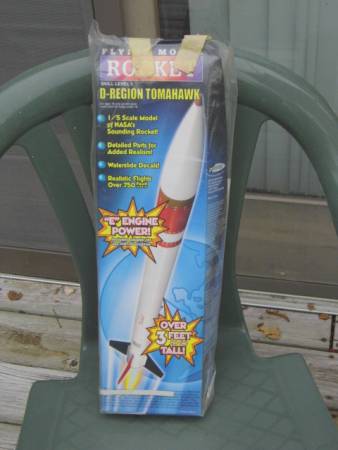
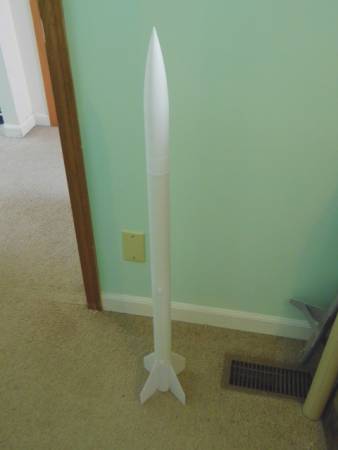
Estes D-Region Tomahawk
By Steve Lindeman
2020-08-13

This is a replacement for one that I lost last year at a club launch in Brooklyn, MI. At ejection shock cord snapped and body tube came in ballistic way down range. NC drifted back in opposite direction for a very, very long walk. On recovery of rocket, top half was crushed down to baffle I installed.
I ordered this one on eBay on Aug. 4 and received it on Aug. 11. So with this one I will try and paint as described with flat paints for scale instead for coating it with Dupli-Color's Clear EFFEX like I did the first one (I wasn't interested in scale at the time, this time I am). Nose cone is going to be a challenge to paint. Last time I just painted the tip red and a couple of red stripes but scale is much different, this will be interesting. Hope it turns out OK. On a side note: the package was opened but all parts were there. Also I will not be installing the baffle system that I had in the first one as I don't recall how I did it.
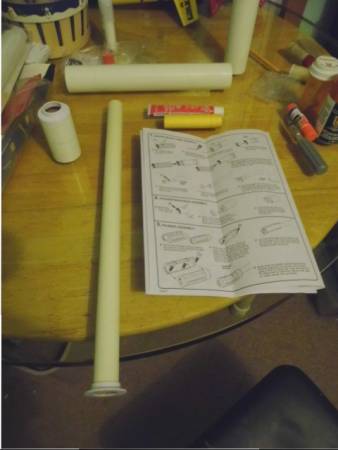
Engine Mount Tube Assembly & Stuffer Bulkhead Assembly
2020-08-17
As typical with Estes builds the motor mount is the first step. I marked the yellow engine spacer at the 3/4" mark and then grabbed a plastic straw and marked it at 2 3/4". I then used the plastic straw to apply a bead of white glue inside the motor tube. I then slide the green engine stop block into the tube and using the yellow spacer set it to the proper depth. Next I switched to plastic glue and glued the fin body bulkhead onto the end of tube as per instructions and set it aside to dry.
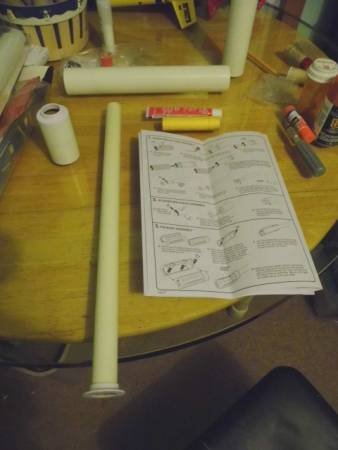
Engine Mount & Stuffer Bulkhead
I then grabbed the tube joiner and marked it at the 1 1/2" mark and then used plastic glue to glue the stuffer bulkhead onto the joiner tube.
Fin Body & Lower Body Tube Assembly
2020-08-17
Fin body was test fitted and then plastic glue applied as per instructions. Tube assembly was laid in place and other half of fin body attached and taped together then set aside to dry. In the mean time I grabbed the lower tube and marked the tube for the launch lugs. Once the fin body was set I applied plastic glue it and twisted it into place. I then flipped the tube around and using both carpenter's and plastic glue I glued the Stuffer Bulkhead assembly into body tube. Next step was to glue the launch lugs on again using plastic glue. After they were glued on I glued on the Scale Launch Lug Detail. Rocket was then set aside to dry.
Lower Body Tube Assembly

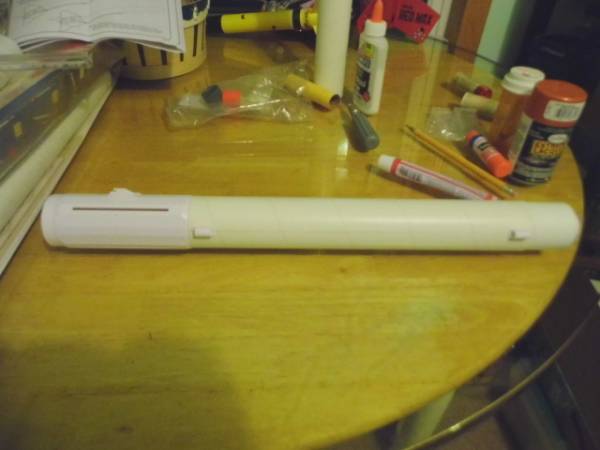
Upper Body Tube, Nose Cone, & Shock Cord Assembly
2020-08-17
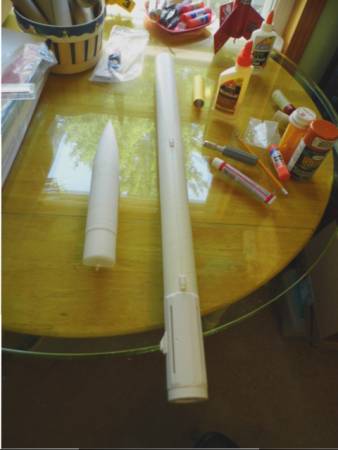
At this point in the assembly (step 7. Fin Assembly) I am skipping for now as I plan to paint the fins with flat paint before assembly. So on to step 8. I applied three light bands of carpenter's glue around the stuffer tube and slid it in the upper tube with a twisting motion. I then cleaned up the excess glue and set it aside to dry. I then moved on to the nose cone. I took the tip and glued in onto the nose cone with plastic glue and set it aside to dry also. Next I glued the shock cord assembly into the upper tube with carpenter's glue. All that is left now is to paint and attach the parachute.
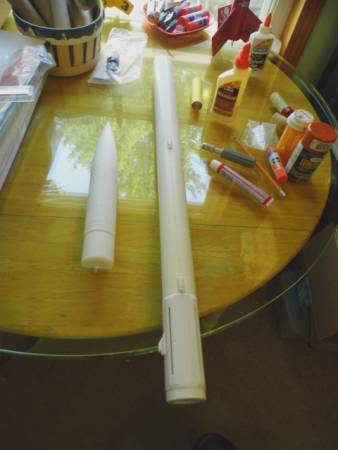
Upper Body Tube, Nose Cone
Ready for primmer
 |
 |