| Construction Rating: | starstarstarstar_borderstar_border |
| Flight Rating: | starstarstarstarstar_border |
| Overall Rating: | starstarstarstarstar_border |
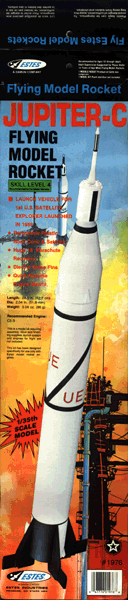
| Manufacturer: | Estes  |
 Brief:
A 1/35 semi-scale model of the rocket used to launch America's first satellite.
This is the same scale as the Estes Mercury Redstone and Mercury Atlas.
Construction:
No plastic parts in this kit with the exception of the booster adapter, spin
bucket and the Explorer I payload. Body tube is a one piece Centuri ST-20.
Motor tube is a short length of BT-20 and the centering rings are fiber. I
replaced the rubber shock cord with sewing elastic, and the original 1/8"
launch lugs with 3/16" lugs.
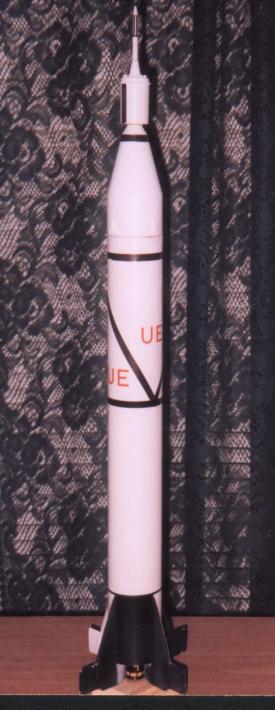
This was a skill level 4 kit. The oversize fins were built up from 2 fin halves glued together. The fins were easy to carve a good looking bevel into. Engine mount was a standard mount that I've built dozens of times. I built it with epoxy to give me the option of using Aerotech power later, should I choose to do so. I added a 1/4" long piece of spent engine casing to the top of the motor clip for added strength. The fin alignment guide had 2 lines per fin, and you centered the fins between the 2 lines. This helped me get the fins on very straight.
The only problem I gad was gluing the spin bucket to the top of the booster adapter. The fit was too loose and I never did get it to align correctly. As a result, the top of the model has a small but noticeable tilt to it.
The instructions call for you to fly without the Explorer payload, but I opted to build a cradle for the top section a la the Redstone, and recover the model in 2 sections. I used an 18" chute for the main section, and a 12" chute for the top section.
Finishing:
There were no decals for the roll pattern at the bottom of the booster, so you
have to paint it in yourself. This came out looking pretty good, certainly
better than the one piece roll pattern decal Estes is using for the Mercury
Redstone.
The old black stripes had flaked a bit over the years, so I replicated them with black trim Monokote. The instructions were very clear about placement of the decals. Interestingly, you are instructed to place the horizontal stripes first, then the diagonal stripes last. I realized too late that, had I done it in the reverse order, the intersection of the diagonal stripes would have been covered up by the horizontal stripes. The "UE" decals were still usable and look good on the model.
Construction Rating: 3 out of 5
 Flight:
The C5-3 is hardly available anymore, so I used the C6-3. The motor is held in
place by old-fashioned motor clip Estes used for years. I had no problem
getting the motor into or out of the model. Preparation is easy, the body tube
is long enough to hold a generous amount of wadding and still have room for 2
parachutes.
This model isn't exactly a fast flier, but it was very stable, with ejection very near apogee on both flights. Flights were not vertical, but more of a long, graceful arc. I think that the C5 would have given a more vertical flight due to its higher initial thrust spike. Both times the model recovered without damage. I look forward to trying this model out on D13 power someday.
Recovery:
The Jupiter-C requires the standard recovery system upgrade that every
experienced rocketeer should use. This is typical of kits from this era.
Flight Rating: 4 out of 5
Summary:
This model is an excellent addition to my fleet. It goes well with the Redstone
and Atlas. I would have given it a higher rating, but the problem with aligning
the spin bucket gave me fits. If Estes ever re-releases the kit, they'll need
to fix that feature.
Overall Rating: 4 out of 5
 |
 |
Flights
|
|