| Construction Rating: | starstarstarstarstar_border |
| Flight Rating: | starstarstarstarstar_border |
| Overall Rating: | starstarstarstarstar_border |
| Published: | 2012-05-29 |
| Diameter: | 0.98 inches |
| Manufacturer: | Estes  |
| Skill Level: | 3 |
| Style: | Futuristic/Exotic |
 Brief
Brief
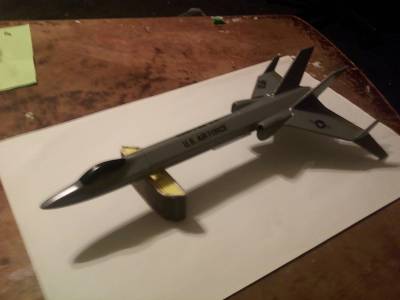
This is a Futuristic style kit, aparently meant to look like a interceptor/fighter capable of atmospheric and space flight. Skill level 3 due to the plastic body.
Components
This build was actually part kit, part cloning for me. I got the original plastic body form a fellow BAR in Arizona, but the rest of the parts I had to copy myself. The motor mount is standard 18 mm of Estes design, using a modern clip. The original had no thrust ring at the top, so I added that for safety. The parachute tube is standard Estes BT50, cut to 9 1/2 inches long. The fins were cut from 3/32 balsa, using fin pattens downloaded from Jim Z's archive site (http://www.spacemodeling.org/JimZ/estes.htm).
Construction
Pros and cons, lets see. Being as this is the second time I have made this rocket I didn't have many. The cool look of the rocket itself is the main pro, along with the minimal prepping it needed before primer and paint. The only cons I can think of is the lack of a thrust ring in front of the engine mount, and the standard Estes use of a rubber band with a tri-fold paper mount. That paper mount is what almost led to the destructon of my first one. You BAR veterans out there may know this trick Estes does, glue in the shock cord mount, it fails on the first flight, and your rocket's lower section comes down in perfect balistic fashion, embeding itself in the dirt.
For those of you who want to see my detailed build look here (http://www.rocketreviews.com/estes-1929---stealth.html
Finishing
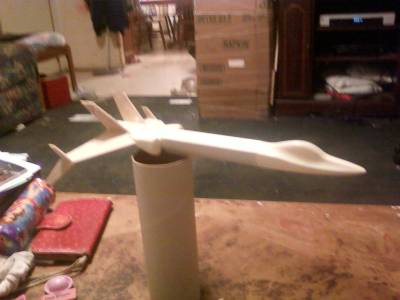
Let's see, pros and cons on finishing this. Pros- outer plastic body is hard enough not to dammage easily,yet it's con is the flaws of bad casting, and 30 years of age. And compared to when I was a kid, it feels tiny now. Cleaning up some of the details would have been impossible without all the attachments on my Dremel tool. My fingers are just too big to work some of the smaller areas.
Flight
Flight- Ok It has been about 4 months since the build was finished, and I finally got to take it out to fly. (May 20)
First attempt resulted in a "static test fire" with the model staying firmly attached to the launch rod. Always check that the paint on your rockets did not get into your launch lugs. The model should slide up and down your launch lug (or rail if that is what your useing) with zero drag. Once the inside of the launch lugs were cleaned out, it was on to attempt #2.
Second flight was perfect. Liftoff the pad the instant the motor lit, straight up flight, and ejection right at apogee. Flew great on an C6-3 Estes motor. I didn't have the courage yet to attempt a 3rd flight with one of the D21-4 Aerotech motors I had in the field box.
Pros- Great looking flyer.
Cons- my own sloppy paint job slightly clogging the launch lugs, and forgetting to bring the Camera for pictures.
Recovery
Recovery- Scratch built 16 inch mylar parachute with 4 squares of Estes wadding. Came down slower than stock due to the stock parachute being 12 inches.
Pros- That shiny mylar is very easy to see against all sky backgrounds. Today's slightly cloudy sky dramatically contrasted the shiny silver underside of the parachute, and on very sunny days it glints brightly enough to see it clearly (this is not my first rocket to use the mylar I have been useing for parachutes)
Cons- Being 4 inches larger than stock, and lighter in weight also, led my rocket to being drug downwind by the parachute after it landed. Perhaps the larger size was not such a good Idea after all.
Summary
If I ever get the chance to make another one of these kits, I certainly will. Unfortunately they hit Ebay as rarely as the solar eclipse crosses the United States. Might have to try scratch building a upscale clone.
 |
 |
Flights
|
|