Modified Estes Mean Machine
By Steve Lindeman
2012-02-22

Saw this rocket at Hobby Lobby on clearence last week and couldn't resist the urge to buy it. I have a similer rocket that I call Big Red that I built using two Prowler kits but has been a challange at times transporting becauce of its length so when I saw this new version of the classic I grabbed it. In fact I grabbed both them along with a Big Bertha. All for $47.37. Retail would have been $78.97. This is twice this winter that I've got a good deal from them. Last summer I picked up a Super Neon on clearence for $10.19 and a Big Daddy for $17.99. Almost $20.00 off. God bless Hobby Lobby.
For the most part this is going to be a stock build with three exceptions. The top coupler will be made into a baffle with 1/8" plywood ends with holes custom drilled by me. I'm also going to install a screw eye in the top of the baffle and attach a 20'' lentgh of kevlar cord to it followed by elastic cord in place of the stock paper mount and rubber band that Estes supplys. The final modification will be papering the fins. I learned this trick just a fews years ago and wished I had found or thought of this sooner. All of my builds now get this treatment. I love the flawless finish and extra strength it adds to balsa fins.
02/23/12
Assembeled MM per instructions and set aside to dry. Next started work on plywood inserts for baffle in top coupler. I know I'm jumping ahead slightly but thats how we roll sometimes. Traced the inside of a coupler twice onto a piece of 1/8" plywood then cut and sanded both pieces to a snug fit in the coupler. Next drilled 3/16" holes in both pieces. Seven holes in a close cluster in the middle for the bottom one and eight in a circle near the outside edge for the top one. After glueing both baffle plates in place I'm done for today. On a personal note this is not going to be a quick build as I have several projects that I want to work on at the same time and sometimes one takes president over the other.
02/24/12
Today I will be papering the fins. Was also hoping to spray some primer by tomarrow but we are under a winter storm warning as of last night so no can do. It has been in the mid 40's for the last week which is not normal for Michigan and I was starting to get launch fever. Today was a reality check. 
02/25/12
Compleated steps 4-9 which was marking the tube for fin mounts and launch lugs, final sanding of fins, attaching fins and installing bottom coupler. Skipped step 8 for the moment, and steps 10 & 11 due to modification of top coupler/baffle with screweye. Tied Kevlar to screweye and installed baffle. Proceeded to step 12 and ran reinforcement beads around everything and thats all for today.
02/26/12
Went back over all fins and launch lugs with white glue. Not going to do step 8 (the plastic jointer) till after rocket is painted so will be moving on to another project till weather permits.
03/03/12
Sprayed first coat of primer on fins today but after opening basement windows to get some cross ventilation it got to cold to do any more work.
03/04/12
Sanded fins with 220 paper and applied second coat of primer. Snowing today so can't open windows long to air out basement. Sure wish warmer weather would hurry up and get here.
03/07/12
63 degrees out today so was able to take rocket outside for final prime job and sanding. Went over joints with HobbyLite first then sanded entire rocket with 400 grit paper. Reprimered and then sanded again with 600 grit. Now ready for main color. Weather is going to cool off again over the weekend but warm back up next week so can't do anymore today as winds are picking up to gusts of 35 mph.
03/11/12
Managed to get the silver undercoat on the roocket today. Have decided to make yet another purple rocket as I still have 3 cans of metalflake that I bought on close out last year. Never was real big on black anyway and on this rocket I'm sure warpping would be an issue if left in the sun to long. My Big Red Prowler suffers the same fate so I know that the purple won't be any better I just prefer the color.
03/12/12
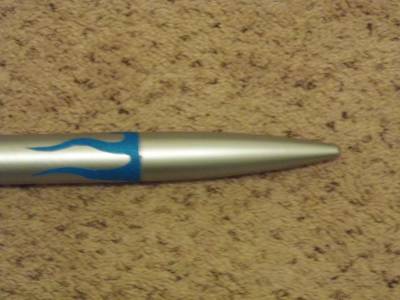
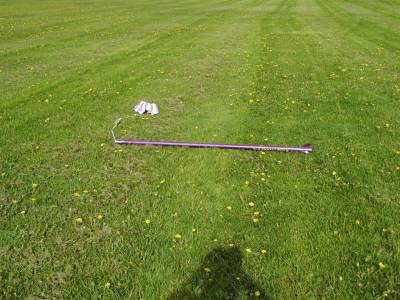
Raining today so not doing much. Got the 2" blue painters tape out along with some wax paper and laid out the flame pattern for the top end of the rocket (see photo). I first wrapped a piece of paper around the rocket to get the size then removed paper and drew the pattern on it. Next I cut it out with an X-acto knife. Then stuck the blue tape to the waxpaper, laid the patteren over it and again used X-acto knife to cut it out. Finally I peeled the waxpaper off tape pattern and applied tape to rocket.
03/13/12
Hit 60 today but with 15 MPH winds. Was able to apply second and final coat of silver to nose cone in spite of winds but will wait till tomarrows predicted 75 degree weather to do main body. Back tracked to step 8 and went ahead and plastic glued the plastic jointers in. I was going to leave them unpainted around the collars because I was worried of possible chipping due to being put to gather and take apart so many times but decided to take a chance and go ahead and paint them. So they got masked off and hit with silver.
03/17/12
Finally got the OK from wife to paint rocket. Applied first coat and set aside to dry. Wife decided she wanted to go to the dollar store while it dried so off we go. Came home and shot rocket with second coat. Let it dry a short time then hit with final blending coat. Let air dry for awhile then removed tape and set rocket in garage to finish air drying. Hopefully will finish with decals and clear coat tomarrow.
03/18/12
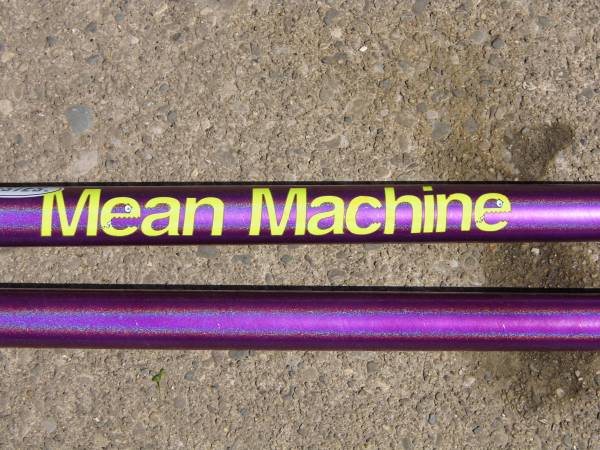
Applied decals today. Fin decals went on with no trouble but then disaster struck. The Mean Machine decal ripped in to several pieces. Managed to salvage most of it and and get it on the rocket but will have to try and do some touch up work before I clear coat everything.
03/19/12
Got out my smallest paint brush along with a can of yellow spray paint and newspaper and touched up bad spots in decal. Next I sprayed entire rocket with Dupli-Color High Preformance Clear EFFEX paint that is available in the automotive department of Meijers department store for $11.88 a can. Auto Zone also carries it for $12.98. After paint air dried out side for a while attached the parachute to rocket and got it ready for glamoure shots. Rocket is ready for maiden flight. Pictures to follow.

Maiden Flight
2013-05-10
Yesterday I finally got a day with almost no wind and was able to get her maiden fligh in. This was the fifth flight of the day and the only one to use the Mantis pad. I caught a lull in the wind an launched. Flight was straight up and impressive looking. Parachute deployment happened just as rocket turned parelle to ground. Nice slow drift back down somewhere around 300' from pad. Apon inspection at recovery point noticed slight black marks on chute where it looks as if the hot ejection charge gases hit it. Considering that this rocket has a baffle and where the baffle is located I was surprised. Note to self: Add a little dog barf next time just to be safe.
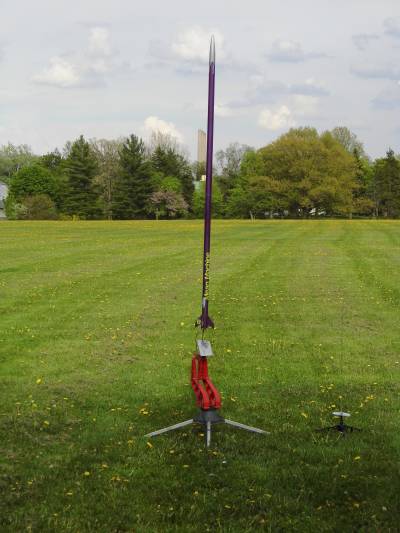
Mean Machine in 5...4...3...
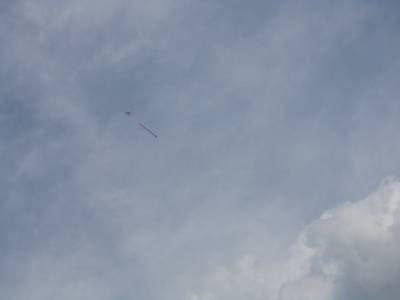
Mean Machine under chute
Mean Machine Recovery
 |
 |