Aerospace Speciality Products WAC Corporal (24mm)
Aerospace Specialty Products - WAC Corporal (24mm) {Kit} (KWAC-24)
Contributed by Robert Koenn
| Construction Rating: | starstarstarstarstar_border |
| Flight Rating: | starstarstarstarstar_border |
| Overall Rating: | starstarstarstarstar_border |
| Diameter: | 1.33 inches |
| Length: | 21.88 inches |
| Manufacturer: | Aerospace Specialty Products  |
| Skill Level: | 1 |
| Style: | Scale |
 Brief:
Aerospace Speciality Products produces a series of scale kits in various sizes. They range from Micro-maxx motor size
up to 29 and 38 mm engine size kits. I have been a fan of Andy’s scale kits for a long time and own all of his
Micro scale kits as well as other mini-engine, standard engine and D engine size kits. So being a scale model fan I
purchased his D engine size Wac Corporal kit about three years ago. The kit is only a bit larger in diameter than the
engine (BT-55 size tube) and as I result I also expected very good performance when I flew it, the type of performance
requiring a reasonably good sized field or very calm day.
Construction:
The kit comes bagged in a plastic bag typical of ASP products. Inside the bag were:
- BT-55 main tube
- BT-55 balsa nose cone
- Square balsa stick
- Balsa sheet
- Launch lug
- BT50/55 engine mount
- Kevlar® recovery line
- Heavy duty mylar parachute
- (3) Nose cone weights
- Large screw eye
- Elastic shock cord
- Instructions
The next step is to prepare the fins. A template is provided which is used to mark the balsa sheet for the three fins. Once the fins were marked onto the balsa it was a simple task to cut them out. After cutting the fins I trimmed the edges with my X-acto knife and then sanded three edges to an aerodynamic profile. Of course the root edge is kept square. After sanding the fins I applied a coat of balsa filler coat and three coats of sanding sealer while sanding to a smooth finish between coats. I also sealed the nose cone at the same time. When the fin preparation was complete I drew lines on the rear of the body tube for the fins and attached the fins with CA glue. I finished the fin attachment by mixing up some 5 minute epoxy and filleting the body tube joints. This makes for an extremely strong attachment to the tube.
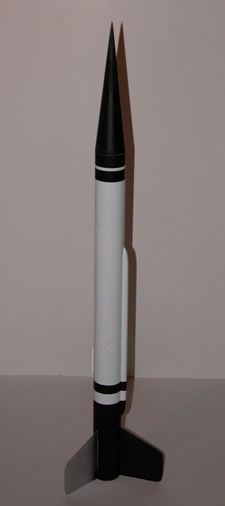
This model also maintains its’ scale appearance by having an instrumentation tunnel down the side. The tunnel is made by taking the square balsa stick, cutting to length, and rounding the sides and ends to simulate the actual rocket’s tunnel. Once this is done I also sealed and sanded the tunnel. It is then glued into place per the instructions.
To finish up construction the three heavy washers are attached to the nose cone along with the screw eye. The washers are almost exactly the diameter of the body tube so need to be carefully centered during installation. I actually epoxied them into place and then threaded the screw eye into the nose cone. Finally the elastic shock cord is attached between the Kevlar® line and the screw eye. I then assembled the parachute and attached it with a snap swivel.
Finishing:
At this point in the construction process all that remained was painting since I had already finished the balsa
surfaces during construction. I first primed the rocket with Rustoleum®
gray auto primer and sanded between coats. Next I painted the entire model with Krylon®
semi-gloss white paint. I masked off the areas to be painted black and sprayed them with Krylon®
semi-gloss black paint. The final step in painting was to paint one fin with Rustoleum®
aluminum metallizer paint. Overall this was a fairly simple model to paint.
Construction Rating: 4 out of 5
 Flight:
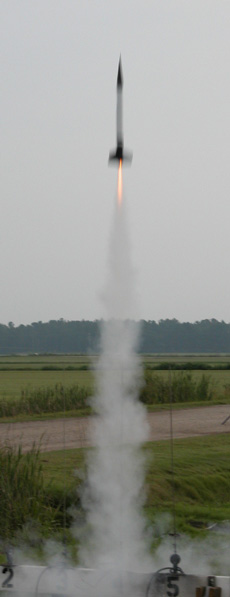
The model was first flown in South Carolina at the Freedom launch in September 2006. It was a perfect day and a very
large field. I flew the model on an Estes®
D12-7 and as expected for a relatively small and light model it flew very high and straight on the D. Recovery was
nominal and I didn’t have to walk to far to retrieve it.
Recovery:
The model deployed the parachute at about the nominal time and gently floated to the ground. I do imagine the shock
cord had a good twang since the three weights on the nose cone add considerably to the weight of the cone but
everything appeared good after landing.
Flight Rating: 4 out of 5
Summary:
The ASP 24mm Wac Corporal is another nice kit from ASP. It features quality materials and does require the modeler to
put in some effort to produce a nice looking and flying model. While not being difficult to build the modeler will be
required to cut the fins and model the instrumentation tunnel. But the modeler will be rewarded with a nice looking
scale kit. It also flies extremely well on an Estes®
D engine. The instructions also mention that it can be built to fly on 18mm engines if the engine mount adapter kit is
purchased or built from scratch. I would expect very good performance on B and C engines as well. After building this I
am somewhat tempted to buy ASP’s large Wac Corporal as well. Only time will tell.
Overall Rating: 4 out of 5
Other Reviews
- Aerospace Specialty Products WAC Corporal (24mm) By Joshua F Thomas (July 30, 2020)
This is a replica of the late 1940s WAC Corporal sounding rocket. It does not include the 'Tiny Tim' booster, but other kits from ASP Rocketry have it with the booster as a multi-stage rocket. The kit is all good quality materials and the instructions are extensive and have plenty of pictures. Fins are laser-cut balsawood, and tubes are standard BT-types. Shock cord uses both ...
 |
 |
Flights
 Model Rocket Kit")

|
|