| Construction Rating: | starstarstarstarstar |
| Flight Rating: | starstarstarstarstar |
| Overall Rating: | starstarstarstarstar |
| Manufacturer: | Quest  |
Brief:
I just want everyone to know that the only reason I am doing this review is not
because I am desperate to get one in or because I need the points for the on
going contest! Maybe! It just so happens that I received this kit with a Quest
QEZ at the same time. These were graciously donated by Matt Constable from
Quest at a SSS club meeting here in Phoenix for a build session at our monthly
meeting. This is a rocket but not exactly a powered one as we normally think of
them. This one is launched with a rubber band. Simple but effective. And now
that we have had a chance to use them, you may want to rethink about getting
one for yourself. I'll explain more later.
Construction:
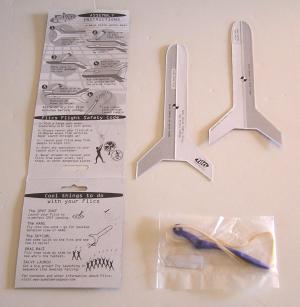
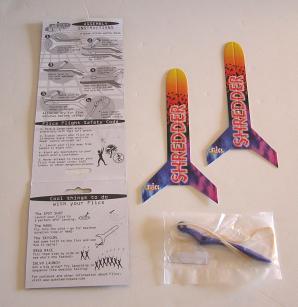
The kit consists of two stiff paper preprinted, pre-cut, and pre-scored rocket
halves with a small bag containing the launch rod, rubber band and two pre-cut
pieces of stiff paper which are the launch hook and nose weight. The
instruction sheet is on the back of the header card. I could go into the boring
details of the construction (ok, you twisted my arm enough!) Glue the two
halves together. Duh! Better yet, follow the directions exactly. They are
clear, easy to follow and get the job done nicely! Basically, there are three
pieces to put together and the rocket is complete. I used Titebond II for this
as well as all my other kits and it works just as well on paper as it does on
wood. DUH, what is paper made of? You could use thin CA but I would be worried
that it would bleed though the paper and ruin the face side graphics. A nice
thin coat of regular glue does the job nicely. When the two halves are
together, add the nose weight, wait about an hour and you should be good to
launch. We put ours together on a Saturday and used them the next day at our
park launch to give them plenty of time to set up.
This is a very easy to assemble kit with excellent parts and well versed instructions. I give it a 5 for a well done kit and a 5 on ease of construction.
There were no con's on this kit, except for the question of why you would even want to do it in the first place. However, after using it, you will quickly see all of the pro's of having one.
Finishing:
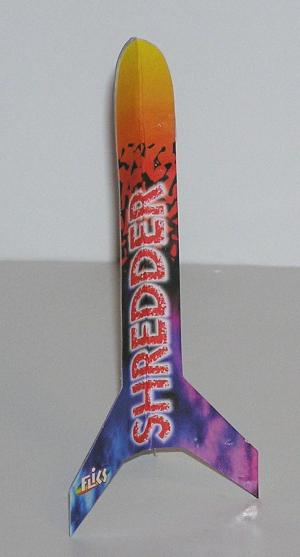
No finishing is required. (Now there's a change I can deal with!) When
completed, it does look surprising good and is actually slightly taller than my
ancient Sprite!
Construction Rating: 5 out of 5
Flight:
Now this is where things got interesting! We had gone to our favorite B6-4
field to lite some regular BP and brought the Fliss kits along just to try them
and forget them.
Well that didn't happen! I started to set up the regular launch platforms while the two boys moved out into the field to shoot the Shredders. After reminding them to NOT shoot them at me or each other, I went about my business of set up and was quickly distracted by the shouts and laughter coming from the middle of the field. After watching the boys, I grabbed my Fliss and joined them in the fun. Yes, FUN! After using up the novelty of shooting them straight up into the air, (yes they fly beautifully up and down), we started to use them for a spot landing contest. Here is where they are an absolute blast to use! We picked a spot on the field and tried to shoot them to it. At first we were trying to go too far and after finding a suitable range, we were really bombing the target. The best part was we could walk to the target spot, retrieve the rocket and them shoot them back from where we launched them. Hey, no recovery walk! We then started to shorten the target distance so that they were going straight up into the air, while still trying to land in the target area. Obviously you need a grass field for this and various dark or light areas become your target areas. You could also put an actual target on the ground and try for that.
As it happened, we spent so much time playing with the Fliss rockets, we ran out of light to do our regular launch! WOW, that was FUN!!!!!
Recovery:
After almost thirty or so launches with each of the three rockets, there was
very little wear and very minor ding damage on any of them. The paper is very
thick and if your recovery area is soft, you should get hundreds of flights out
of this one. Even the launch lug was holding up very well.
Flight Rating: 5 out of 5
Summary:
We couldn't find any con's and the pro's are many! There has to be many more
ways to use this rocket and the launch costs are only two or three bottles of
water or a Poweraid or two! Not bad for a few hours of fun!
Overall Rating: 5 out of 5
Other:
This may not seem like much of a rocket and very limited in what it can do but
remember it becomes what YOU make of it. As for us, we now include them with
all of our regular stuff!
 |
 |
G.M.K. (September 18, 2005)
D.K. (March 13, 2006)
|
|
J.R.T. (September 4, 2005)