| Construction Rating: | starstarstar_borderstar_borderstar_border |
| Flight Rating: | starstarstarstarstar |
| Overall Rating: | starstarstar_borderstar_borderstar_border |
| Published: | 2010-06-06 |
| Manufacturer: | First Flight Hobbies  |
Brief:
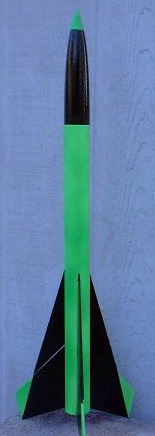
A single stage large model rocket.
Construction:
- Two sheets of 1/8” balsa fin stock – 3” X 16” and 4” X 16”
- Fin patterns and alignment guide
- Balsa nose cone
- Two BT 60 body tubes – 8” and 11”
- BT 60 coupler
- 24mm motor mount tube
- Two plywood centering rings
- Engine block
- Engine hook
- 15” plastic parachute
- 30” of yellow cord
- 36” of ¼” elastic
- Screw eye
- Snap swivel
- 3/16” launch lug
- Water slide decal
The assembly instructions are sketchy at best and jump around a bit and would not be suitable for a beginning
modeler.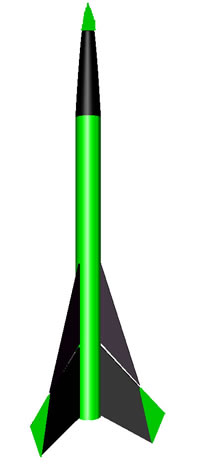
First was to mark the fin and LL alignment lines on the lower tube and cut the fins using the included patterns following the lay-out diagrams in the instructions. I was able to cut the three larger fins from the smaller piece of balsa and the three smaller fins from ½ the larger balsa sheet.
There was no indication which tube was upper and lower. By process of checking the fins against the tubes, I determined the longer tube was the lower tube.
Next we jump to assembling the motor mount. I would recommend notching the top cr for the yellow cord before mounting the cr to the mmt tube. I also notched the lower cr to accommodate the motor hook.
After the mmt is set to dry, we jump to installing the eye screw in the nose cone.
Back to install the mmt into the marked lower tube. At this time I also glued the two tubes together using the supplied coupler as this step was not covered anywhere in the instructions.
When the mmt had dried and fillets were done and dry, it’s time to start gluing on the fins. I did them one set (one lower, one upper) at a time.
After the fins were securely in place, I guesstimated the lower edge location of the lower launch lug and glued both in place. The instructions say to use the stand off pattern from the fin template sheet to make stand offs for the lugs, but I found no such pattern nor reference to their sizing so did not use them.
The parachute requires basic assembly of attaching the shroud lines. I opted not to use the included snap swivel.
Finishing:
Finishing is left up to the discretion of the builder as there is no photo to use for
reference. There is a water-slide decal included.
Construction Rating: 2 out of 5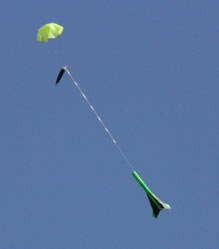
 Flight:
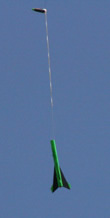
The recommended motors are C11-3 and D12-5. First flight was on a C11-3 for a nice,
straight boost with deployment right at apogee.
Recovery:
Shock cord is of two parts - Kevlar®
string and elastic. Recovery was right for the motor used for the first flight.
Flight Rating: 5 out of 5
Summary:
The instructions need to be more detailed for a beginning builder with more illustrations.
They also need to be organized a bit better to avoid jumping from one task to another without any flow of the build.
With multiple body tubes, the upper and lower tubes should be so designated either in the parts list or in the body of
the instructions.
Overall Rating: 2 out of 5
 |
 |
Flights
|
|