| Construction Rating: | starstarstarstarstar_border |
| Flight Rating: | starstarstarstarstar |
| Overall Rating: | starstarstarstarstar |
| Diameter: | 0.28 inches |
| Length: | 6.99 inches |
| Manufacturer: | FlisKits  |
| Style: | Contest, Glider |
Brief:
Rocket gliders and Micromaxx mini-rockets are cool, but what happens when you combine the intricacies of rocket
glider geometry and the miniaturization of micro-scale? You get the Fliskits Nanite. It's an amazing little glider that
you'll be hard pressed to ever get back, so enjoy it while you can.
I have to point out that this review is of the beta of the kit, not yet released at time of writing. There are a few instances where I will note suggested improvements or enhancements. I have discussed these with Jim Flis and will try to note his feedback. Some will be incorporated as standard design, while others will be considered advanced tips for a more competition or performance oriented modeler. Heck, considering I built this while competing at NARAM-49, is it any wonder I had performance on my mind?
Rocket gliders by their very nature are challenging, much more so than conventional boost gliders. In order to be stable during boost, your CG must be safely forward of your CP, but in order to glide, your CG needs to be fairly close to your CP. Since you can't spit the motor (per NAR competition rules and safety code), this change in geometry is typically handled via either a sliding pod, scissor/flop wings, or a sliding wing. In the case of the Nanite, the sliding wing method is used. While this is probably the easiest and most reliable method, this is not something that should be undertaken without the experience of at least a couple regular boost gliders under your belt. If you have not built a glider, please start with an Estes Eagle, Quest Flat Cat, or Apogee Condor. If you've built boost gliders, this is a great introduction into the world of rocket gliders.

Construction:
Parts were very good quality and included:
- Balsa nose cone
- Balsa stock for wing, tail, stabilizer, pod support
- Basswood spar (boom)
- 1/64" plywood panel (sliding box)
- Tubular nylon braided elastic*
- Assorted lugs
- Burn string**
* -- This is likely to change to Sig rubber prior to release
* -- The kit will include a small spool, which Jim provided me with the beta. This is wonderful burn string--thin, pure cotton, and better than anything I've come across previously.
Since this was purely a beta, and Jim knew I had ample rocket glider (and Micromaxx) experience, instructions were definitely crude and basic. Obviously though, one would expect the released product to be typical Fliskits standard of clearly written with plenty of helpful illustrations. I suspect that this kit will break the string of Micromaxx kits fitting on one page instruction sheet though as there will probably be plenty of tips along the way.
I began with the nose cone/pod assembly. Working in tight spaces, the aft end of the nose cone needed to be notched to allow it to serve as a motor stop as well as to allow gases to pass through the side vents (cut into the body tube). Glue in place and you might want to coat the aft end with a little thin CA in multiple coats to help protect it from the ejection gases. You might laugh, but those MMXs really do burn away at balsa, and I've even burned through a few Kevlar® shock cords in my day.
The basswood boom must be trimmed--basically just a slight taper at the aft end and a small angled cut with a rounded front for streamlining. I found the aft taper to be way too steep, putting at least 10 degrees of incidence on the tail. I believe this is being corrected prior to release. The overkill on the incidence serves to provide extra lift, forcing more nose weight/longer boom, plus it will slow down the glide a good bit, all of which are bad news for performance.
Next up is construction of a small "box" that attaches to the wing and slides along the boom. This box is built up from two plywood side panels and a couple of basswood strips on the top and bottom. While this does need to be strong (it's one of the most stressed joints on the model), be sparing with the glue and don't let any get on the inside seams. I wound up using the boom itself to set the spacing just right, being careful to slide the box back and forth and not allowing any glue to hit the boom.
The pattern sheet provided includes a pattern for one wing half and directions to make 2 pieces. I generally find it better to make the wing as a single piece, get it balanced and evenly airfoiled then split in two and rebond for the dihedral but to each his own. Depending on the packaging of the final kit, this might yet be released as a single piece wing template.
I will fess up to the fact that I managed to make my wing backwards, reversing the leading and trailing edges as I sanded away a beautiful airfoil. I trust the released pattern sheet will clearly mark the leading/trailing edges and that future modelers will not be as dimwitted as I (though in my defense, it was a very late into the night after a long day of flying). To assist with the dihedral, there's even a cut-out jig on the pattern sheet, which is a wonderful tool that will greatly simplify one of the trickier aspects of glider construction.
One key tip: use yellow glue rather than CA for all the balsa joints. Yes, I know it's a little heavier and takes longer to bite, but it will bind better than CA and that makes a big difference on such a small scale design such as this. While those wings are tiny, they will be under a lot of stress and you don't want the glue joint to fail.
Once you've tacked the wing dihedral, you attach it to the sliding box. This is a critical alignment--make sure the wings are level (90-degree angle to the boom both vertically and horizontally).
Stabilizer and tail are cut using a pattern provided. I substituted 1/32" balsa (C-grain) for the 1/16" in the kit, which I think makes a considerable difference. It's strong enough to hold up and lightens the aft end quite a bit. This allowed for much less weight up front, and you could conceivably even shorten the boom by 1/4-3/8" to boost performance a bit. 1/32" balsa is probably overkill though, and I believe the standard kit will remain 1/16".
That basically completes the glider part of construction, leaving you with the task of the rigging for the sliding wing. The beta kit used a braided nylon elastic, which is likely to be replaced with a Sig rubber, but the basic rigging approach will be the same. The elastic is attached to the bottom of the sliding wing box. On the beta kit, to provide sufficient tension, this was handled via a launch lug that extended about an inch aft of the box with the nylon slipped through it and knotted at the end to act as a stop. From there, it follows the boom, and curves up/forward around the front of the boom/pod support where it's glued firmly in place. There should be enough tension that the wing wants to stay forward, resting against the pod support bracket.
The burn string "plumbing" starts with a launch lug anchored to the underside of the wing, which is where you tie one end of it. From there, it goes aft to the tail, where you anchor another lug. The string loops through the lug, then heads forward along the boom, through the vent holes in the pod, and after a wrap around the nose cone, gets taped in place (the wing is pulled all the way back while this is rigged). Once the ejection charge burns the string, the tension is released and the wing slides forward, converting your rocket into a glider.
Finishing:
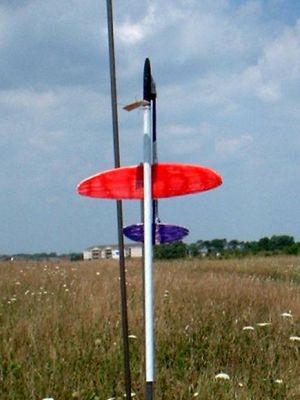
OK, normally competition style rockets and gliders in general are not painted as the weight is a performance drag.
With this little guy though, you have to give it some color or you'll never get it back. I used Sharpie markers
to give it plenty of red and black for picking up in the sky and on the ground.
Construction Rating: 4 out of 5
Flight:
As I prepped this for its maiden flight, I caught plenty of grief from my club flyers. Having just come back from
NARAM with a poopload of trophies, they were expecting me to fly "real" rockets like a 14-foot long G
superroc, not some tiny glider that needed to fly off a wire instead of a real rod. I didn't help the cause any by
spending about 15 minutes playing with the tension and trying to get things just right.
As I prepped for flight #1, I noticed the basswood boom was having trouble with the tension of the elastic and was bending a little bit to the side that the burn string was pulling on. The result was a fairly squirrelly boost since the rudder was essentially a fin canted at about 15 degrees. My resulting altitude was barely 30 feet. Once it hit ejection though, it transitioned into a beautiful glide. I might have gotten the leading and trailing edges backwards, but by gosh I put a nice airfoil on it and the glide had a real "wow factor".
Flight #2 came a couple weeks later. Our club was having an official NAR contest, so I decided to fly this for a record attempt in 1/8A-RG. I had replaced the elastic with a slightly longer piece to reduce the tension and pulled the wing back just a little further so that the lug trailing the slider box rested against the edge of the stabilizer, holding it in place and eliminating most of the bend.
The result must have worked because the glider absolutely disappeared the instant the motor lit. Fortunately, we were able to pick it up when we heard the telltale "Pfft" of the ejection, and sure enough, it transitioned into another fantastic glide though this time from about 80 feet up and in steady 10-12 mph winds. Yikes! If I wanted to break a record, I had to bring the glider back. A 40-something man racing through 3-4 foot tall briar patch in shorts chasing a scrap of balsa barely 6 inches long must have been a pathetic sight, but after 49 seconds, the glider came down and I had shattered the previous record of 34 seconds. I found it right away, and walked slowly and proudly back to the range carefully avoiding any further damage to my legs (and glider) in the thorny weeds.
Recovery:
While the second flight was excellent, I can't help but think it suffered in the heavy wind and didn't get much
thermal support at all so I plan on making a couple more tweaks on the next build, shedding another gram or two, and
fully expect to top 80-90 seconds on this.
Flight Rating: 5 out of 5
Summary:
I can't say enough good things about this rocket/glider--it's an amazing flyer and a seriously competitive performer.
It's a welcome contrast to the RTF toys that are notoriously poor flyers and solid evidence that downsizing in
materials doesn't have to mean downsizing in quality or performance.
With such a low cost per flight and such innovative designs now available in MMX, if you aren't flying micro you should at least be thinking about it. If you are flying micro, you really need to give this glider some thought. It's not an easy build but well worth the effort and a sight to behold as it glides away into the sunset. Now if only R/C technology were micro'd down so you could control the glide on this...
The only cons I can offer up are already being addressed--excessive incidence on the boom/tail and heavy/taught elastic that's too finicky to work with consistently.
I rarely go above 4-4.5 on reviews, but on the assumption that the elastic problem is worked out, I give this one a hard earned 5.
Overall Rating: 5 out of 5
 |
 |
Flights
|
|
|
|
J.F. (September 23, 2007)