| Construction Rating: | starstarstarstarstar |
| Flight Rating: | starstarstarstarstar |
| Overall Rating: | starstarstarstarstar |
| Diameter: | 2.60 inches |
| Length: | 44.70 inches |
| Manufacturer: | Madcow Rocketry  |
Brief:
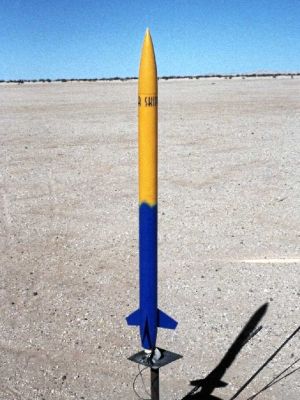
Skipper is a 29mm 3FNC rocket of traditional but interesting design that has 3
rather tiny ply fins positioned above a beautiful balsa boat tail. Like the
entire Madcow product line, it is a deluxe kit that includes virtually
everything but glue and paint--you get sanded balsa cone and boat tail,
eye-bolt hardware, nylon chute, Nomex®
chute protector, Kevlar®
shock cord. Fin attachment is through-the-wall to the motor tube, and the laser
cutting is exceptional, the best I have ever seen.
Construction:
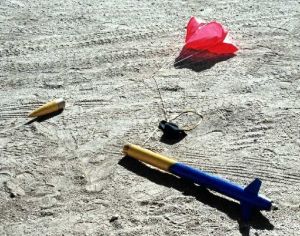
The components have a fit and finish that has to be seen to be believed. The
photo with this article that appears to be of the Skipper before painting is
actually the test fit of the parts before gluing--the entire rocket can be test
assembled without adhesive--the fit of the parts is that good! I consider the
Skipper and the Madcow Rocketry line generally to be genuine ARF (Almost Ready
to Fly) on this basis. I was able to build Skipper, ready for painting, in a
total of exactly 21 minutes including sealing the balsa parts. I had to mix 5
minute epoxy only twice. The build is just astonishing, especially for a rocket
of this size (F-G power). It would be a snap to build right at the field and
launch within the hour.
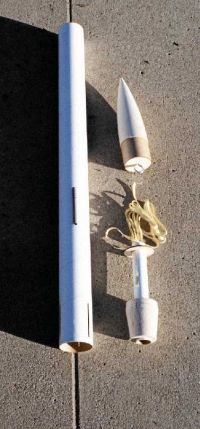
Instructions were superb, not that they are even necessary. Everything fits together intuitively, even for a first timer. Being able to test fit the entire rocket together without glue enhances its "buildability". First to assemble is the balsa cone and base assembly with bulkhead and eye-bolt. No lead is needed for the recommended motors, but if you intend to fly on more than G power, the highest that is recommended, you might want to sneak 2-4 oz. of lead sinkers into the cone base before gluing together (or see my review of the Madcow Momba for a way to install removable ballast in Madcow products). Also, remember to lock the threads of the eye-bolt with a gob of epoxy so it doesn't loosen after sealing up. Next, I assembled the motor tube to the top centering ring and the boat tail, which serves as a lower centering ring for the motor tube. See photo of these finished subassemblies. Madcow includes a notch in the centering ring to pass the Kevlar® shock cord through for anchoring. Just a few minutes after starting with the epoxy set on these pieces, I plugged the motor tube-boat tail section into the body tube and glued the three TTW ply fins through the pre-cut slots, applying an epoxy fillet to the base of each fin with a Popsicle stick. I did make one slight modification: I managed to step on and squash one of the two 1/4" fibre launch lugs supplied with the kit so I substituted a plastic BIC pen barrel instead. I like them better anyway. I mentioned earlier the solid balsa nose cone and boat tail and the need to seal these before painting. I accomplished this by simply smearing the exposed surface of each with a thin layer of freshly mixed 5-minute epoxy using a finger covered with tape for skin protection. This gives a glass smooth finish that takes paint perfectly and is far more durable than those powder-based balsa sealants, which in my hands will chip if you look at them the wrong way.
Finishing:
Painting was with Tamiya spray blue and yellow. I used no primer to seal the
ply of cardstock tube, but if you like a perfect finish, this would be a good
idea. The supplied "Skipper" decal was applied near the top of the
body tube. One further addition I made before flying was to tie a length of
para cord (about 2 feet) to the Kevlar®
shock cord to add a bit of "give" since the Kevlar®
is like steel and has no stretch whatsoever.
Construction Rating: 5 out of 5
Flight and Recovery:
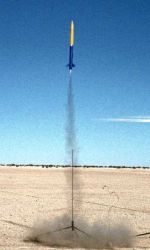
Flight was at our club's Plaster City launch site on a beautiful day. Skipper
boosted perfectly on an AT F50T-6 to about the 1000' predicted by the
manufacturer. Recovery was uneventful and it returned with no damage.
Second flight was on a G40W-7, again perfect in all respects. Third flight was on a G35W-7 Econojet, which is not one of the recommended loads but close enough to a G40 and I had one available. Perfect boost, ejection exactly at apogee. On recovery, I was surprised to find a small (3/4") zipper at the top of the body tube with the shock cord Kevlar® tape still wedged inside. This should not have happened. I am wondering if the extreme stiffness of the Kevlar® shock cord might be the cause or maybe it was just bad luck. However, I did use a non-approved motor after all.
Flight Rating: 5 out of 5
Summary:
PRO: I can only use superlatives to describe the Skipper kit. Just wonderful
kit manufacture, fit and finish. It goes together with easy. Despite those
really tiny fins, Skipper flies beautifully on F-G power. I think it could
easily fly on 29mm H-power, like the H128 or H165R, for a L1 cert.
CON: You do need to use a few tricks to seal the balsa components, and I would recommend adding a piece of para cord to the supplied Kevlar® shock cord in Quest fashion so there is better shock absorption. Best to add this so the square knot joining the 2 pieces is level with the top of the body tube. This will prevent any possibility of zippering by the tough Kevlar® tape.
Overall Rating: 5 out of 5
 |
 |
Flights
|
|