| Construction Rating: | starstarstarstar_borderstar_border |
| Flight Rating: | starstarstarstarstar_border |
| Overall Rating: | starstarstarstar_borderstar_border |
| Manufacturer: | Sky  |
Brief:
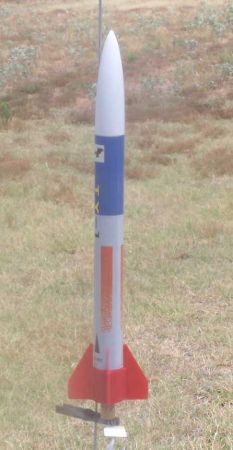
The Sky Eagle is a simple 4FNC sold through Apogee Components and manufactured by the Chinese company, Sky Rockets.
It is billed as a skill level 1 but that is making it more difficult than it really is. It is on a par with an Estes
EX1 kit.
Construction:
Sky body tubes are somewhat different from what we are used to in the US. They are not spiral wound. Instead, there
is a single vertical seam running the length of the tube. Neither is this regular cardboard. It seems to be some sort
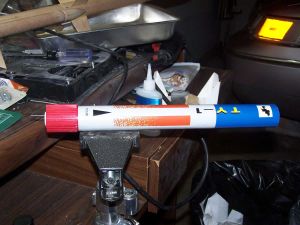
of plasticized paper. The entire BT is pre-painted in a red, white, and blue scheme complete with Chinese characters.
The kit comes with a pair of 1/8" lugs made of the same stuff as the BT and having a single straight seam. The
nosecone is plastic but of a different type than the styrene I am accustomed to. Unlike the previous Sky rocket I
built, this one had a significant seam line. The fin can is red plastic and the fins are of the same material. An
overly large parachute kit finishes out the kits contents. Taped to the bag though was an Estes style tri-fold mount.
Construction begins with the motor tube. A slit is cut for the engine hook 2" back from one end. It should be noted that this results in a hook that extends beyond the motor tube much more that I am accustomed to. It was the same with the Sky Long March 3 I built and seems to be an idiosyncrasy of the company. The instructions then call for the hook to be glued into place and a piece of tape put over it.
 The motor tube is then slid into the plastic fin can. The instructions say to glue both ends with plastic model cement.
I did not have any of the tube type cement handy and I did not think the liquid solvent type would do too well on the
BT. I opted to use thin CA.
The motor tube is then slid into the plastic fin can. The instructions say to glue both ends with plastic model cement.
I did not have any of the tube type cement handy and I did not think the liquid solvent type would do too well on the
BT. I opted to use thin CA.
It should be noted that this kit does not include a thrust ring. Based upon previous experience, that downgrades it for me but I did not include one because I had none on hand.
I did a double take at the next step. The instructions said to install the launch lugs centered between 2 of the fins. The problem was that the BT had not yet been installed on the fin can. I looked over the instructions to see if I had missed anything but there was no mention of putting the two elements together. I concluded that they were supposed to be assembled by this time because the illustration from the previous step showed them being slid together with an arrow. There is just no mention of this in the text. I put the BT on with some CA. I then installed the lugs with yellow glue.
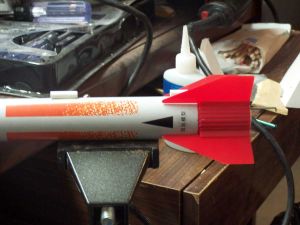 The fins came next. They just slide into the slots on the fin can. They went in easily and I used a liquid plastic
cement to fix them in place.
The fins came next. They just slide into the slots on the fin can. They went in easily and I used a liquid plastic
cement to fix them in place.
The recovery system provided consisted of a tri-fold and a short piece of elastic. I wanted to make some changes here. I cut a long length of Kevlar® and tied a loop in the middle. I then inserted both ends into the tri-fold and glued it into the BT. With the long Kevlar®, I was satisfied with the length of elastic which seemed to be of good quality. I tied the elastic into the loop I had put in the Kevlar®. That made the rocket ready for finishing, such as there is any finishing.
PROs: Easy to build.
CONs: No thrust ring, incomplete instructions, tri-fold mount, and short elastic.
Finishing:
Theoretically, this rocket needs no finishing. The BT is pre-finished in red, white, blue, black, and a bit of
yellow. It actually looks fairly nice. The fin can and fins are a complementary shade of red that goes well with the
overall schema. The nosecone is white. It is the nosecone I was unsatisfied with.
The plastic is a bit translucent and off white. The previous model I had from Sky, a Longmarch 3, was the same. I wanted it to be completely opaque. With that in mind I primed it with Kilz and allowed the primer to dry. I then did a bit of light sanding and painted with Krylon gloss white. That was the extent of my finishing.
PROs: mostly done, looks pretty good.
CONs: little/no room for individuality.
Construction Rating: 3 out of 5
Flight and Recovery:
I only got to launch this one once for a variety of reasons. The biggest one though is that it was late in the day
and over 100 degrees. I didn't have the energy to launch it more than once.
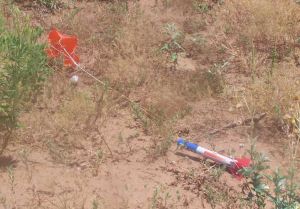
Since the rocket is a bit heavy with a plastic fin can, I decided to use a B4-4 on the maiden flight. It lifted the rocket nicely but it weathercocked a bit. Ejection took place right after apogee and the rocket drifted down without any ill effects except in terms of the number of sand burrs per meter walked.
It will get another outing.
Flight Rating: 4 out of 5
Summary:
This is an easy rocket that looks pretty good for a 4FNC. The flight is adequate though nothing spectacular. It might
be a good kit to get somebody started but was a bit boring after lots of other builds. I put it together because it was
quick and I had a limited build window.
Overall Rating: 3 out of 5
 |
 |
Flights
|
|