| Construction Rating: | starstarstarstarstar_border |
| Flight Rating: | starstarstarstarstar |
| Overall Rating: | starstarstarstarstar_border |
| Published: | 2013-09-27 |
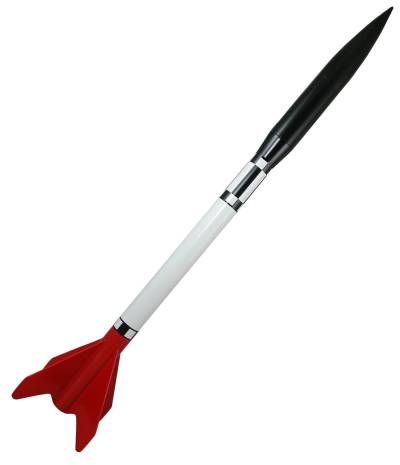
| Diameter: | 2.50 inches |
| Length: | 46.25 inches |
| Manufacturer: | Estes  |
| Skill Level: | 5 |
| Style: | Sport |
 Brief
Brief
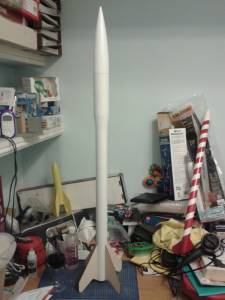
Part of the Pro Series II line of 29mm mid power kits, the Ventris is a payloader with a larger diameter paylod bay and stylish curved fins. I liked the look of it and found the enlarged payload bay interesting and wanted to build one, received as a birthday present and waited less than a fortnight to get cracking.
Components
The Pro Series II kits are all bagged. It had stood up to shipping fine without any damage.
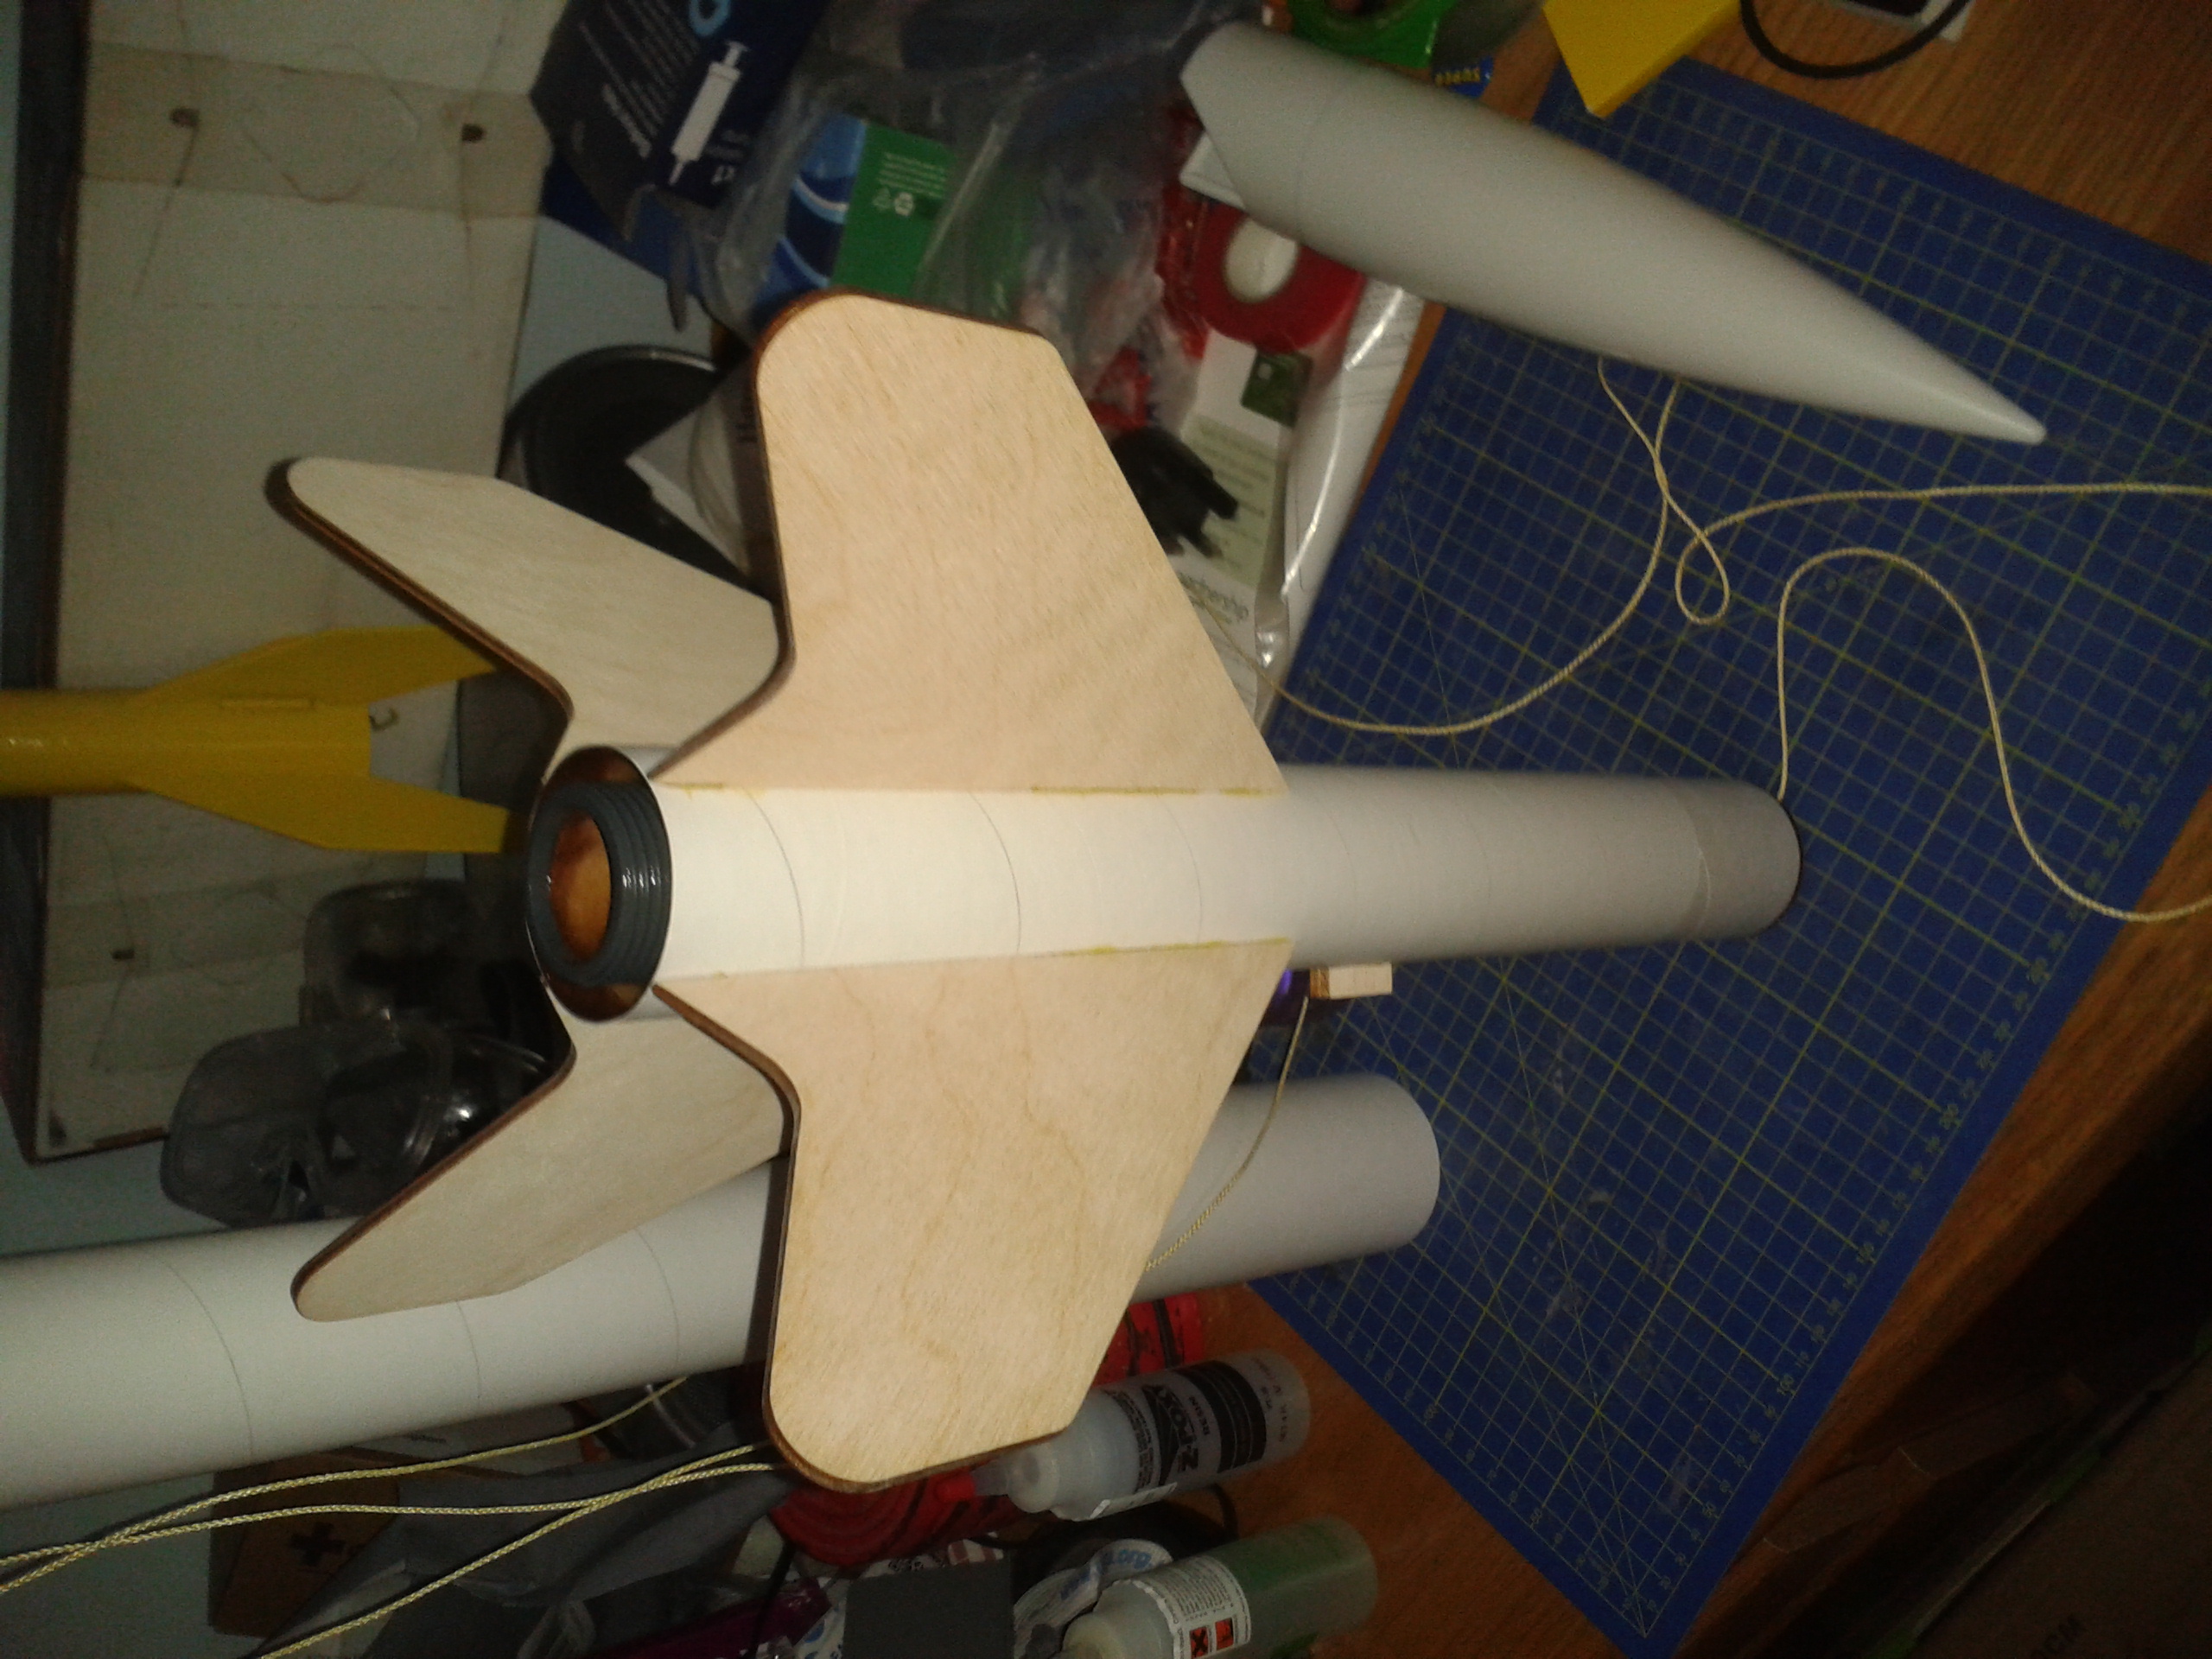
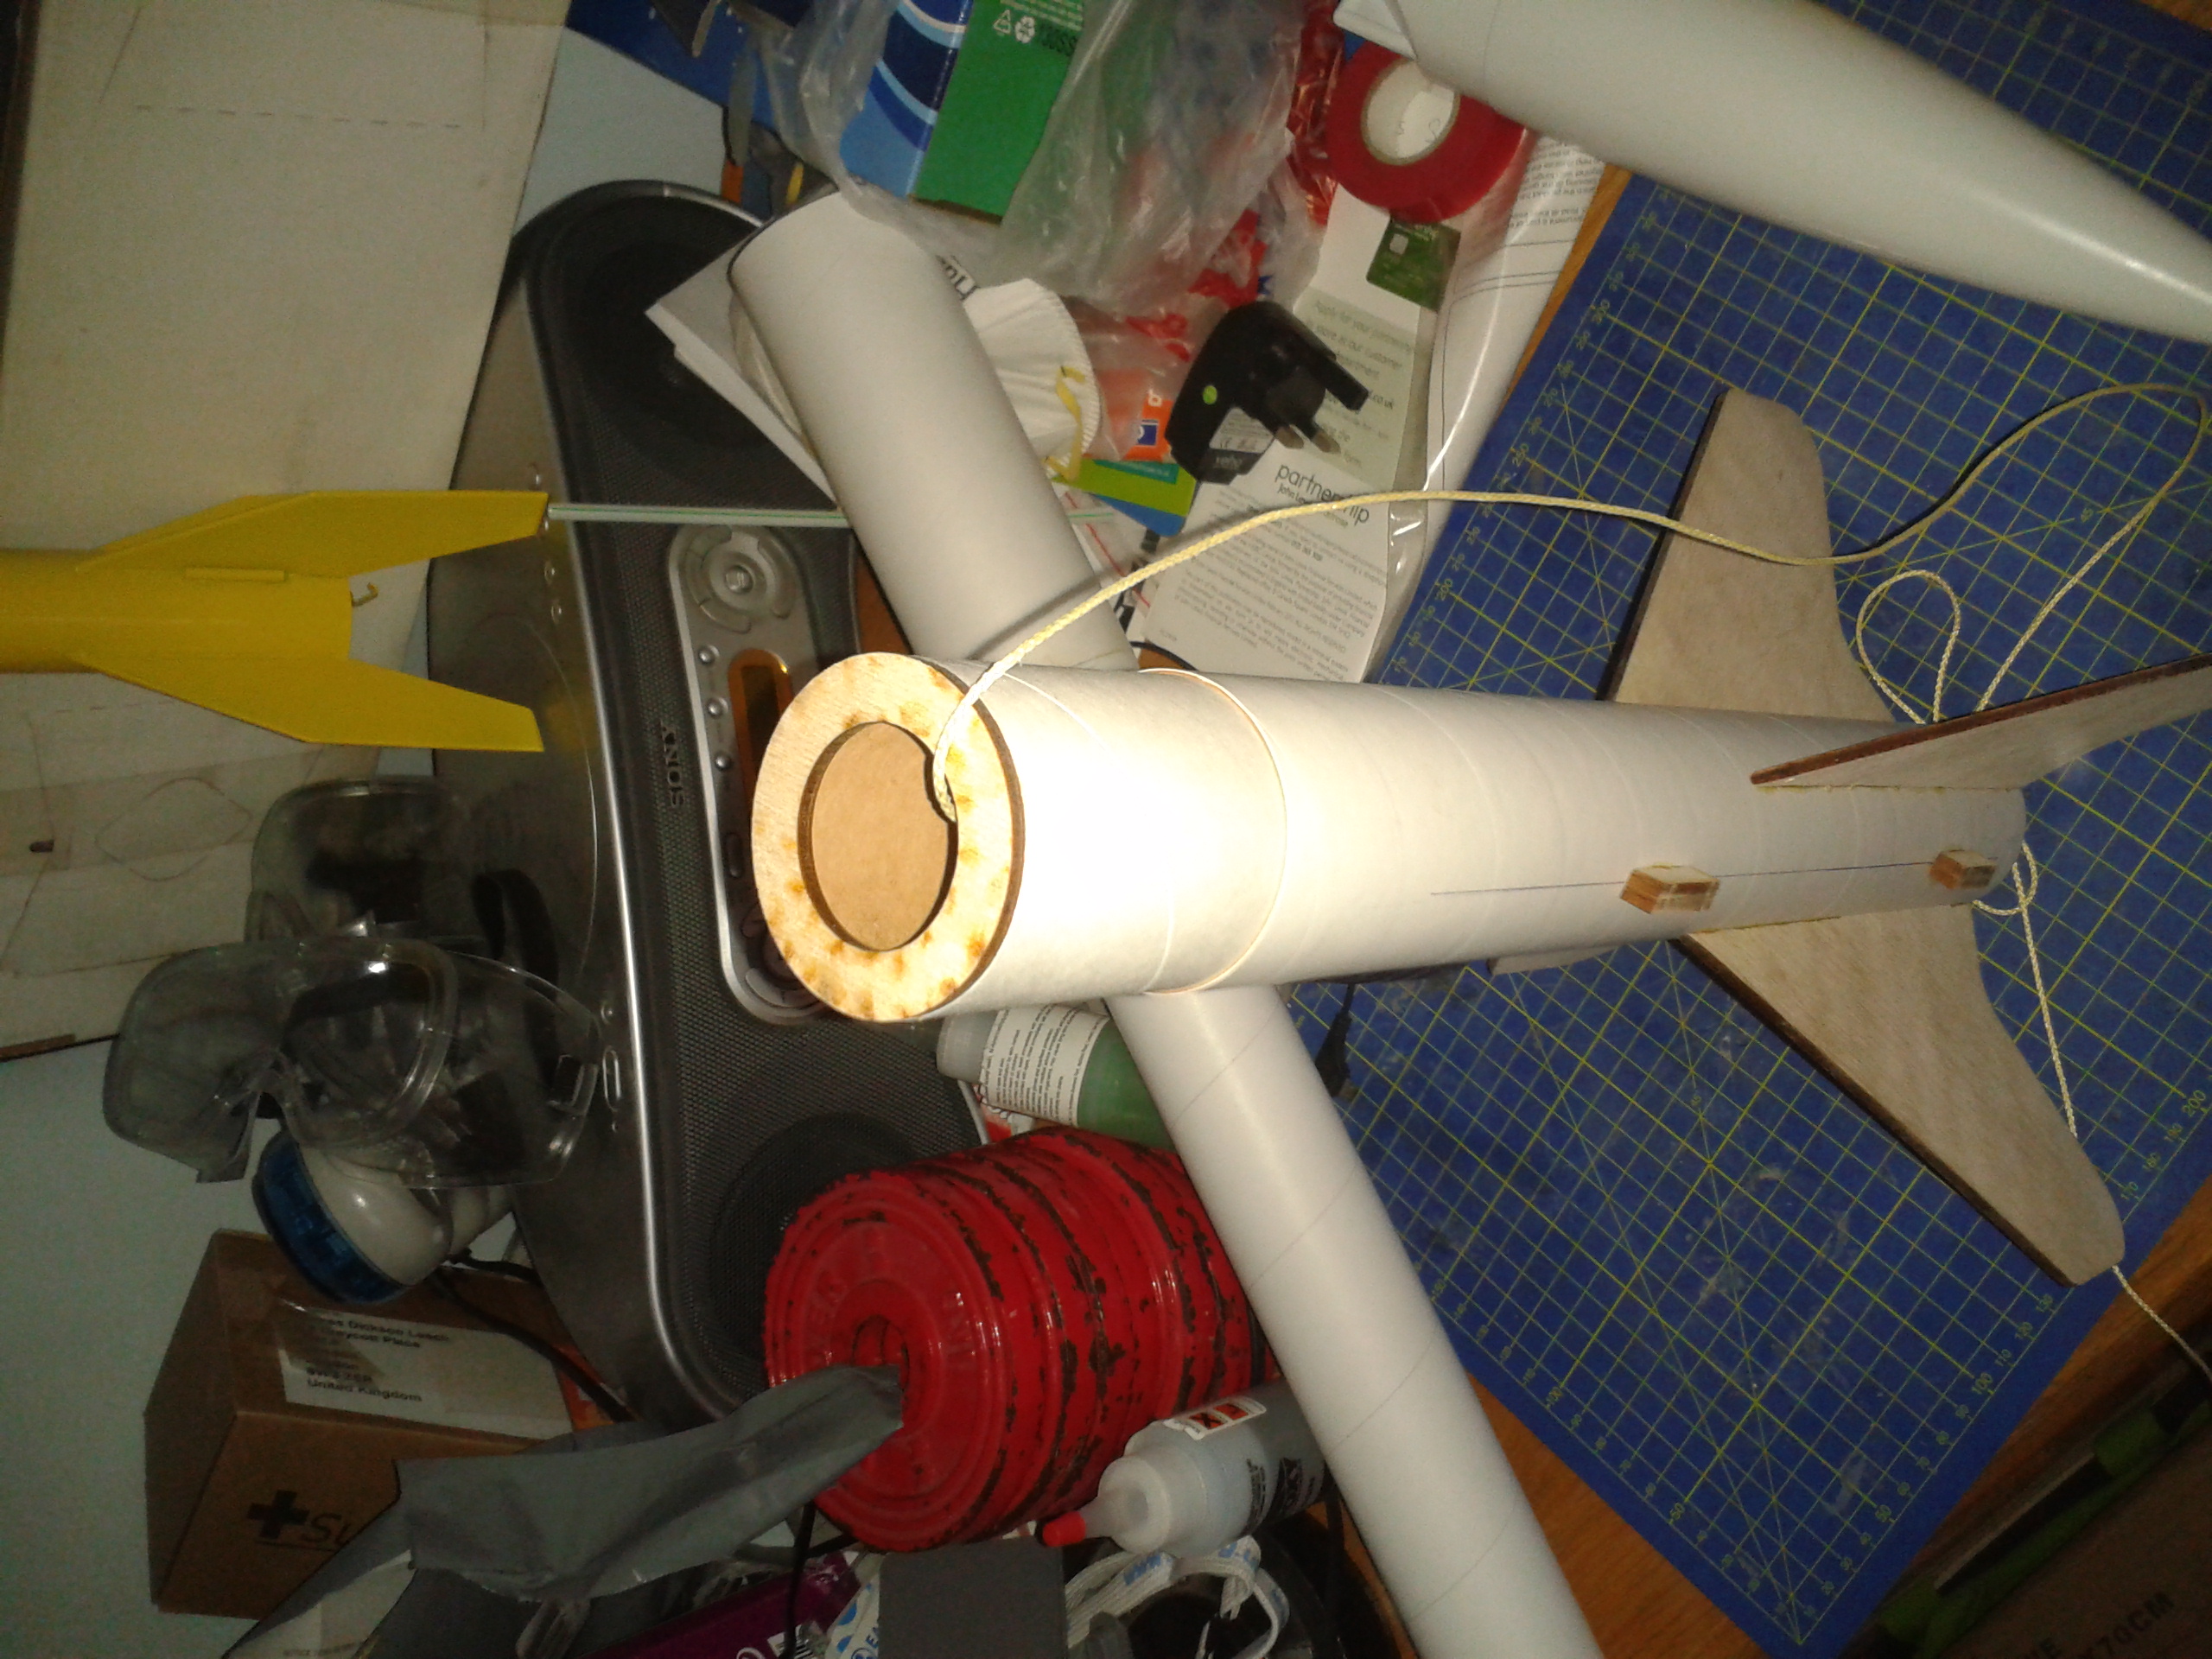
Centering rings and Fins were of good quality, only a quick sand on the plywood fins to get them smooth. The nosecone and transition didn't have huge amounts of flash and all the tubes were of good quality. Slightly more tubes than I am used to from an Estes kit (two lower body tubes with a coupler, an upper body tube and motor mount) but all good firm paper tubes. I am not bothered about spirals and this was very subtle on these tubes.
Nice Ripstop nylon parachute, the now standard 29mm motor retainer all I liked.
Plus a couple of meters of half inch elastic and a big cutout 3-fold shock cord attachment point finished it off.
Only Decal in the kit was a "Estes Pro Series II" one. While I like the stock look I am not bothered as I generally don't apply many decals.
Construction
I was racing to get this built during a short period when both my girls were napping, so I didn't have a huge amount of time to document with pictures and even forgot to do the internal fillets!
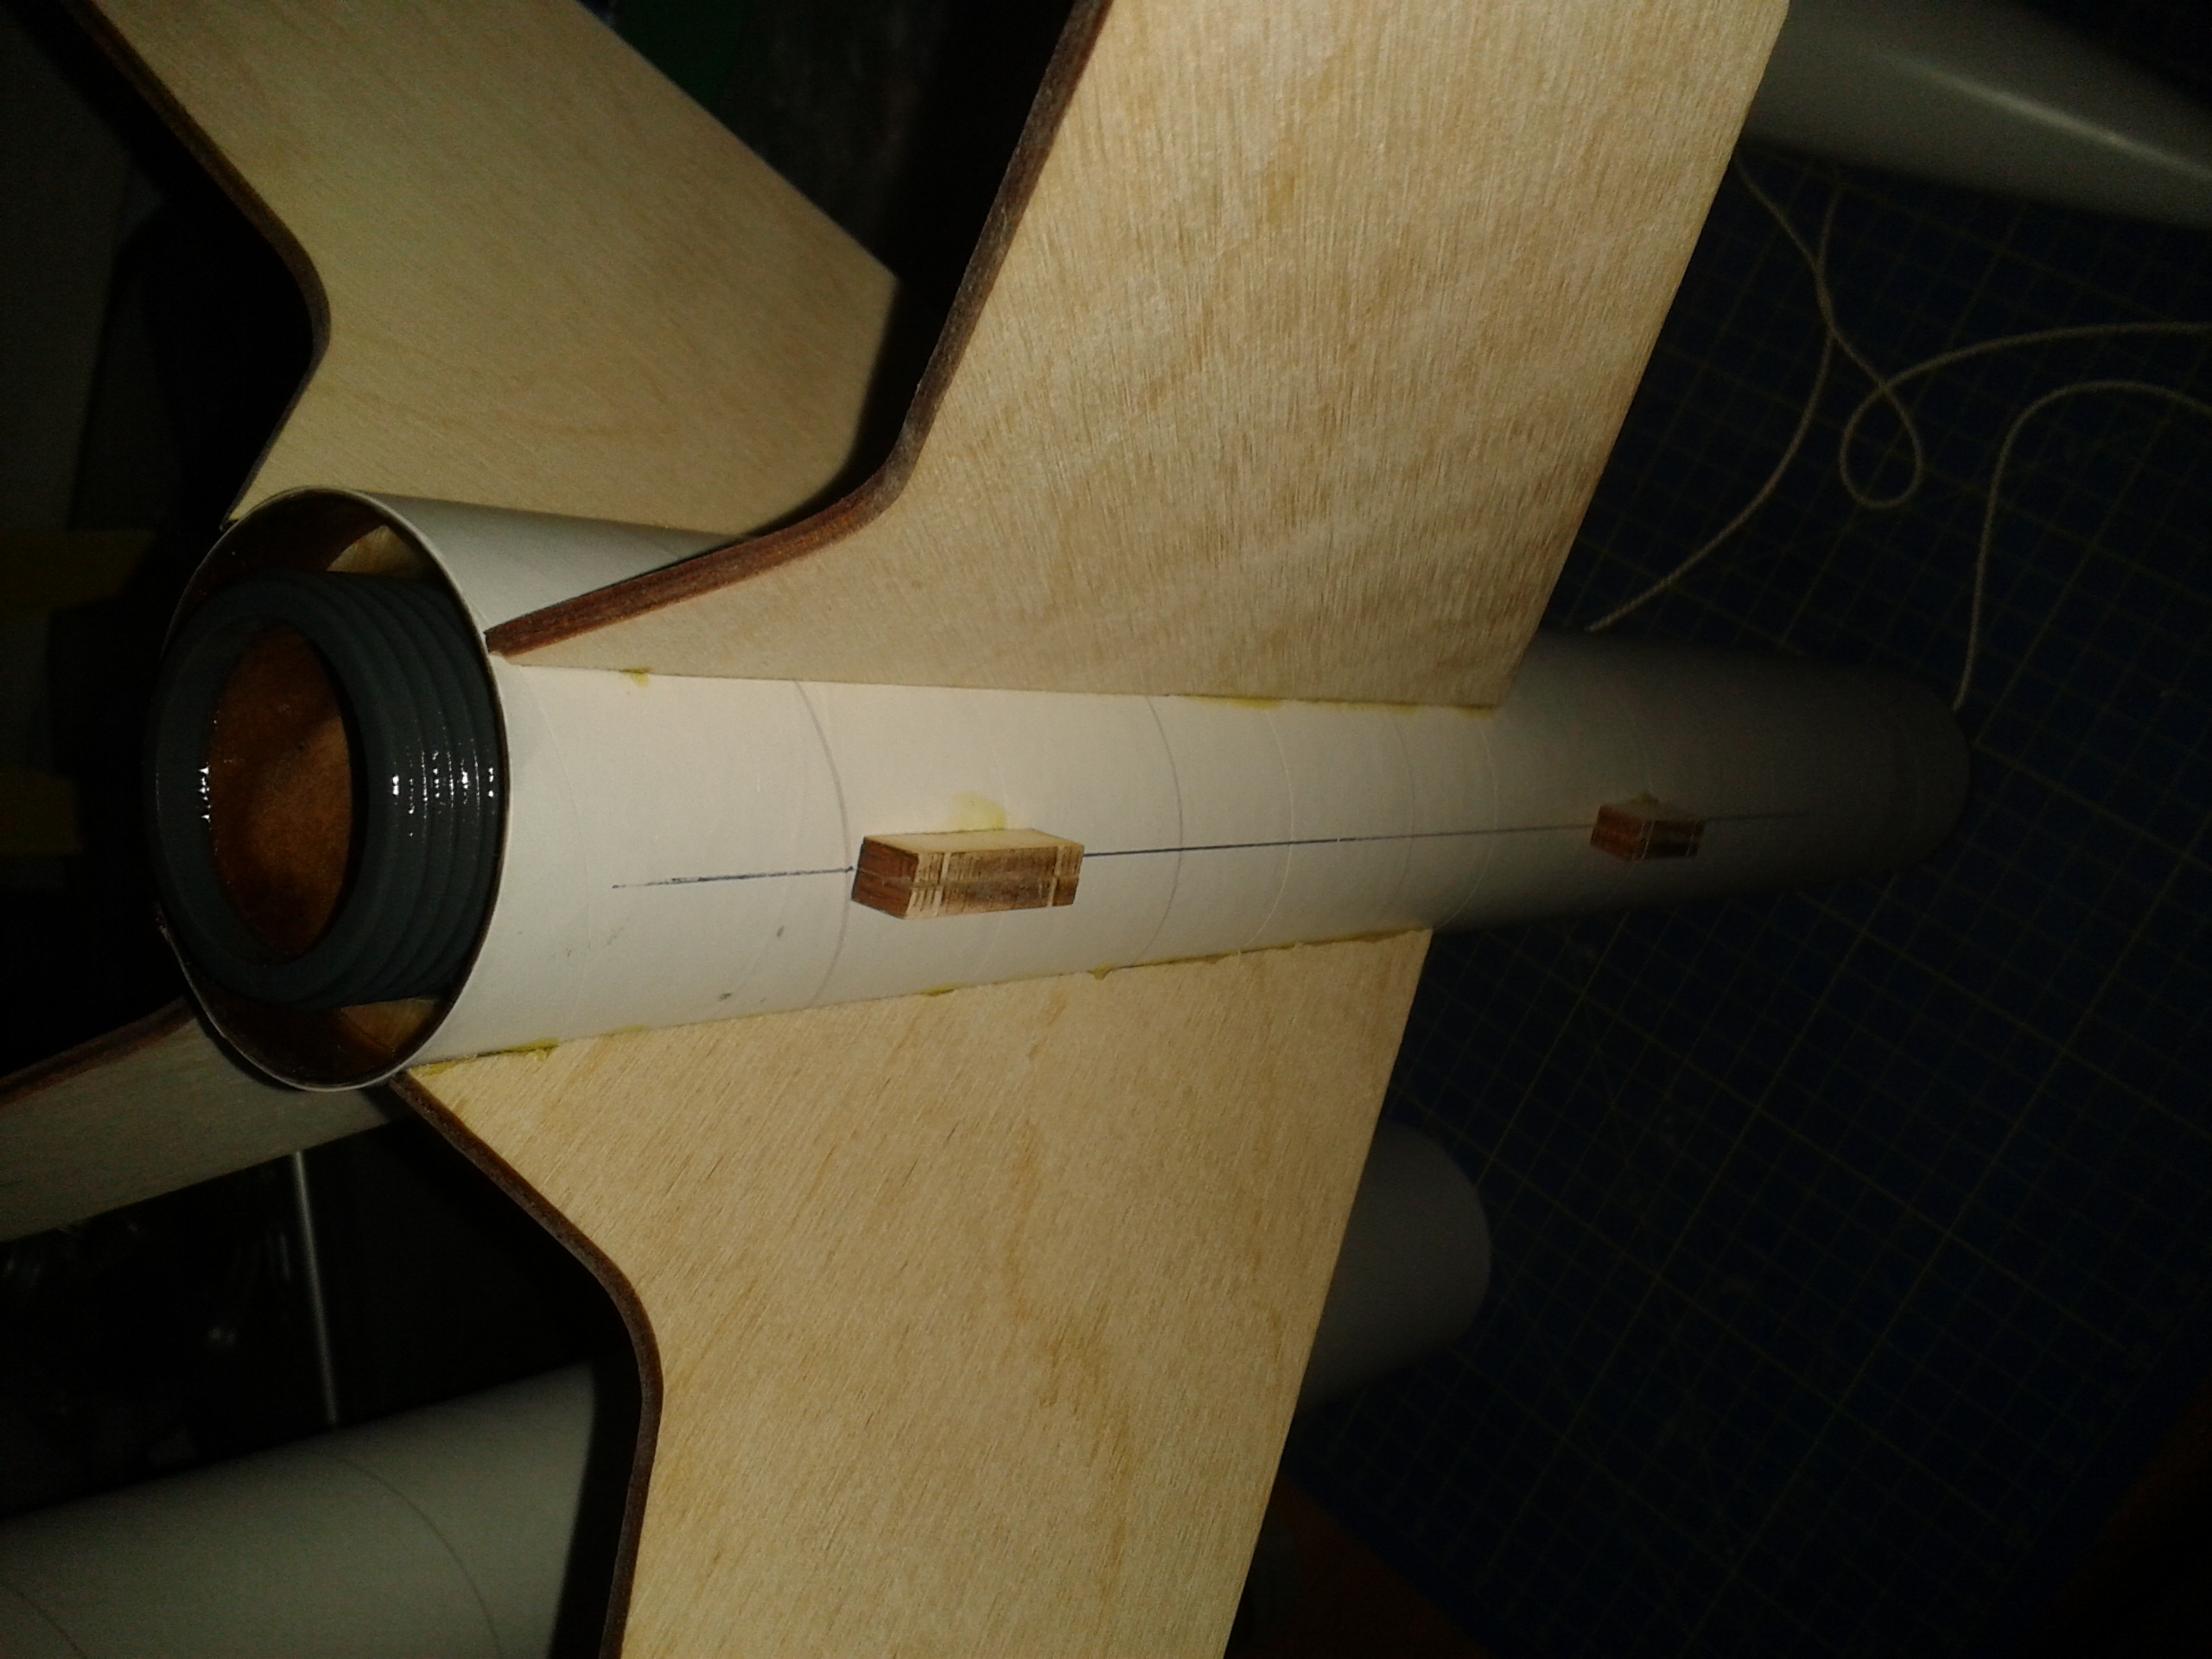
I pretty much ignored the instructions, but I did use the green ring Estes have supplied to line up tbe centering rings correctly, this was very useful and I liked the attention to detail. I built the entire model with yellow glue as I like it, except for a dab of epoxy at the end.
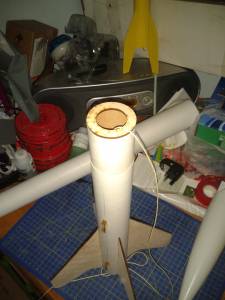
I put two centering rings either side of the fin tabs and left the third one off to use it in a zipperless modification. The centering rings were tight on both the motor and body tubes, but I didn't sand them as the tighter the better for keeping it solid with minimum extra weight. I didn't put in a thrust ring as I plan to use Cesaroni reloadables of various lengths. I tied a 10 foot length of kevlar to the motor tube and through the upper centering ring to avoid using the Estes 3 fold method.
I am building the model to break apart at the coupler in the rear section, and used the third centering ring on the top of the coupler to stop the kevlar from zippering the body tube. I have not tried it before and we will see how it works.
My first issue with the kit (beyond the shock cord and attachment) was that if you put the transition and nose cone into the payload there is almost no room left for anything. I want at least a mobile phone in there for camera and tracking so I trimmed off the top of the transition to give myself more volume, howvever the lower end of the transition is pierced. I realise this will have all the laundry between the motor and this hole but to stop any pressure passing through and popping off the nosecone I sealed it with a bit of scrap balsa from the launch lug standoffs.
I then fitted and glued the fins, and tied the elastic to the lower part of the transition and glued the transition into the "upper-lower body tube" (if that makes sense) and the payload tube.
The elastic and kevlar I tied to a steel curtain ring I have lying around for this sort of thing, and attach the parachute to the ring as well. I will add some permanent wadding as well before flying.
The fins went on well and lined up easily.
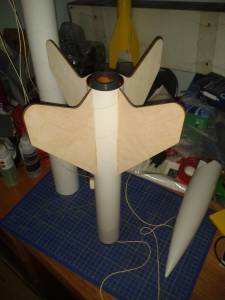
After that I realised I had forgotten to add internal fillets but the rocket is feeling pretty solid and I think I will get away with it especially with TTW tabs.
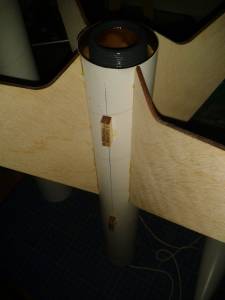
I then scored the inside of the retainer body with a craft knife, and epoxied it into place. I had a little run into the motor tube but saved it with finger soaked in meths and added that to the rear fillet I built up below the retainer so the epoxy puddled around the centering ring and the base of the retainer.
The standoffs I thought were very interesting. I discarded the lugs as we tend to launch this size rocket from rails in the UK and will be adding buttons onto the standoffs. They are very simply two pairs of thin standoffs that you glue together to make a much more sturdy attachment for the launch guides. I used an aluminium angle and drew a line, then glued these on. Once everything was dry and set I will add the rail buttons.
My daughter was squawking through the monitor so I washed up and went to get her.
Finishing
Rocket will fly unfinished as the weather is not on our side for even a quick base coat before the launch is due, but apart from the lack of decals I can't see any problems finishing the rocket as you like.
Only deductions for the kit are personal like not wanting purely elastic shock cords in mid/high power rockets, and not wanting to use wadding and the lack of space in the upper section (I reckon you might struggle even to get an egg in there if that was your goal!) .
Otherwise very happy with the quality of the product and ease of build.
Flight
First flight was on a F120 Vmax. Boost was dead straight up to about 600 feet, deployment was good except for an overly tightly wrapped parachute refusing to unfurl. This led to a "helicopter" recovery being called on the flight line as the nomex and the wrapped chute came down with the rocket orbiting. Nosecone dug about two inches into the soft field and absolutely no damage. Several comments on a good flight and was probably sixty feet from the pad.
It was pointed out that the only drawback with my deployment point is that the charge from the motor may fire the parachute up into the body tube and wedge it. However it was pointed out that if you were using electronics in the payload bay this would be the best place for the break.
I do however have to add to that the launch lugs had started to split away. I am less keen on these, a single thick block would have been better.
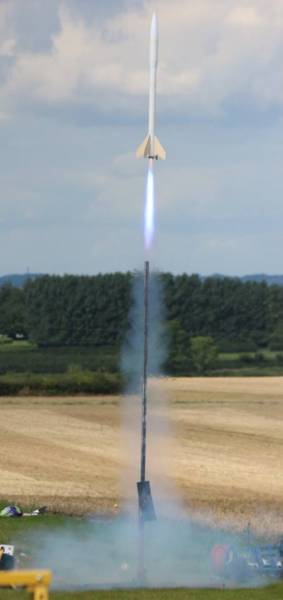
Picture is of the second (ill-fated) launch
Recovery
Recovery suffered from human error but I had no problems with the materials. Was able to come down with a furled chute without damage into the fields.
Summary
This is a decent quality kit for mid power 29mm engines. The retainer, decent finstock and design are all good, and the rocket will be stable on pretty much anything you want to put in it.
Only small gripes would be for the standoffs to be improved, and the lack of space if you don't remove the endpiece of the transition or nose cone.
A note of caution however - read below.
Other Reviews
- Estes Ventris By Bill Eichelberger (November 12, 2020)
The Ventris is one of the first four rockets released by Estes as part of their new Pro Series II mid-power collection. While all are great looking birds, the Enerjet-esque lines of the Ventris were the clincher when it came time to make the choice of which bird would be my 50th birthday present. Components Plastic nose cone Payload section Main body tube ...
 |
 |
Flights
|
|
|
|
Bas Dickson Leach (September 28, 2013)
Sorry, the additional comment was meant to read that built stock (or even slightly lighter than stock) you shouldn't try and get too excessive on the motor. The second launch was on a Blue Streak H255. This reached the speed of plywood during boost and one of the fins shredded, ripping apart the back end of the rocket. This caused drag separation of the rest at very high speed. A pro would be that the chute almost stood up to this, only losing a couple of attachment points, and pretty much everything except the motor mount tubes was recoverable.
Complete user error! But it looked good off the pad!