| Published: | 2010-11-13 |
| Manufacturer: | LOC/Precision  |
![[Picture]](/images/archive/images/ratings/rating_loc_viper_iii.gif) (07/01/04) The LOC Viper III is my third LOC kit and I purchased
it for the 24mm x 3 cluster aspect. I wanted a cluster rocket that could fly on
D12's and E9's and the Viper III fit the bill.
(07/01/04) The LOC Viper III is my third LOC kit and I purchased
it for the 24mm x 3 cluster aspect. I wanted a cluster rocket that could fly on
D12's and E9's and the Viper III fit the bill.
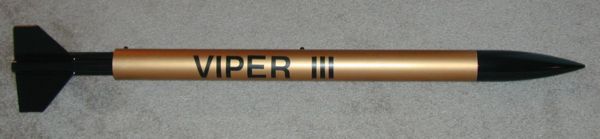
The Viper III is a 47.5" tall rocket based on a 2.6" airframe with the cluster of motor tubes sticking out of the bottom. The three fins are attached at the joints of the motor tubes. Nothing terribly fancy about the rocket.
The kit includes a 30" long body tube and a 9" plastic nose cone. Then add the three 12" long motor tubes that stick out 8 ½" to make up the 47 ½" total length. There are two 1/8" plywood centering rings, three 1/8" plywood fins (pre-cut), a recovery system and a launch lug. The recovery system consists of a round 18" nylon parachute and 96" (8') of 3/8" wide elastic along with the standard LOC nylon loop for mounting the recovery system to the side wall.
CONSTRUCTION:
Typical LOC instructions: printed on the back of the 8½ x 11" card stock that displays the kit specifics through the plastic bag that held the kit. There are only two illustrations, a rear view and a side exposed view. These give some direction, however, the kit is designed for those that have built some before and don't need picture-step to picture-step guidance. The text instructions are clear and take the builder from start to finish and give some insight into flying preparation. Also the shock-cord mount has its own separate instructions.
The Viper III is really easy to build. LOC recommends Epoxy glue, but for fun I used Omni-Stick glue for everything but the shock cord mount. I did this to test out the strength of this glue on a bigger rocket. It takes some getting used to, but grabs quickly (formerly called Quick Grab - see here for more info) and has adequate strength.
As I said, this rocket is simple to build. Here's what you do:
- Glue Motor Tubes together
- Glue Centering Rings on Motor Tubes
- Glue Motor Tubes into Body Tube
- Glue on Fins
- Attach Shock Cord Mount
- Attach Shock Cord and Parachute
- Attach Nose Cone
- Finish
That is it, really!
I didn't install LOC's launch lug, but instead used Rail Buttons.
I used my typical finishing techniques for Kraft tubes and plastic nose cones. I then used Walmart Gold and Gloss Black paint (additional comments about Walmart paint). After waiting 1 week, I added vinyl letter that I bought at Ben Franklin's and then hit the whole rocket with Walmart Clear coat.
Overall, for CONSTRUCTION I would rate this kit 4 ½ points. The instructions are adequate and will get anyone that has a bit of experience through this simple to build kit. It would be nice to have lettering or decals. A bolt with nut could be glued between the three motor tubes for retention, but for this rocket, I'm more understanding as to why their isn't motor retention. Quality of parts was excellent and everything fit.
FLIGHT/RECOVERY:
LOC recommends three of the following motors: D12-5, D21-7, E9-6, E15-7, E30-10, and F21-8.
LOC indicates the rocket should weigh 16 ounces. My rocket weighed in at 16.3 ounces (with the Nomex heatshield). Pretty dead on, I would say.
I added a piece of Nomex® heatshield and prepared for its first flight on D12-7's. I followed the instructions and made a tape thrust ring and then friction fit each motor into the motor tubes until they were all even. I then put in three Estes ignitors, added the ignitor plug and then twisted the ignitor wires together in parallel.
 Using my Estes Command Controller on 14.4V all three
motors ignited and lifted the Viper III to an excellent first flight. The
flight was perfectly straight and it was a perfect apogee at ejection. Recovery
was good with a fairly fast descent rate on the smaller parachute.
Using my Estes Command Controller on 14.4V all three
motors ignited and lifted the Viper III to an excellent first flight. The
flight was perfectly straight and it was a perfect apogee at ejection. Recovery
was good with a fairly fast descent rate on the smaller parachute.
I felt the rocket would life fine on three C11-3's so I gave that a try. Unfortunately only two ignited and lifted the rocket to about 25 feet, it turned and then a few feet from the ground ejected. There was no damage.
The third flight was on three E9-6's. Varooom! This was great! (see pic on right). Straight and good altitude. It was still heading up, but not at a fast pace when the ejection charge popped the parachute. The fast descent rate helps to keep it from drifting off.
For FLIGHT/RECOVERY, I would rate this rocket 4 ½ points. What a nice flier on Estes motors! The descent rate is fast, but the rocket is sturdy and can take it. It would be nice to have a piece of Nomex® included in the kit, but since it isn't we recommend you get one.
I give the rocket an OVERALL rating of 4 ½ points. The rocket is super simple to build. You can get away with wood glue (or Omni) except you should use epoxy for the shock cord mount. This is the type of rocket that can give the Estes-motor flier an entrance kit into LOC/Precision. That can be a stepping stone into mid to high power. Definitely a kit to consider.
Other Reviews
- LOC/Precision Viper III By Cliff Oliver
Picture courtesy of LOC/Precision Brief: This model is a single-stage, three-motor, cluster rocket. It was designed for 24mm mid-power motors. Primarily D and E impulse motors. Construction: In this kit there are one body tube, three motor tubes, two 3/16" plywood centering rings, three 3/16" plywood fins, one 18" nylon parachute, one elastic shock cord and mount, ...
 |
 |
Flights
|
|
P.C. (August 22, 2006)
G.W.R. (March 17, 2010)
|
|
C.S. (March 1, 2001)