| Construction Rating: | starstarstarstarstar |
| Flight Rating: | starstarstarstarstar |
| Overall Rating: | starstarstarstarstar |
| Manufacturer: | Madcow Rocketry  |
Brief:
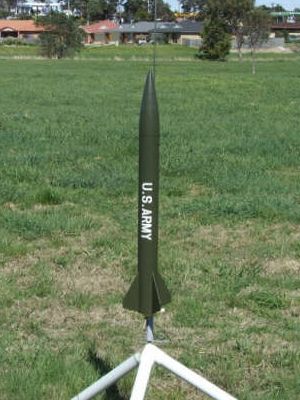
Madcow Rocketry's Little John is a very nice 1:4.8 scale version of the U.S. Army's old Little John unguided
artillery rocket with a number of thoughtful design features--especially the nose cone "ballast box" design.
Loaded with top notch components, it is worth every cent one will ever pay.
Construction:
The Little John's components consist of:
- 1 custom balsa nose cone (made from a solid high-density balsa)
- 1 heavy-duty pre-slotted (laser-cut) body tube
- 2 laser-cut light plywood centering rings
- 1 29mm motor tube
- 4 laser-cut 1/8" light plywood TTW fins
- 1 eyebolt, nut, and washer
- 1 nose cone shoulder coupler
- 1 nose cone shoulder (plywood) bulkhead
- Kevlar® shock cord
- nylon shock cord
- 1 Nomex® chute protector
- 18" rip-stop nylon chute
- 2 1/4" launch lugs
- 1 "U.S. Army" vinyl decal
The Little John proved to be a most simple rocket to put together and was not really any different to constructing any basic 3FNC or 4FNC rocket. The instructions were very easy to understand with basic but clear pictorial diagrams to aid in construction which ultimately made for a quick and very accurate build. Component quality is absolutely superb with all the wooden components being laser-cut to perfection and the other components equally awesome. The crowning glory being the huge solid balsa nose cone.
NHP 12-minute epoxy was used during construction instead of the recommended 5-minute epoxy.
The motor mount was constructed like any other conventional rocket with two centering rings attached to the motor tube although no thrust ring is supplied so as to allow for greater choice of 29mm motors. The Kevlar® shock cord is then tied around the motor tube against the front centering ring and secured in place with epoxy with the free end then run through a laser-cut notch in the front centering ring. After having initially slightly roughened up the body tube exterior with 240 grit sandpaper, the completed motor mount assembly is then epoxied into place at the rear of the body tube with the rear of the motor tube being aligned with the end rear of the body tube (one does need to be careful to ensure that the centering rings are clear of the fin slots). The nylon shock cord was then tied off to the Kevlar® shock cord. Once that was done, I penciled a launch lug line between two of the fin slots using the trusty door jam method.
 The TTW fins needed very little sanding along their tabs. I secured each fin in place and
followed up with small epoxy fin fillets. No mention was made in the instructions as to airfoiling or rounding the fin
leading/trailing edges so I opted to leave them square.
The TTW fins needed very little sanding along their tabs. I secured each fin in place and
followed up with small epoxy fin fillets. No mention was made in the instructions as to airfoiling or rounding the fin
leading/trailing edges so I opted to leave them square.
I then marked the CG point at the prescribed 21.25" from the tip of the nose cone using a large piece of angle iron and as per the instructions, epoxied a launch lug at the CG point and epoxied the rear launch lug 1/2" from the end rear of the body tube. Small epoxy fillets were added to both launch lugs.
The last step consisted of making up the simple and unique "ballast box", which allows for easy addition of nose weight to satisfy the urges of super-insane high fliers. An eye bolt is secured with a nut and washer to a plywood bulkhead with a small blob of epoxy then smeared along the eye bolt thread and nut to prevent the nut from coming loose later. The bulkhead is then epoxied into place to the supplied nose cone shoulder coupler with an epoxy fillet then applied to the bulkhead/coupler joint. With the nose cone friction-taped into the coupler, the shock cord and chute tied off to the coupler eye bolt and the largest motor I intended for use in the Little John inserted into place, the Little John is then balanced with weight added if the balance is behind the CG point.
Once the balance is at or ahead of the CG point, the instructions state to then epoxy the nose cone into the coupler,however, I opted to do that later once I had painted the nose cone.
Finishing:
I sealed the nose cone and fins with six applications of NHP Micro-Fill balsa sealer and three applications of
Aeroflyte Acetone Dope with light sanding in between after which both the nose cone and body were primed with two
applications of Tamiya Grey spray primer. Two applications of Tamiya TS-5 Flat Olive Drab spray lacquer were used for
the final color coating. The painted nose cone was then epoxied into the coupler and the coupler itself colored black
with a Sharpie marker.
The vinyl decal was then carefully applied with the decal itself being high quality and adhering well to the paint.
Construction Rating: 5 out of 5

Flight:
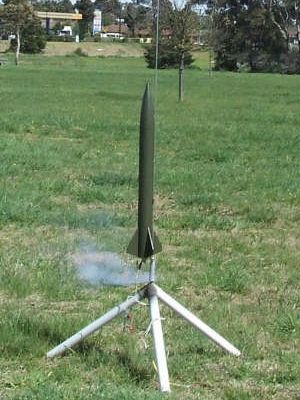
The first two flights were made with an Aerotech E15-4 (using a 24/29mm motor adapter purchased separately from
Madcow). The weather was relatively mild and sunny although wind speeds were starting to pick up by the time I got
around to launching.
Prepping the rocket for flight was a cinch with the Nomex® chute protector and three handfuls of dog barf. After taping the motor and motor adapter into the rocket, I loaded the Little John on to my trusty NCR Modular launch pad and upon hitting the launch button, the Little John took off slowly and majestically with a roar into the sunny skies tracking with a slight weathercock to a respectable 650-700ft.
The third flight was conducted on another day which was windier using an Aerotech E30-4. That motor propelled the Little John so quickly off the launch pad that it simply seemed to vaporize upon motor ignition. Very impressive straight flight!
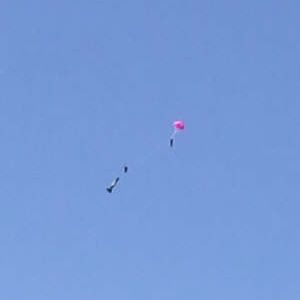
Ejection for all three flights was just past apogee by a second or two.
Recovery:
No problems were experienced during recovery with the rocket recovering nicely on the supplied 18" nylon chute.
There was no scorching of the chute and nylon shock cord. Adding dog barf also helped at protecting the Nomex®
chute protector which was only slightly blackened by the motor ejection charges.
On the third flight due to the windy conditions, the Little John landed quite hard on a patch of hard ground but the only damage was a tiny scratch on the nose cone. The nose cone being made of solid high-density balsa undoubtedly helped minimize damage!
Flight Rating: 5 out of 5
Summary:
This rocket is a truly exceptional product from Madcow. I simply can't think of any CONs and is worth every cent of
its $49.95 price tag considering the very high quality of its components. The customer service from Madcow's
proprietor, Mike Stoop, is also fabulous. Dealing with Mike was, without doubt, one of my best rocket purchasing
experiences.
The blurb at the end of the instructions state to "Now go have so fun!" Fun is exactly what I had with the Little John. This rocket is in a league of its own, I say no more.
Overall Rating: 5 out of 5
Other Reviews
- Madcow Rocketry Little John (2.6) By Drake "Doc" Damerau
Brief: Lightweight 29mm HPR scale of the Little John complete with Nomex ® chute protector and rip stop nylon parachute. Construction: This kit comes with high quality plywood fins, a balsa nose cone and a sturdy motor mount. Full recovery equipment is supplied including a nice parachute and even a Nomex ® chute protector. The kit comes well packed in a heavy bag and ...
 |
 |
Flights
|
|
|
|
J.F.B. (March 22, 2008)