| Manufacturer: | FlisKits  |
The following article was a submission to the FlisKits, Inc
Deuce-Bash Contest and is archived with permission
from FlisKits. Some of these designs are not actually kitbashes, however, all come from the basic motor design feature
of the FlisKits Deuce's Wild.
(Contributed - by Matthew McFarland - 02/07/07)
Brief:
Here is another entry for the FlisKits Deuce Bash. It uses only the Deuce kit parts and leaves several parts for
other projects.
Construction and Finishing:
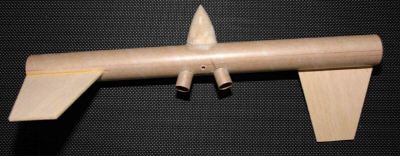
- Take the body tube and mark several lines on it. All lines will be the length of the tube. Using your Deuce's Wild template mark all five lines (the four fins and the launch lug). Now turn the fin template 180 degrees and line up all the fin marks with the template. When it is lined up, mark the launch lug line again. The second launch lug line should be 180 degrees opposite the first launch lug line. The launch lug lines are the top and bottom lines of the rocket. You now have 6 lines, but you will only use four: the top and bottom for centering the motor mount wedge and the two bottom fin lines for the fins.
- Find the center of the tube on the top and bottom lines. Mark it well.
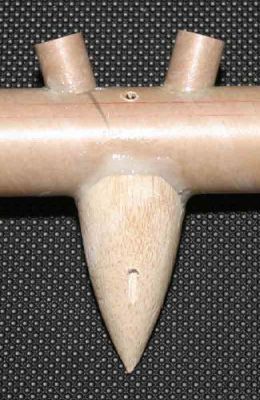
- Take the motor mount from the kit and get the cute little wedge. Mark center of the bottom of the wedge. Now cut a slot on the bottom line in the center just big enough for the center wedge to fit in. You will also have to cut a little slot in the top tube line centered about 2mm long. The wedge should just reach from bottom to top being flush with the tube. Glue it in.
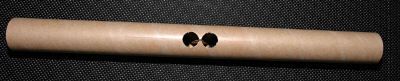
- Cut circles right next to the wedge to accommodate the motor mounts. Repeat on top and bottom.
- Glue motor blocks in tubes and install tubes in the body tube.
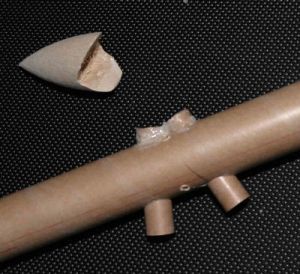
- Cut the bottom of the nose cone off and save it for a nose block on another project. (The recessed part that fits inside the BT-60 tube)
- Cut a radius in the bottom of the nose cone to fit the BT-60 tube. Sand well to get a nice fit.
- You will notice that the motor tubes stick out the top of the body tube. You must cut recesses in the newly formed nose cone to accommodate this. Now glue the nose cone on. I taped the top of the motor mounts closed and then used gel epoxy as to add nose weight and not create voids in the nose.
- Make two fins from the Deuce pattern sheet and glue them on different fin lines on opposite ends of the tube.
- Now we need a launch lug. Drill a hole as close to centerline as you can up from the bottom through the nose cone.
- Paint, fly, etc.

Flight:
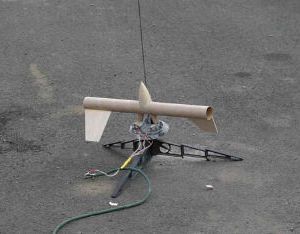
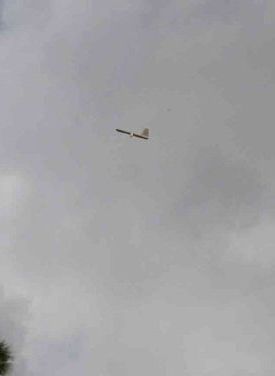
I used B6-0 engines and had 3 great flights. I did not paint it because quite frankly, I did not know if it would be
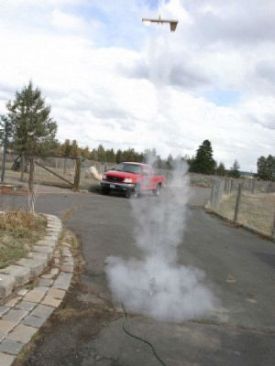
stable and I could not figure out how to put this rocket into RockSim. The first flight was a beauty and I got a great
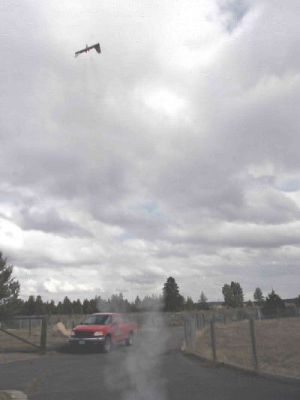
picture of it leaving the pad. You can see the swirls in the exhaust as the rocket has already made a revolution. It
peaked out at about 150 feet as a guess and then tumbled about 4 times before it started spinning its way back to the
ground. All landings were soft and close. The first one was about 20 feet from the launcher, the second two feet from
the launcher, and the third 15 feet from the launcher.
Now it is painted a beautiful yellow (OSHA warning color for rotating hazard) with one black fin so you can see it rotate.
 |
 |