| Construction Rating: | starstarstarstarstar_border |
| Flight Rating: | starstarstarstarstar_border |
| Overall Rating: | starstarstarstarstar_border |
| Published: | 2013-01-07 |
| Manufacturer: | Odd'l Rockets  |
| Style: | Ring/Tube/Cone Fin, Spin-Fin |
Brief

The Pipeline is a standard engine sport flyer with three canted tube fines. The canted fins induce a spin or roll on ascent.
Components

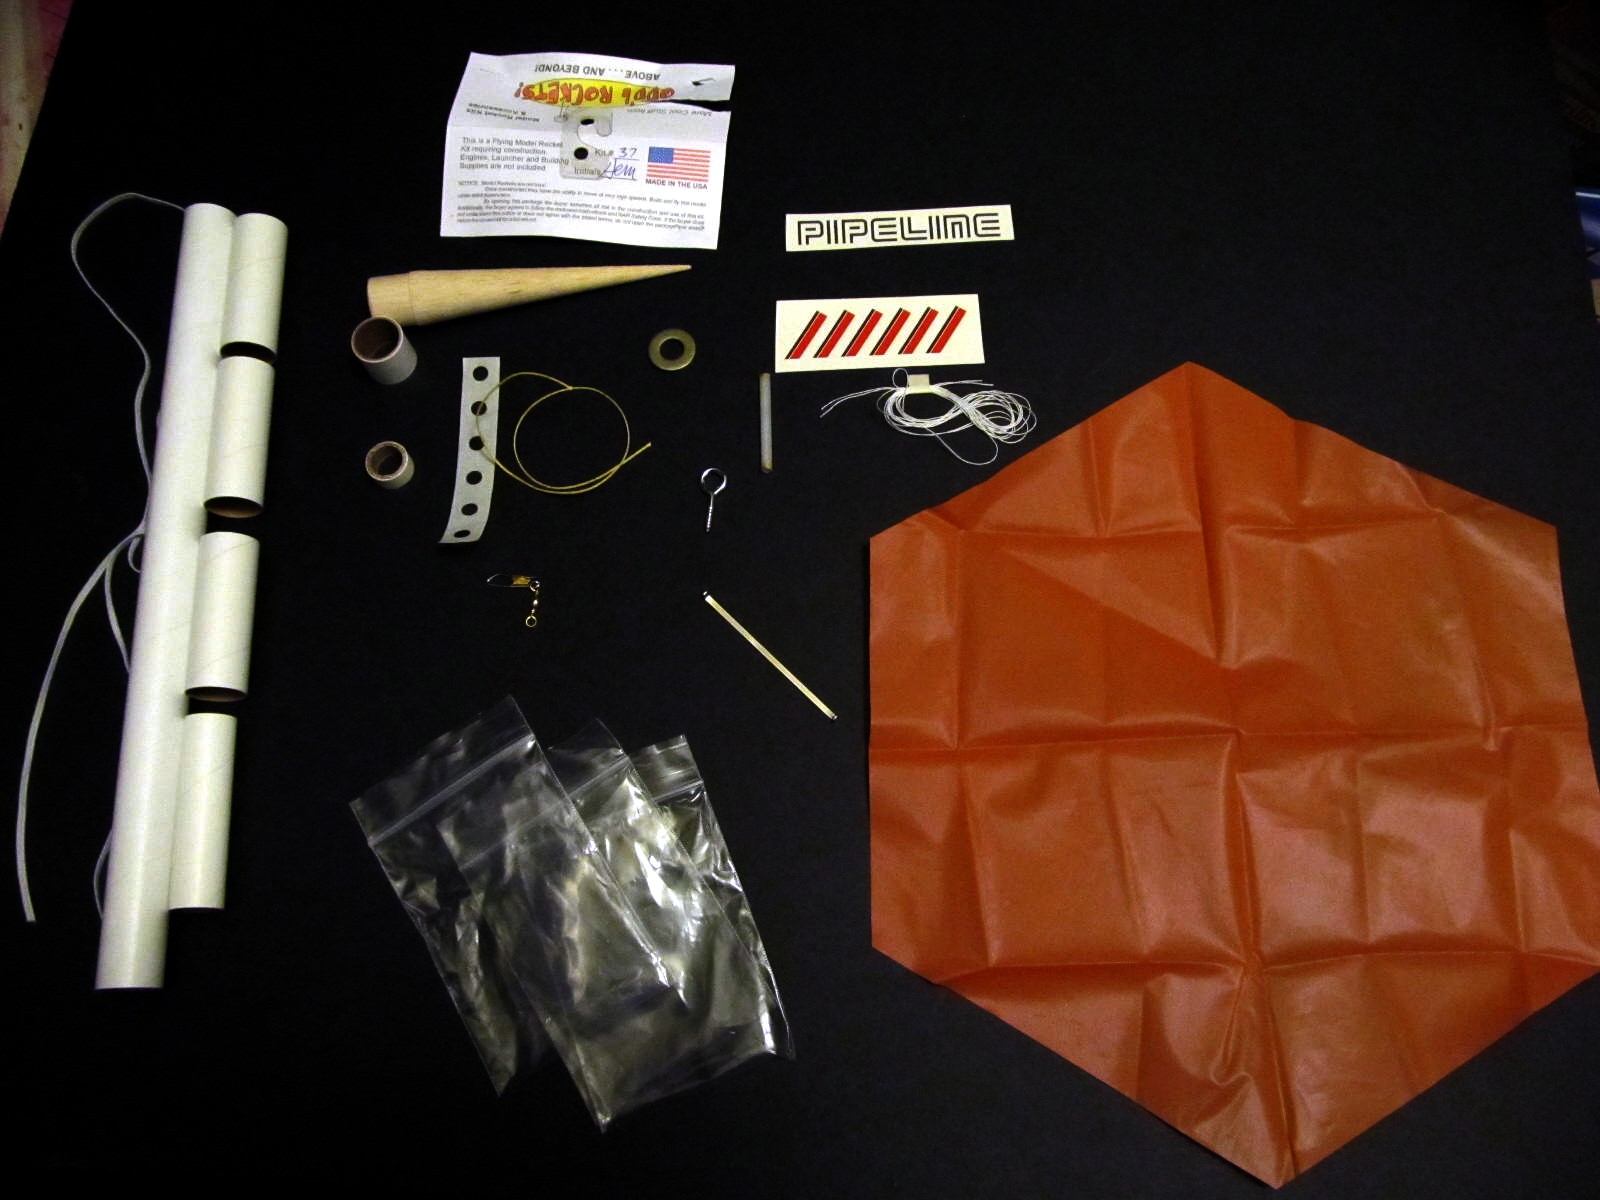
I was really impressed with what you get with the kit.
The nose cone is well-shaped and made of good-quality balsa.
The body tubes have tight spirals. I found three coats of primer adequate to hide them to my eye.
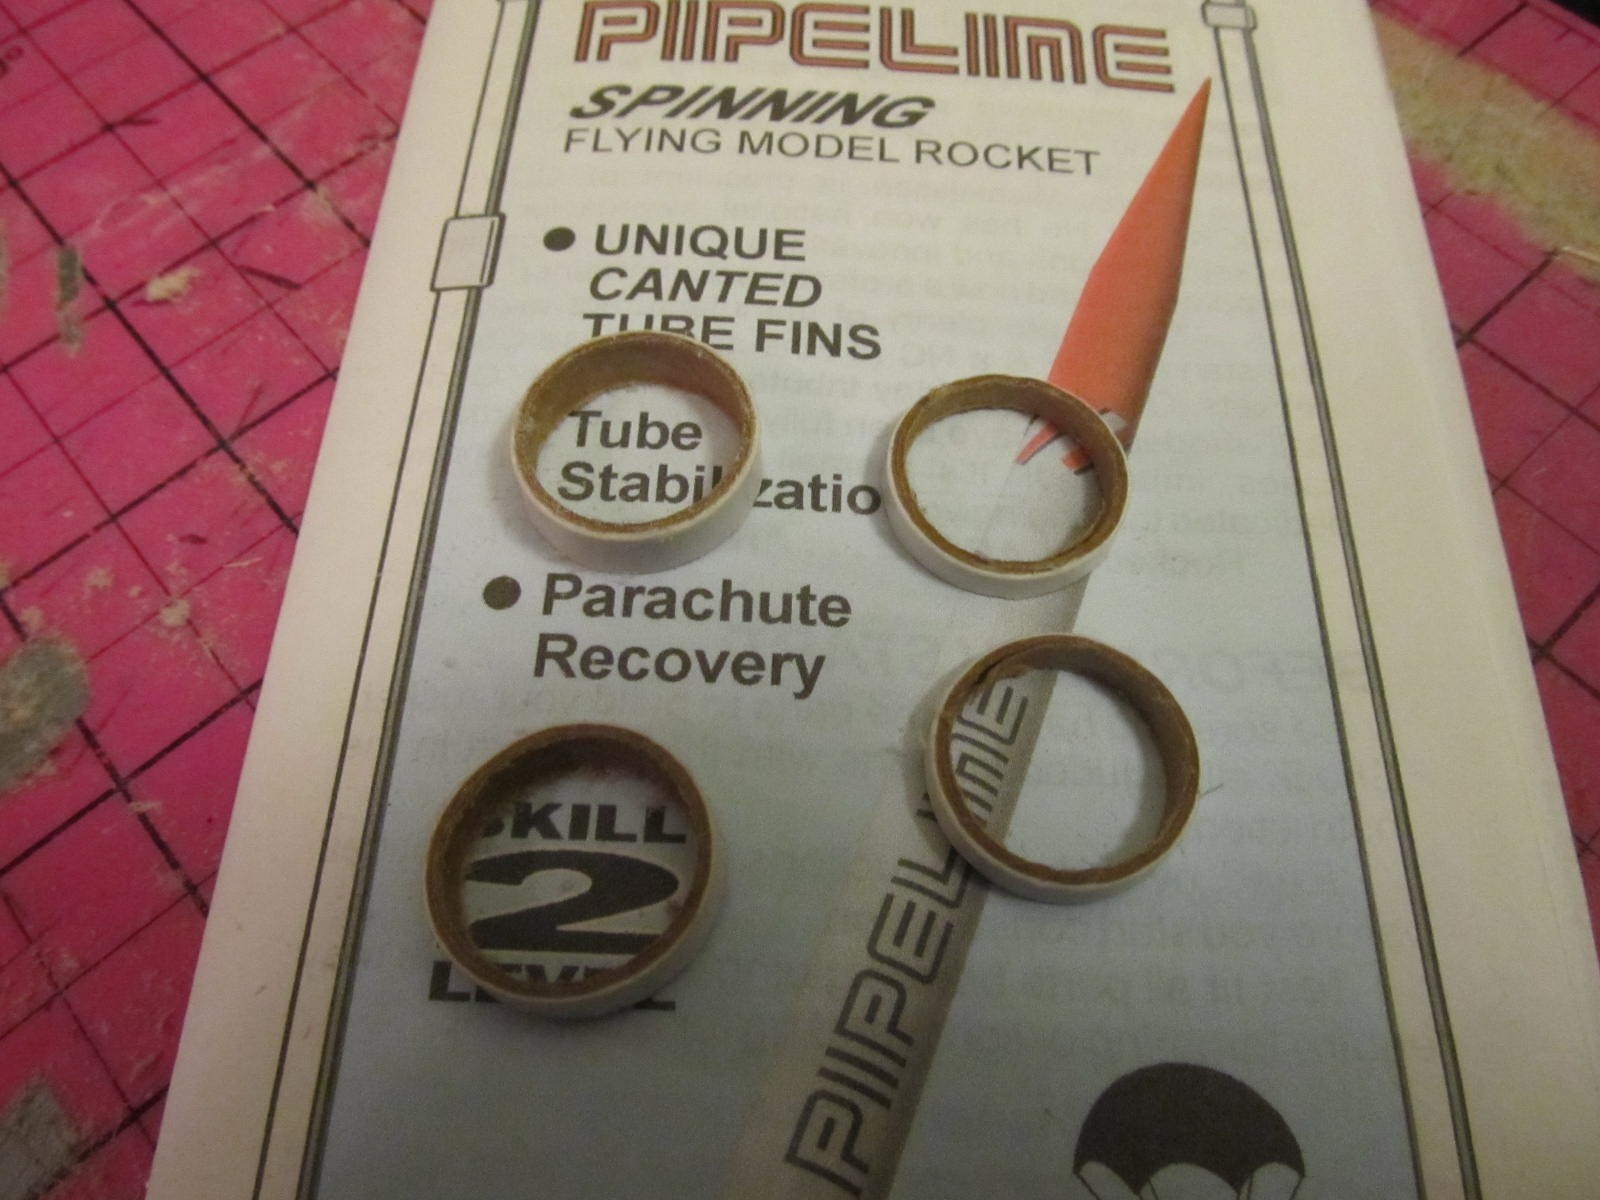
The plastic parachute is nice. The provided reinforcement rings are a nice touch.
The kit comes with a combination of a short length of Kevlar which attaches to a nice (30”) length of good quality elastic.
The provided snap swivel is a nice touch.
Instead of two standard centering rings, they provide one long centering ring. This does makes some things a bit difficult as I will describe in construction.
Decals are a nice touch. They are water slide. And they are clear which is nice as it gives you more flexibility on paint choices.
 Construction
An interesting decision on the design of this rocket was the body tube sizes. The main body tube and tube fins are 0.9080 inches. This is just barely larger than a minimum diameter standard (A,B,C engine) rocket. Motor mount outside diameter is 0.74 inches which gives you about 1/6” difference in diameter. Split this in two (for each side), and this gives you about 1/12” clearance between the two tubes. I guess the reason to do this was simply so they could add an internally mounted engine hook. Had they not done this, the rocket would have been minimally smaller and a lot simpler. But you’d have to friction fit the engine.
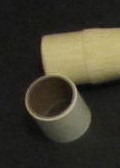
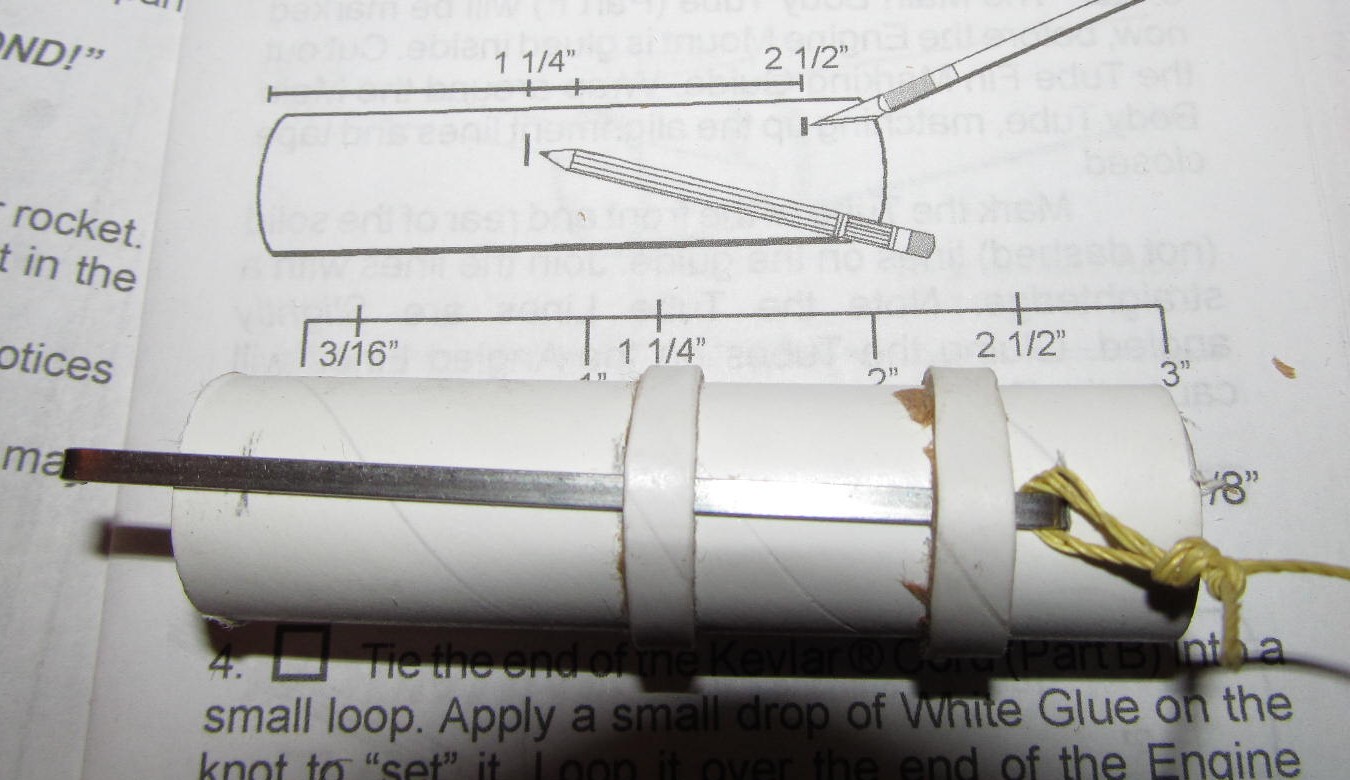
Setting up the motor mount, again the mount comes with a single “long” (about 1 inch) centering ring.
Since I am always running out of centering rings, I cut this into four individual rings, and used two of them for this kit (pretty much the standard “two ring” motor mount.)

I was glad I did this. The instructions don’t tell you to cut a slot in the centering internal diameter to accommodate the engine hook (in fact, I suspect it would be difficult.) I found that even cutting a slot in my two cut rings, it was a REALLY tight fit to slide the rings over the motor mount tube AND the engine hook. But it did work.
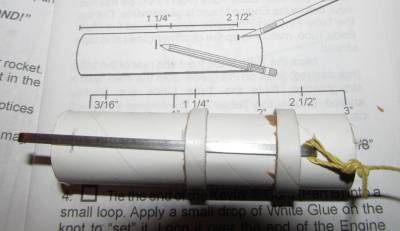
The instructions have a nice marking guide ruler built in, which really helps.
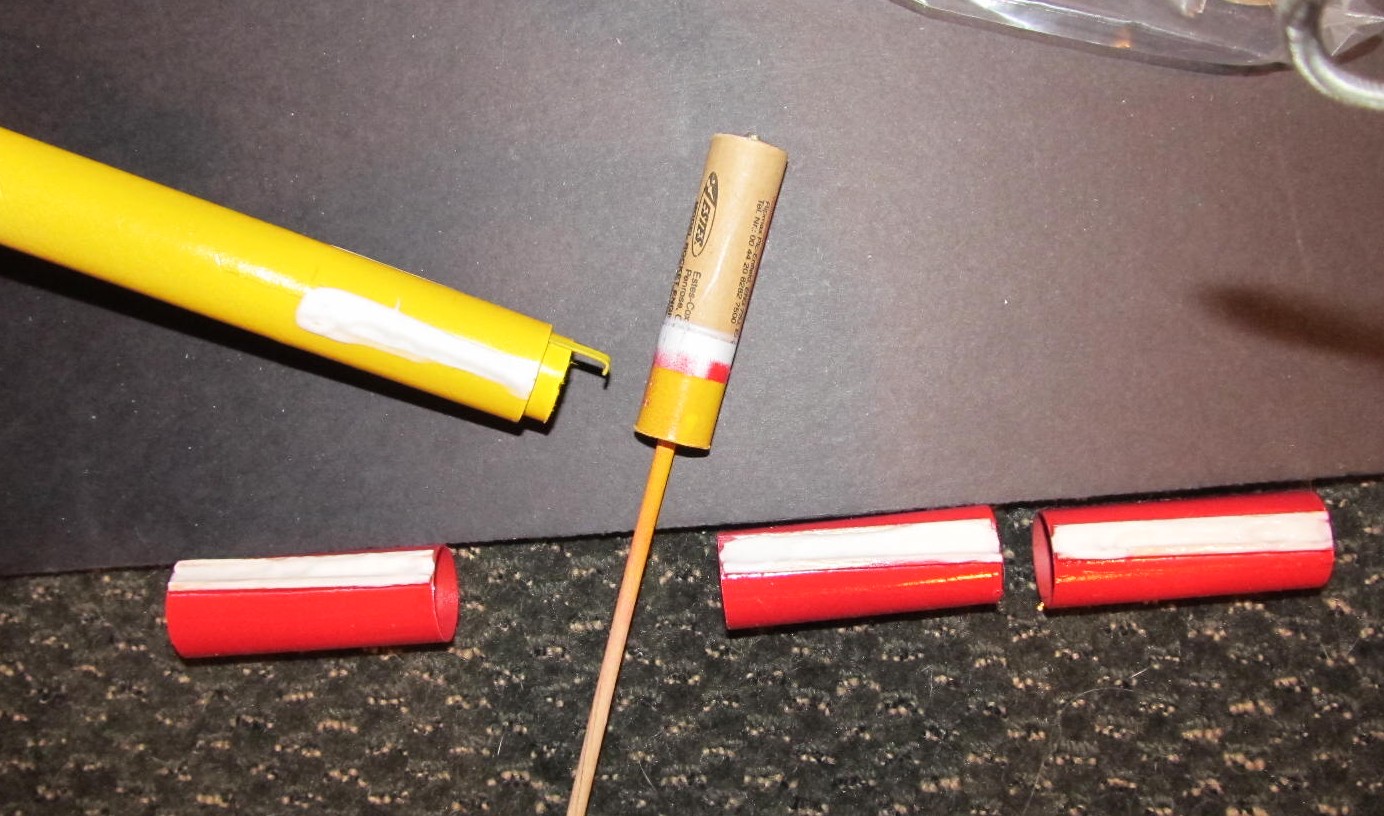
I DO really like the shock cord attachment, which wraps around the forward end of the engine hook where it pokes through the motor mount tube.
A key part of this kit is canting the tube fins. Yes, this is a case where you intentionally put the tube fins on “off center.” Instructions for this involved marking a canted or angled strip on each of the tube fins, then trying to sand this down so the tube “will simply collapse in” (a quote from instructions). Then you mark the center of this canted strip, and line it up with a true axis aligned mark on the fuselage (main body tube). It was six separate steps for this. I guess this might work, but seemed to me very complicated and easy to mess up.
All the placement areas were of the tube fins and main body tube were lightly sanded in advance to rough them up a bit for better adhesion.
I did it differently. I marked the canted “strips” on the tube fins. I then cut two pieces of 1/32 inch balsa the length of the fin tubes, basically each was about 1 mm x 1 mm x 2.5 inches (the length of the tube fin.) Had I thought ahead I would have made them 2.0 inches as the tube fins are 2.5” long and they overhang the tail of the fuselage by 0.5”. I call these Balsa Fillets. These are easy to line up and glue onto each edge of the strip marks on the tube fins. These can then be filleted to the tube fins before you attach the tube fins to the main body tube. This “locks in” the angle of attachment. Once in place, the tube fins literally fall into canted alignment against the main body tube. You just have to pick which marker you want to line up the tube fin up with.

The other advantage of this technique is that it allows you to separately paint the tube fins and the body tube. (I find it extremely difficult to mask the tube fins if I want them a different color from the body tube AFTER they are already attached.)
Finishing
The nose cone was nice balsa and I was happy with just a couple coats and sands of thinned Elmer’s Carpenter Finish.
Three coats of primer just about got rid of the tube spirals, and I thought this was easier than trying to fill and finish them. It wasn’t perfect, but from 4 feet away it hid the spirals pretty well.
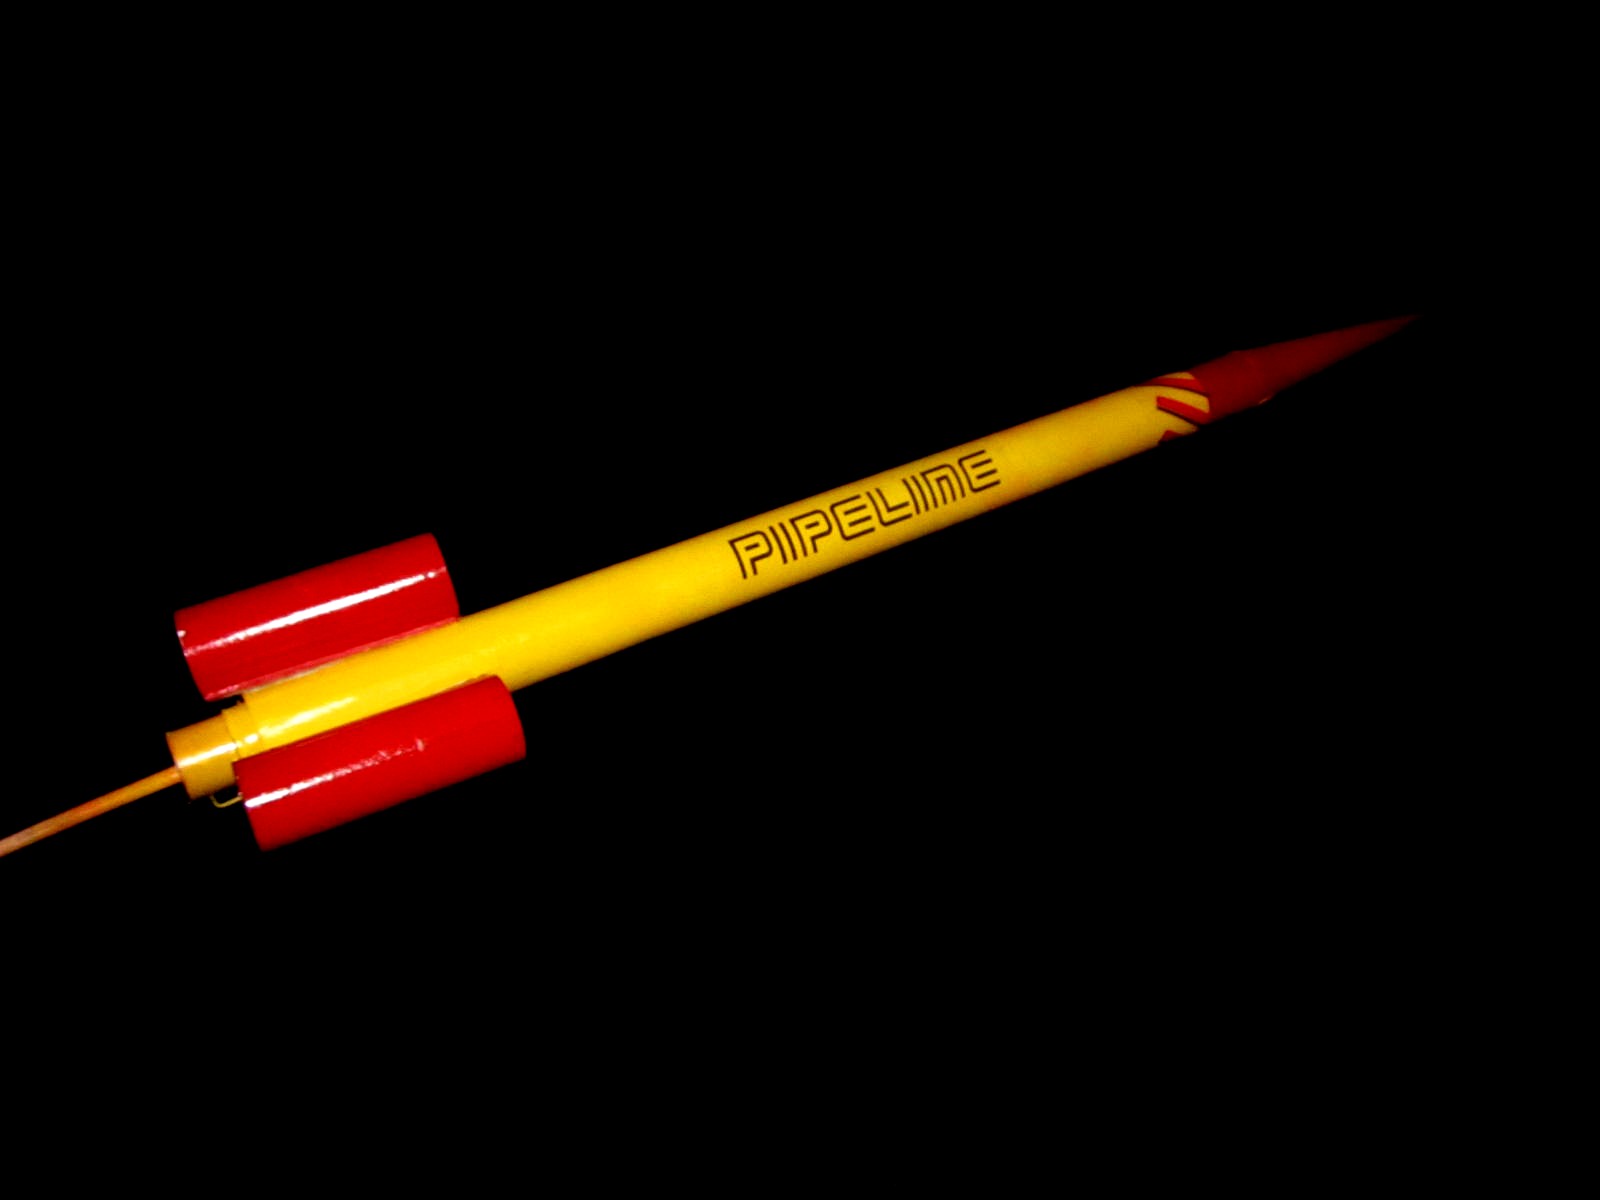
I liked my yellow and red paint scheme more than the stock scheme. I was REALLY glad the water slide decals were clear, and the yellow set them off pretty well. A darker color wouldn’t have worked as the background would not have enough contrast for the decal. The two decals provided (PIPELINE and a wrap around decoration) really set this off well. They were good quality and slid on easily, and were tough enough to allow me to adjust them a bit without tearing.
Flight
First flights I was out of B6-4 engines, and this seemed a might heavy for an A8-3. And I had a bunch of C6-5s. It was a nearly windless day, with minimal high clouds.
On a C6 this puppy moves. On the plus side, the canted fins didn’t seem to cause that much drag, at least not on the C6 engine. Trajectory was arrow. Chute opened at Apogee. I’m estimating altitude at 500 to 700 feet. Was REALLY glad we had no wind, cuz it took a while to flight back to us (about 75 feet from pad.) It wasn’t until it was halfway down that I realized that I really hadn’t noticed any significant spin on ascent. Certainly no “corkscrewing” of the smoke trail. Second launch was identical, again little if any obvious spin. Some of this may be simply due to how fast this rocket flies on the C6,.
A later flight was with an A8-3. This didn't get off the pad very quick and weathercocked quite a bit even with minimal breeze. There was a more pronounced rotation on this engine.
Recovery
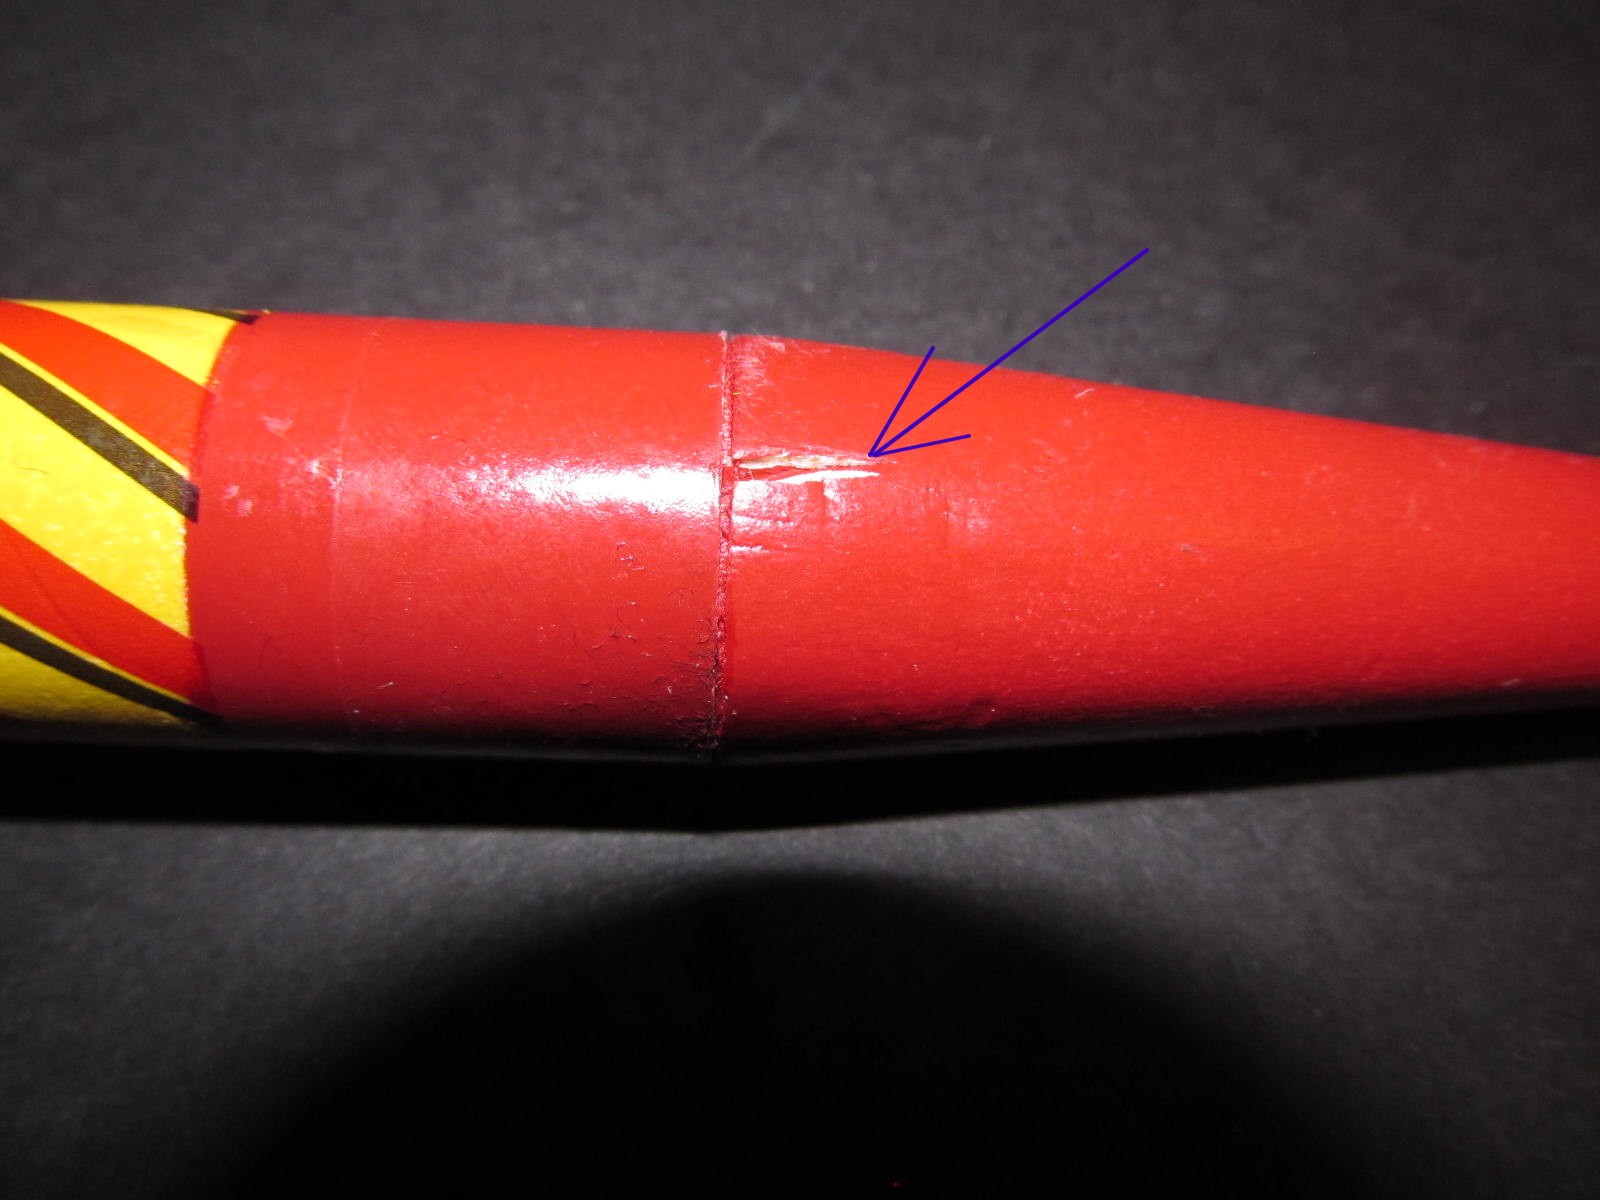
Kit comes with a nice bright 12-inch orange chute which is about right for this model. After putting the provided reinforcement rings on, I used a leather hole punch to punch out the central holes, as I don’t like poking things with sharp objects like the pencil recommended in instructions. Rocket came down lightly with no damage to the body or fins. Despite the 30” length of elastic, it had a nice “smiley” on the nose cone from snap back impact onto the forward end of the main body tube. The combination of Kevlar at the engine mount attachment and elastic forward reduces the risk of getting a zipper, while it also keeps the elastic away from the engine ejection charge. I would consider adding another couple of feet of Kevlar on the front end

Summary
Quality of materials is excellent.
Instructions are clear, but in my opinion the method of aligning the canted fins recommended is difficult and complicated. In any case, I didn’t do it that way.
Only has two decals, but they are good quality and they really spice up the model.
Going from BT-20 0.74” diameter to whatever BT designation for 0.908” allows the model to have an internal engine hook. Seems like a lot of work just to put in an engine hook. Also, trying to slide the provided centering ring over the motor mount AND the engine hook was really tight.
The key that makes this model an Odd Roc is the Canted Fins which impart spin rotation on ascent. I am pretty sure I kept the angle right, but the flight on a C6-5 I really didn’t appreciate the spin very much (certainly not as much as the CorkScrew, another nifty kit from Odd’l Rockets, which has a very pronounced spin on ascent but a similar arrow straight trajectory.) There was a moderate spin with an A8-3, but that was a pretty weak engine for the rocket. I think if you really want a spinning rocket, the CorkScrew is a better choice. Without the spin, this is simply a three tube fin rocket. It is however a very nice looking and flying three tube fin rocket. Price is about comparable to the Estes Super Neon, a 6 tube fin rocket which is also standard A,B,C engine bird.
 |
 |