
Brief:
Estes Quasar was a single stage sport rocket with a 12" parachute for recovery. Production ran from 1973 to 1984. It was listed as KC-1, a Citation series rocket. It came out in 1973 it was a Original Citation with plastic chromed NC and clip-tip fins, In 1975 it was changed to a white NC and clip-tip fins,Then it was changed later on to a white NC with regular plastic fins.
I still have my 2 original Quasar 1 Citation with chromed NC and clip-tip fins and the other is the White NC and regular fins.
Construction:
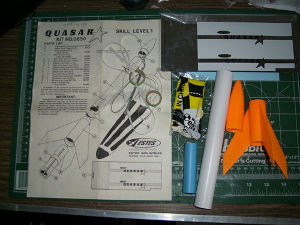
What you will need to build this kit:
- 1 Estes Alpha III kit.
- 1 BT-50H 7.75"
The following components in the Alpha III kit are:
- 1 Engine mount tube (type BT-20J) 2.75"
- 1 Body tube (type BT-50EE) substitute for the 1 BT-50H 7.75"
- 1 Retaining Ring (Plastic) (type HR-20)
- 1 Split Adapter Ring (type AR-2050S)
- 1 Adapter Ring (type AR-2050)
- 1 Plastic Fin Unit (type PFS-50A)
- 1 Plastic Nose Cone (type PNC-50K)
- 1 Launch Lug (type LL-2A)
- 1 Screw Eye (type SE-3)
- 1 Shock Cord (type SC-1)
- 1 Parachute (type PK-12A)
- 1 72" Shroud Line Cord (type SLT-72)
- 1 6 Tape Disc (type TD-3F)
- 1 Engine Hook Standard (type EH-2)
- 1 Decal (type D-14) Won't need for this build.
- 1 Shock Cord Mount (type SCM-50)
You will need the Quasar Decal Wrap-on (type KDM1) you can order from Excelsior Rocketry.
 The instructions are well illustrated and easy to follow to assemble this rocket. You will need to down load the Estes Quasar plans from JimZ Plans for the placement of the decals.
Supplies you will need: scissors, white glue, a knife, pencil, masking tape, 320 grit sandpaper, and spray paint, both primer and white.
Finishing:
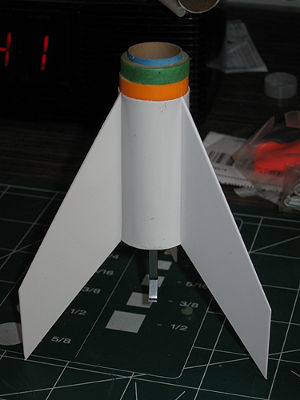
You need to first take the NC, tape the base off with masking tape, and spray two to three coats of white primer. The fin can unit needs the top part taped off so it will slide into the body tube, then two to three coats of primer. Set both of those aside and let dry. After those parts have dried, spray paint two to three coats of gloss white.
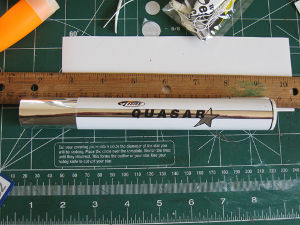
Next is draw a straight line down the BT-50H tube. You will need this line to apply the decal to the tube. Cut out the decal and apply to the body tube. Here's the gotcha part: the decal is 1/8" shorter than the body tube. I cut 1/8" wide strip from the left over foil decal and applied to were it was short. Be very careful when applying the decal to the body tube. Make sure that you do not have any bubbles under the wrap. Add the launch lug next as illustrated in Quasar plans. The rest of the rocket is assembled like the Alpha III kit.
Construction Rating: 4 out of 5
Flight:
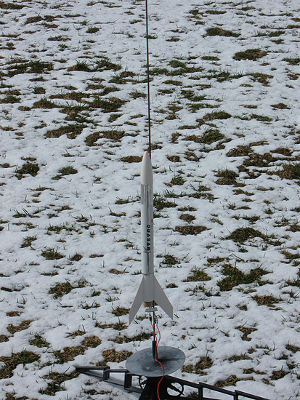
Preparation is simple 4 sheets of wadding. I've use Estes 1/2A6-2 and A8-3 to fly this rocket. It really shoots off the pad and flies nice and straight.
Recovery:
I flew this rocket on a Estes A8-3. No damage at all flying and this rocket is easy to recover. I would recommend a bright parachute for this rocket. It goes higher than expected on A8-3. I estimated altitude of 200 feet.
Flight Rating: 5 out of 5
Summary:
This is a fun and easy to assemble rocket a great classic kit from 25 years ago.
Overall Rating: 5 out of 5


