Pemberton Technologies Screamin Green Meanie
Pemberton Technologies - Screamin Green Meanie {Kit}
Contributed by Bart Butler
| Construction Rating: | starstarstarstarstar_border |
| Flight Rating: | starstarstarstarstar |
| Overall Rating: | starstarstarstarstar_border |
| Manufacturer: | Pemberton Technologies  |
Brief:
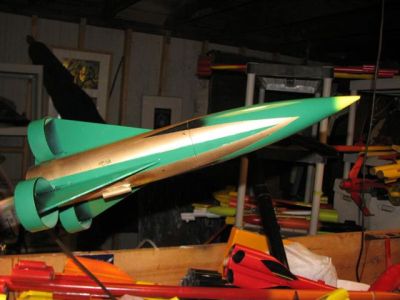
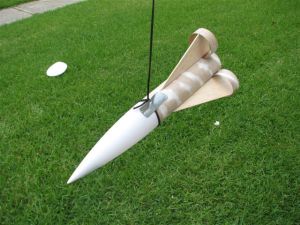
This is a Big Daddy-style rocket. It has a short, fat, mean look with tubes on the end of the fins. I love the tubes.
Parachute is plastic with Kevlar®
shroud lines. Laser cut tubes and fins that made this a very easy kit to build
Construction:
Parts list:
- 1 Plastic nose cone BT-80 Ogive
- 1 24mm motor mount tubing (BT-50)
- 1 BT-80 (the instructions say BT-60 so I'll get a message to Layne about this)
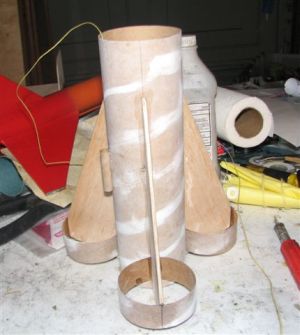
- 3 1" BT-80 tube fins
- 60 inches of Kevlar® shock cord
- 1 Parachute
- 1 Nose ballast, a block of clay
- 3 Laser cut 1/8" balsa Fins
- 1 1/4" launch lug
- Wraparound fin allignment guide
- 2 centering rings, BT-80 to BT-50
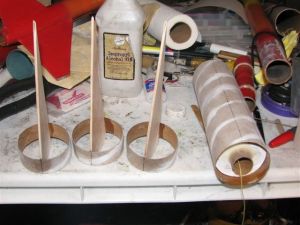

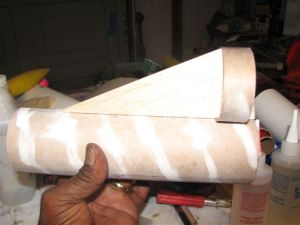
PROs: Kit instruction good and easy to follow. The pictures in the instructions were good but must be read a couple of times. The assembly order was to the T. Don't forget to fill those spirals. I used the Elmer's white wood filler. I used 5-minute epoxy instead of wood glue. The only extra things I needed were some lead fishing weights, the 1/4 split shot type (I picked them up at Wal-Mart). Don't forget to CA the Fins. I got the kit from Pem Tech.
Finishing:
I started with primer, sanded it smooth as silk, and let it dry for a complete day. Went to Wal-Mart, got me some
emerald green, gold, black, and yellow paint. I started with the gold. [Hint: use the gold last as it absorbs the gloss
out of the other paints.] I finished with several coats of clear. Came out beautiful.
Construction Rating: 4 out of 5
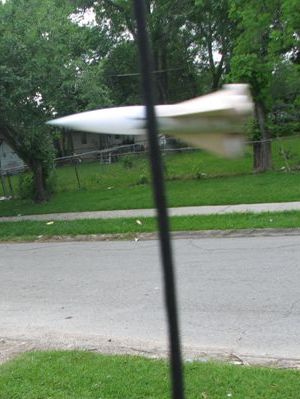
Flight:
C11, D12, E9, E15, and E18 are the recommended motors. I used a D12-5 for the first flight. The chute's shroud lines
got ripped out but all was well. I added nose weight, put a trash bag chute in, and put it up on another D12-5. That
was a much straighter flight. Next, I used E9-6s twice. They were both beautiful straight, glorious flights. Then I put
together a F24-4 reload, which was a tremendous flight.
Recovery:
The shock cord was tied to the MMT that I epoxied in place. Materials are very good. It goes together easily and is a
good kit to build. The recovery is graceful even though I flew in 5 to 10 mph winds. The only damage that I had was a
small piece of one of the fins was broken next to the tube fins. One minute epoxy took care of it though.
Flight Rating: 5 out of 5
Summary:
This rocket is a hit in my book. It flies great. The main pro is the look it is a good looking rocket, but it needs
nose weight.
Overall Rating: 4 out of 5
Other Reviews
- Pemberton Technologies Screamin Green Meanie By Claude Maina and Katy Maina (October 28, 2009)
Brief: This is a skill level 1, 24mm engine rocket that has a great look and some unique features. It is easy to assemble and flies very well. The instructions are very clear and detailed with very good illustrations. The kit was a prize offered by Pemberton Technologies for the July 2009 Best Rocket Competition on The Rocketry Forum and won by one of us (Katy). The build and fly ...
- Pemberton Technologies Screamin Green Meanie By Matt Gillard (September 17, 2009)
Brief: I won this rocket from the March best rocket competition on TRF. I got the rocket sent super fast from the states to the UK. Thanks to Layne at Pemberton Technology for such a great prize. It's a hybrid of a 3FNC and a tube fin rocket. Construction: The kit comes in a plastic bag and has some of the best instructions I've ever seen in a kit, with step by step guidance, ...
 |
 |
Flights
|
|