| Construction Rating: | starstarstarstarstar_border |
| Flight Rating: | starstarstar_borderstar_borderstar_border |
| Overall Rating: | starstarstarstar_borderstar_border |
| Manufacturer: | Estes  |
After flying a bunch of Quest MicroMaxx rockets and thoroughly enjoying them, I decided to step up a bit in the backyard capable flying machines that my son would enjoy. With that I purchased an Estes Mighty Mites Outlaw Starter Kit from Walmart for $10. The kits comes with a launch pad, launch controller, an Outlaw rocket, an extra motor ring and two 1/4A3-3T motors.
I have to admit this little flier is fun and we have enjoyed it. So much so that I have also purchased a Blitz and Sizzler set and a whole bunch of 1/4A3-3T motors!
THE LAUNCH EQUIPMENT:
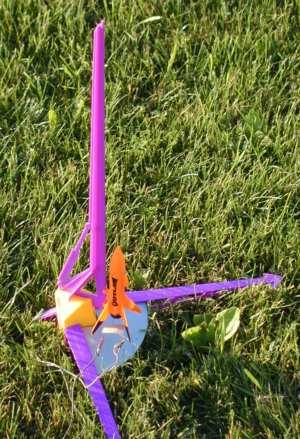 The launch pad assembles easily with only the need for a small Phillips screw driver. The screw driver is needed to remove the bottom panel. Underneath this panel is where the "juice" comes from in the form of four (4) AA batteries. This is nice being positioned here because it adds weight to the launch pad. It has three legs, two long legs and one rear, short stabilizer leg. The deflector shield sits nicely between two of the long support legs. The launch rod is plastic and formed right into the launch assembly and will only accept a "C" launch lug that comes on the Ready-to-Fly Mighty Mites. The is no adjustment for the angle of the launch rod.
I would love to see some mid-powered pads that have the blast shield and battery pack idea incorporated. I believe they would be very successful.
The launch controller is a yellow plastic box with a place to insert a safety key which lights a bulb indicating continuity. By pressing a small button the varoooom occurs. The 15' wires run from the launch controller to the launch pad and are permanently attached because the batteries are in the bottom of the pad. The two clips are near the launch pad. It would have been nice to be able to separate the controller and pad, maybe by using a plug-in connection.
THE ROCKET:
The rocket is Ready-to-Fly after you tie an orange streamer to the elastic shock cord. The pre-assembled elastic shock cord is tied to the nose cone and is fed through a side port of the rocket and knotted to prevent if from pulling through the hole.
There is no other assembly and only one other moving part which is the retaining ring. The ring is a twist-lock type that holds the motor in place during flight. Estes provided a second ring in case the first one is lost, however, after nearly 10 flights our ring is still in place.
Overall, for CONSTRUCTION I would rate this kit 4 ½ points taking away only for the ability to detach the wires from the launch pad.
FLIGHT/RECOVERY:
 To prepare the Outlaw for flight, you need to put wadding in then roll up the streamer and push it in along with the shock cord. Then put the nose cone in place. On the other end, you insert the motor and place the retainer over it securing it with a twist. Insert your ignitor and plug and you're ready. Now bear in mind that this is all very tight because it is a short rocket.
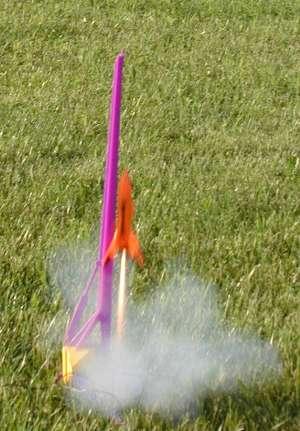
The first flight was off of a regular pad with a 1/8" launch rod and on the 1/4A3-3 it zipped off the pad gained some altitude and popped the ejection while still going up . . . but close to max altitude. Upon recovery it was clear that the shock cord only had 1 flight left and would probably break on the next flight, so it was set aside for that day for an enhancement.
The enhancement was nothing more than cutting out the elastic and replacing it with 8 inches of 1/16 inch Kevlar attached to the rocket and nose cone the same way the elastic was. And no streamer making no need for wadding. As soon as we got the Blitz and Sizzler, I made the same modification to them.
With respect to flying. The flights are all nearly the same. We have had two launches with lower altitude and what appeared to be very unstable. I have to imagine it is due to the motor. Regardless, they have all been successful. We have only flown on the 1/4A3-3's and appear to get over 100 feet. That still works for our backyard or a local school field.
We have flown it 8 more times in the new configuration with much success and enjoyment AND in our backyard (actually front but that just doesn't sound right since most people play in their backyards!) After the 7th flight the seam of the rocket started to separate so I repaired it with some CA before we flew again.
The Outlaw™ has flown 19 times so far on 1/4 and 1/2A's. I had had several other CA sessions to keep it together at the seams, but so far has been the most successful Mighty Mite™ flier.
For FLIGHT/RECOVERY, I would rate this kit 2 points. It must be modified with Kevlar just to get more than the two flights from the motors provided in the starter set.
Overall, the Mighty Mites Outlaw Starter Set was a great buy for $10. Make the Kevlar modification and be sure to watch for the seam to separate (have your CA ready). The launch pad is designed well for its purpose and makes this Starter Set easy and convenient to use. I give the Starter Set an OVERALL rating of 3 points.
 |
 |