| Diameter: | 3.00 inches |
| Length: | 19.00 inches |
| Manufacturer: | Estes  |
| Skill Level: | 2 |
| Style: | Sport |
Brief:
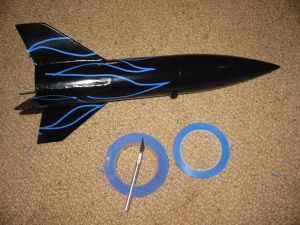
This project was an upgrade of the typical Big Daddy to a 29mm mount with fiberglass reinforcement to the fins and lots of nose weight with a funky flame job.
Modifications:
This is an old style Big Daddy I ran across for $15 which sure beats the heck out of the regular retail price of ~$30 or whatever it is.
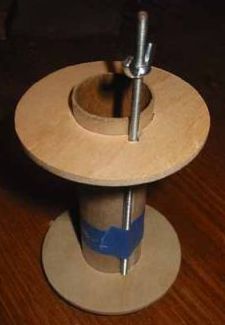
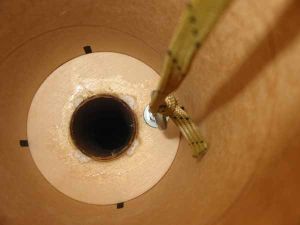
So first up is the MMT. I used 30 minute epoxy because that’s what I have in the house and a #6-32 threaded rod for my positive motor retention. Everything got a good dose of epoxy. The threaded rod was epoxied for the full length of the MMT tube. Then I drilled a hole in the aft centering as close to the middle as possible so the threaded rod sticks out the back end about one inch. During flight, I use a small fender washer and nut for motor retention. I have used this method effectively on many rockets and have never lost a motor.
Next up are the launch lugs. I wanted to push the lugs as far apart as possible on the body tube cause I think it looks cool. I’ve done this before with success.
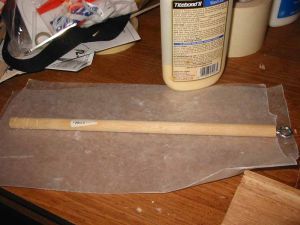
I used a dowel rod to mount an eyelet to attach the shock cord and parachute. I was going to do this with threaded rod sleeved to an eyebolt but that didn't work out. I don't trust the little loop Estes provides on the side of the nose cone considering the type of shock cord I am using. Anyways the rod was inserted into the nose cone and epoxy poured around it. I cut tiny little notches out on the side so the epoxy would have a little something to grab to.
I elected to use the stock balsa fins that came with the kit. Not to worry as I glassed them tip-to-tip. With one exception of some blistering with one of the glassed areas, this went fairly smooth.
Construction:
The body tube, fins, and nose cone were all that were used from the stock Estes Big Daddy kit. Here are the additions: 1/4" launch lugs, 18" nylon parachute, Nomex® heat sheild, 29mm centering rings, 10ft of 1/4" shock cord, 29mm motor mount tube, #6-32 threaded rod for motor retention, 1/8" eye bolt to attach the shock cord, and a dowel rod epoxied into the nose cone to attach the cord.
After flying it once, I took the nose cone and cut the bottom out and cut about 2 inches off of the dowel rod. I found that there is no way to get my heat shield, 18" nylon parachute, and shock cord packed into the bird with a 29mm 40/120 casing in it. After that modification was made I was able to get all the laundry in the nose cone. This modification this is an important step to consider early on because it is a pain to correct after the fact.
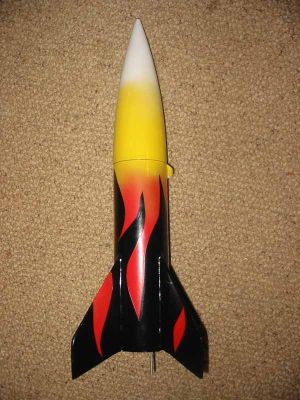
Finishing:
Finishing was pretty typical for most Estes rockets. I used wood filler for most of the imperfections like the tube spirals. For priming I used Kilz spray primer. That is hands down the best primer I have ever used and I followed that up with a couple of coats of gloss black. Then I picked up some 1/8" plastic blue masking tape for the flames at a specialty painters store and used 1 inch blue masking tape for all of the areas that stayed black. A couple of coats of red, yellow, and white, and my flames were complete.
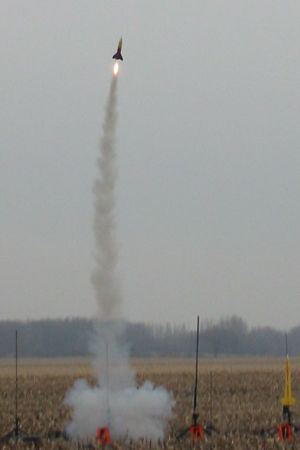
Flight:
So far, I have flown this bird twice. First was at Michigan Team 1 Fall 2006 launch on an F20 with a 7 second delay. RockSim predicted an optimal delay of just under 7 seconds but that was far too long. Then on January 27th, 2007, I went to Tripoli Michiana launch and flew it on an F52 with a 8 second delay. Again, RockSim predicted a touch over 8 seconds for the optimal delay. Real world results differ because again the delay was again too long. Despite the longish delays, both flights were a success with no damage. I believe this is ready for a G64!
Summary:
This project is a "must do" for anyone who is into mid-power rocketry. This will test your building skills and rocketry knowledge, not to mention this is a hoot to fly.
Other Reviews
- Estes Big Daddy By Jim Stuckman
19" LG X 3" Dia 24" Parachute 24mm Motor Mount - D12-3 & 5 recommended This is a great sport flyer that builds very quickly. If you upgrade the parachute to a quality nylon chute you have a very versatile companion for your Aerotech 24mm RMS! 4 My kit is a pre-release beta kit so it did not come in the standard Estes packaging - just a basic plastic bag. All parts were present ...
- Estes Big Daddy By Jon Revelle
Short, stubby, and fun rocket. Flies on Estes D engines. Unfortunately I think it was just discontinued because it was not in Estes' 2005 Catalog. The rocket made its debut in the mid 1990s. At the time, kits were being made with a 4/6 sided box with a bag. This one was no exception. It had: 1 Nose Cone 1 Fat body tube 1 24mm Motor tube 1 Sheet of balsa 2 Centering rings ...
- Estes Big Daddy By Nick Esselman
In keeping with my likes of "stubby" rockets, I decided to build three more that were around three inches in diameter to compliment my 2.6" and my 4" collection. So, I set off to get a LOC Onyx, a RocketVision Grymm, and the Estes Big Daddy. See my 3" Stubby Rocket Comparison Page The Estes Big Daddy qualifies as a "stubby" rocket because it is 19" long and has a 3" diameter giving it a less ...
- Estes Big Daddy By Andy Tate
single stage, 24in. parachute, 24mm motor mount, 3/16 launch lug This is a standard Estes kit. It utilizes TTT (through the tube) fin mounting for the four balsa fins. One three inch paper tube is the body tube with a 24mm paper tube for the motor mount. The nosecone is a large plastic one with the standard Estes shock cord attachment loop. Two cardstock centering rings are included. The ...
 |
 |
Flights
Sponsored Ads


 Solar Starter 2302 (Formerly 2301)")


|
|