| Flight Rating: | starstarstarstarstar |
| Overall Rating: | starstarstarstar_borderstar_border |
| Published: | 2020-08-06 |
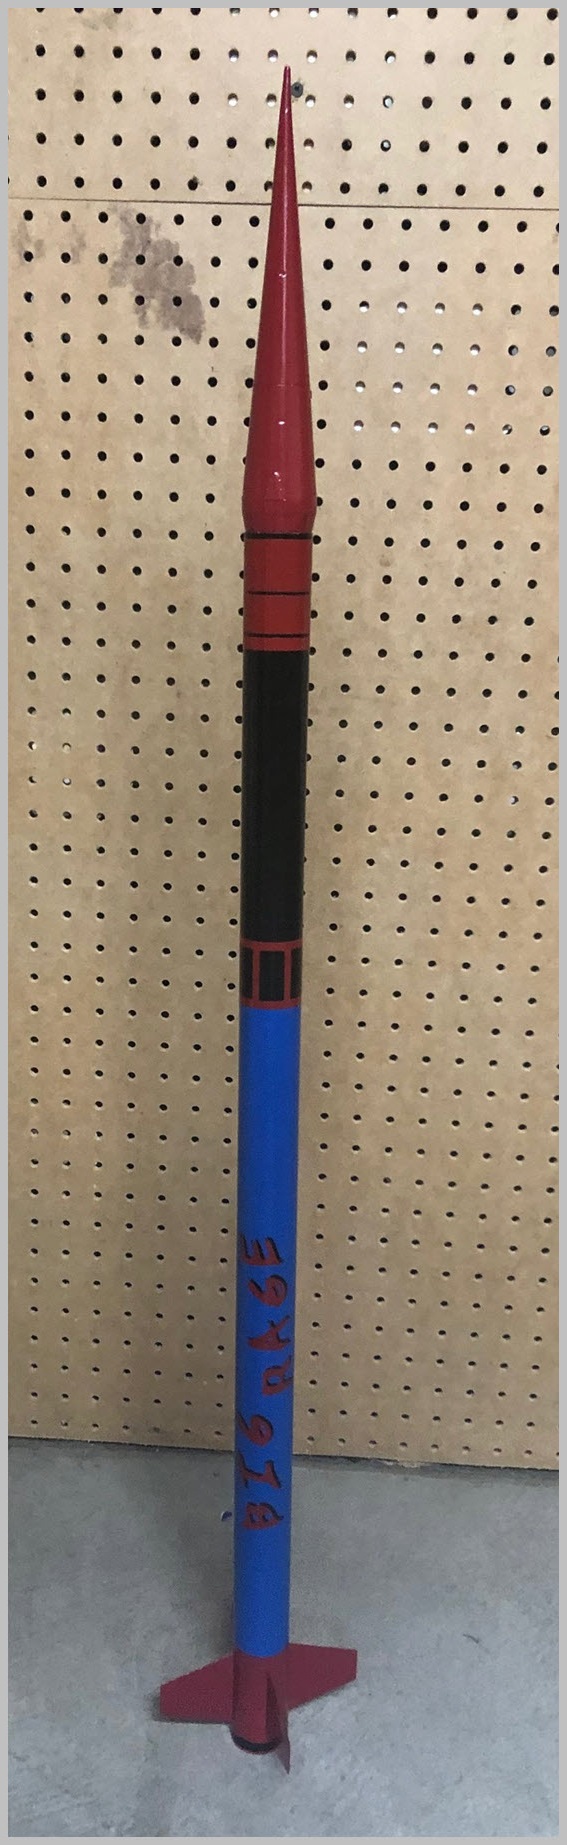
| Diameter: | 1.38 inches |
| Length: | 37.00 inches |
| Manufacturer: | Quest  |
| Style: | Payload |
 Brief
Brief
The Quest Big Rage is designed to be a quick-to-assemble, no paint required rocket that can be assembled in a couple of hours by first time builders. The kit consists of a three-piece plastic nose cone and plastic fin unit in a faded bland pink, two colored main tubes, a motor mount tube, plastic motor mount rings, a tube coupler, shock cord and a parachute. The launch lugs are also a pair of thick plastic pieces that are required to clear the nosecone. The instructions are very well written, and the average person could probably build this in under an hour if you have built a rocket before.
Components
I'll break this down by component. I don't know this kits history as I bought it off eBay CHEAP and the packaging was in rough shape.
The nose cone is a three-piece design with two halves and a separate tip. They are molded in a bland pale pink color, not what is shown on the face card. The two halves are very poorly molded. There are dimples in the plastic and the two halves didn't fit together. A lot of clamping, glue, filler and sanding was required to make them look remotely acceptable.
The one-piece fin unit is nice, but also molded in the pale pink color.
The lower body tube is blue and looked pretty good as far as pre-colored tubes go. Mine was crushed, but that isn't Quest's fault. The upper tube is black and it too looked good except for being crushed.
The tube coupler is about 3 inches long and fit nicely.
The motor tube is soft and crushes easily. I've run into this on every vintage Quest kit that I've built. I remember this as being an issue when I was a kid. I recall ripping them getting motors in and out. This should really be replaced or, at the very least, do what I did and wrap the exposed section of the yellow tube with a piece of scrap tubing.
The pair of motor tube rings are sturdy and fit the stock motor tube well.
The parachute is ok but not very colorful, so it might be hard to see in the sky. Thankfully the Big Rage is a large colorful rocket. The shock cord had not aged well and was falling apart, so it was not used.
After receiving my kit and finding the smashed tubes, I was thinking of scrapping the whole thing as I know Quest uses odd sizes on their body tubes. I took a couple of quick measurements for length and tossed the body tubes in the trash. I put away the remaining parts hoping that I would someday find the correct body tubes. As luck would have it, I was surfing market place a few weeks later and found a guy in my area with another Big Rage and a handful of Quest tubes for sale cheap so I bought them.
Construction
Construction was delayed due to sourcing new tubes but once the project began it went ok
The build started with the motor mount. The stock motor tube is soft, but it's sized correctly for the plastic motor rings so I decided to use it, but beef it up a bit.
I first installed a thrust ring inside to keep the motor from going anywhere. From there I sanded and fit the lower plastic motor ring.
Next, I placed the upper ring in place and marked its location on the tube. I then cut some scrap tubing I had laying around and created a sleeve for the outside of the motor tube. Once glued in place I used a couple of BT20/50 centering rings that had been sanded out a bit and slipped them over the outside of the motor tube. This would add a little more strength as well as give me a good place to attach some 200lb Kevlar line. I cut about two feet of Kevlar and wrapped it around the motor mount below the centering ring. I then sanded and added the upper plastic motor ring and let everything dry overnight.
Next I created a small hole in the upper motor mount ring for the Kevlar cord and fished it through and pulled it down the tube and out the bottom to keep it out of the way. The inside of the fin can and the outside of the motor rings were sanded with 180 grit and wiped clean. Thick CA was applied to the appropriate places inside the fin can and the motor mount was slid into place and set aside.
While the fin can was drying I moved on to the parachute. The Parachute included is 12 inches and made from plastic. I cut a small two-inch spill hole in the center then cut the parachute out. I made my own lines from 100lb Kevlar line then assembled it.
The fin can was now dry and ready to go. I sanded the upper part of the fin can where it gets inserted into the tube with 180 grit and lightly scuffed the inside of the lower body tube. A generous amount of thick CA was applied to the inside of the body tube and the fin can was inserted and held in place for a couple of minutes. The assembly was then set aside and allowed to dry for a couple of hours.
Next I moved to the nose cone. The nose cone is a three-piece design that was horribly molded. There are large dimples everywhere. The two halves do not match up when held together the upper part of one of the nose cone pieces bent backward away from the other side. I began with lightly scuffing the mating parts of the cone then cleaning with alcohol. The lower portion of the cone was glued together using thick CA and allowed to dry. From there I slowly worked my way up the cone using a heat gun and clamps to get the pieces to fit together. In the end it took three sessions to get the nose cone halves to fit together. Finally the tip was glued in place.
Back the main part of the build...
With the lower section of the rocket completed, I lightly scuffed the inside of the main tube and the upper tube then applied Titebond 2 inside the lower tube and inserted the coupler. I waited about two minutes for the glue to set up then applied glue to the upper tube and slid them together and held them for about a minute. The entre rocket was then placed in a 2"x2" piece of aluminum "L" channel and held in place to dry to ensure everything was straight. If you are using the factory supplied pre-colored tubes you will want to ensure that you did not get any glue on the outside if the tubes and wipe off any excess before it dries. I'm working with replacement white tubes that are getting filled anyway so I don't care.
Next, I created a small loop in the Kevlar cord and tied an eight-foot section of 1/8" elastic to the loop. This was fished out the top of the rocket and will eventually be connected to the nose cone. The parachute was attached to the elastic about 12 inches from the end of the cord.
Finally the launch lugs were applied. I didn't care for the stock piece as I felt they were big and bulky. I also questioned how well they would adhere to the tubes, so I made my own standoffs and used standard Estes 1/8" launch lugs.
That is it until after painting is completed.
Finishing
Finishing began with the nose cone. I knew it was going to be the most challenging part of the process. Started with washing the nosecone with dish soap and a green scotch bright. Next started the fun part of sanding, filling, sanding filling etc. to make this presentable. In the end I have a nose cone that looks pretty good, even up close, but it took a ton of work.
The Fin Can and body tubes looked pretty good. I did some filling where the upper and lower body tubes meet but otherwise no filling was required. I lightly sanded the body tubes with 800 grit and wiped everything down. I did one light coat and one heavy coat of SEM filler primer and let it sit for a day to dry. The nose cone was also given one last coat of primer and let it sit.
After priming, everything was sanded with 800 grit. The main body tube was painted with Krylon Patriot Blue. Once dry the upper 11 inches of the tube was masked and painted Krylon black. The following day the nosecone and fin unit were painted with Krylon Hot Pepper red.
I wasn't a fan of the stock paper decals, so I decided to create my own from vinyl.
Flight
The first flight was in a very small park that was maybe 1000 feet square. It was a spur of the moment idea and we just grabbed a couple of rockets and headed out. First flight for the Big Rage was on a B6-2. While the flight was very quick and only managed to get up about 150 feet, it was straight as an arrow and very stable. The 'chute popped at apogee and landed safely about 50 feet from the pad.
Flight two was on a C6-5. I figured that all our rockets had been recovered to that point, so I might as well go for it. Big Rage left the pad quickly and the flight was perfect. I'm guessing around 450 feet. The ejection was a bit late, no harm done. The parachute caught a wind gust and floated well outside the park and into the field across the street. We got lucky as it landed in the grass with no harm done. Note to self: Don't fly rockets to 450 feet in that park on a parachute.
Overall both flights were a success. Both were dead straight and the rocket was recovered without any damage. I feel like a C6-3 would be a perfect motor for this rocket if you have the room. Otherwise it flies well on a B6-2, but I wouldn't fly it on a B6-4 and there is no room for error with the ejection.
Recovery
As stated, recovery uses a 12 inch parachute. The stock chute is ok for what this rocket is. I cut a spill hole in mine to help with stability and help it fall a little faster. I didn't care for the stock parachute lines so they were replaced with 100lb Kevlar. The shock cord was replaced with Kevlar and about 8 feet of 1/8" elastic.
Flight Rating: 5
Summary
Flight and recovery were perfect. No complaints here.
Overall Rating: 3
Other Reviews
- Quest Big Rage By Stefan Jones
( Contributed - by Stefan Jones) Brief: I obtained the Big Rage along with a batch of other Quest kits in an on-line auction. My original intention was to use these as gifts and give-aways. However, the Big Rage kit was damaged a bit in shipping -- the main body tube was crushed -- and I didn't feel right giving it as a gift! I decided to repair and build it. I tried to get a replacement ...
 |
 |
Flights
|
|