Scratch Lil' Ivan Upscale Original Design / Scratch Built
Scratch - Lil' Ivan Upscale {Scratch}
Contributed by John Bergsmith
 Brief:
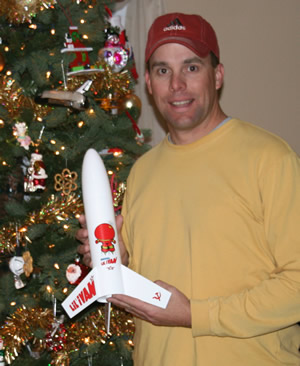
The Lil' Ivan was originally a kit from Centuri, but now produced by Semroc. For whatever reason it's been a favorite of mine and I wanted a larger version. This version upscales to a BT-80 for a scaling factor of 1.61 for a design using a 24mm motor mount.
Construction:
Parts List:
- Main BT-80H
- Motor Tube BT50H
- (1) CR5080F
- (1) CR5080 lite ply
- Nose BNC-80HL
- Fins 1/8" Basswood
- 3/16" Launch Lugs
- 1/8" Kevlar
- Paracord shock cord
- Decals from Excelsior aka Sandman.
I started with the motor mount which uses a BT-50H motor tube that was 4" in length. The bottom ring is made from lite ply while the upper ring is fiber. On the bottom centering ring, I installed two #4-40 blind nuts for the motor retention bracket. The centering rings were mounted a 1/4" from the top and bottom of the motor tube. I created a nice epoxy micro balloon fillet on both sides of each centering ring for strength. I drilled a 3/16" hole in the top centering for my 1/8" Kevlar shock cord to go through. The Kevlar shock cord ties around the motor tube between the upper and lower centering ring.
The main body tube uses a 9" piece of BT-80H. Using the scaling factor of 1.61 you can determine the length of the BT should be 8". However, it's nice to have the extra 1" for wadding and the parachute. Plus, you really can't tell the BT is longer than scale once completed. I hardened each end of the BT with thin CA for strength.
The next step was to I fill the spirals. After sanding the BT, the tube was primed with Duplicolor High Fill primer and sanded down. Next up was to mark the BT for the fin locations and the launch lugs.
This rocket could be built with fins mounted directly to the wall or through the wall. I chose to go TTW, so I cut my slots for the three fins using a sharp #11 blade. The motor mount was glued into the BT using wood glue that created a nice fillet around the top centering ring. A wood glue fillet was also created around the bottom centering ring.
The fins were cut from hard 1/8" basswood and shaped. The fin and launch lugs were glued on with epoxy. Once dry, epoxy micro balloon fillets were created around the fins and launch lugs. I drilled down the center of the nose cone with a 5/16" bit to a depth of 3". I added 1.50 ounces of lead shot, and capped the hole with a 1" piece of 5/16" hard wood dowel. The dowel was drilled in the center for the eye hook.
Finishing:
The fins and nose cone were sealed and hardened using two coats of Minwax Polyurethane. Once dry they were sanded smooth and coated using thinned spackle that was brushed on to fill the wood grain. The filler was sanded off and the rocket was primed with two coats of Duplicote High Fill primer sanding between coats. I used old formula Krylon Gloss White to paint the entire rocket. To finish the model, the decals from Excelsior were installed. Overall the finish looks very good. Once dry, you can finish installing the shock cord and parachute.
Flight:
I designed this model to fly on the 24mm reloads such as the E18, E28, or even D12's. The first flight I used a E28-4 and it worked perfectly. 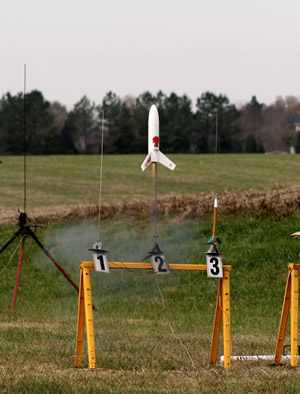
The first boost arrow straight with no stability issues. The E28 produced a very respectable altitude, Rocksim estimates slightly over 1400ft with motor. My guess is Ivan came very close to reaching 1400' on this flight. The 18" parachute opened, but a little too slow to bring it down caused a unrecoverable tree landing. A smaller chute or a spill hole would be required for windy or high thermal activity days.
I've since built a second Ivan that will utilized a smaller chute on windy days!!!
Summary:
This is a very easy rocket to upscale that makes a great flying rocket. Plus the cool decals are available from Excelsior. Overall it's a rewarding project that I'm sure you will enjoy building and flying. The BT-80H, and basswood fins makes the design sturdy and should hold up well to many launches.
Other:
Every rocket I build that uses TTW fins proves to me that every rocket should be built using this technique. Fin alignment is so much easier, and over all strength is increased.
Related Products
 |
 |
|
|
John Pate (November 24, 2013)
This is one of my favorite kits!! You have me wanting to build the upscale model! Never upscaled anything but really want to give it a shot!!!