| Length: | 27.75 inches |
| Manufacturer: | Public Missiles  |
| Style: | Scale |

Presented with written permission from RocketyPlanet:
Product Review by Lucas Kalathas
Thursday, November 15, 2007
|
There are some companies that blend in with their competition, to stock their items on the shelf in hopes of selling to undemanding customers. Others try to provide the cheapest products no matter what it takes to do so. And in other instances, some companies struggle to offer superior quality. Public Missiles Ltd. has been manufacturing rocket kits for over a decade now, and they live by their mission: "Design and manufacture the best rockets in the world and give our customers the best possible service. Period."
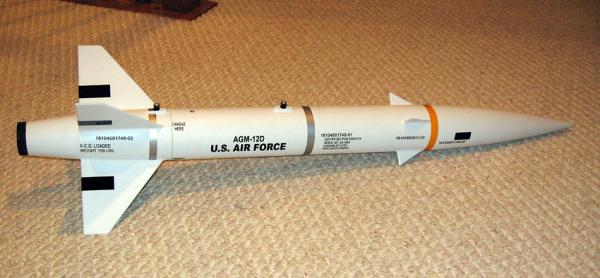
Scale kits of military missiles have always caught my attention, and with the Estes Bullpup 12-D being one of my old favorites, the choice was an easy one. I purchased the 3.0" Bull Puppy, but I wanted some upgrades that were not stock in the kit. I emailed PML with my questions, and just as expected, received the reply only a few moments later.
I was, and wasn't, shocked by reading a "yes" after each of my questions. I've had the pleasure of purchasing from PML a few times before, so I expected their cooperation, but the extent they go to please their customers is simply astounding. I upgraded to thicker G-10 fins (.093" from .062"), a 3.0" Intellicone, 48" chute, and they even made me a 12x12" sheet of G-10 for my electronics mounting board.
|
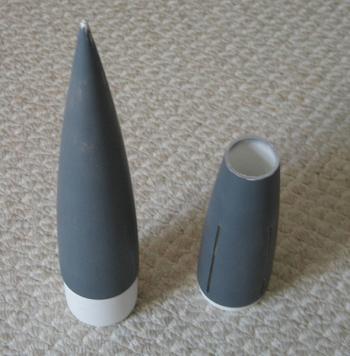
The kit was packed and shipped, sitting on my door only three days later. How they do it, I still don't know, but it's amazing. (I must say packing is yet again great, as nothing even had a remote chance of getting broken or bent). The kit contained the nosecone, pre-slotted boattail, quantum tubing with the dado slots for the canard fins, G-10 fiberglass fins (4 canard and 4 main), piston kit, about 12 feet of tubular nylon, centering rings, 38mm motor mount tube (9.5" long), the parachute, and launch lugs.
To begin like I always do, I test fit everything just to make sure the parts were all cut properly or if they needed any extra sanding (and of course, they fit perfectly). I made a few small additions to the rocket, which only needed me to purchase a 3" coupler, more centering rings, and a few small hardware parts.
|
I first washed and sanded the nose and tailcone in hot water and with multiple sheets of sandpaper to remove the mold-release coating so the paint would adhere easier. I also applied Bondo fill putty to all the abnormalities in the cone and sanded to fill the small gaps in the plastic seams. They were both then sprayed with gray Krylon primer (I will swap from gray to white to help identify any missed spots and these were primed first so when I was ready to finish the painting, I would have an all gray rocket to start with) and sanded to a smooth finish.
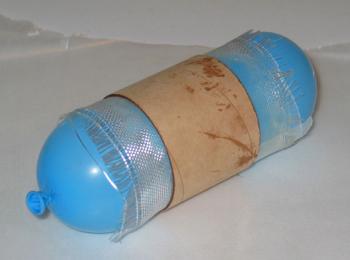
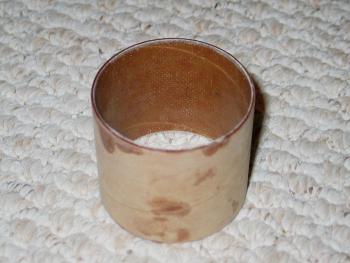
I next began to assemble the piston system. I would change it from its stock configuration by applying a layer of heavy fiberglass to the inside of the piston tube to strengthen it, especially because the lighter phenolic tubes seem to show wear easier over time. I used wax paper and a balloon to help press the fiberglass cloth to the sides and remove excess resin from the cloth. It was my first time applying fiberglass to anything and I must say I am very pleased with my results.
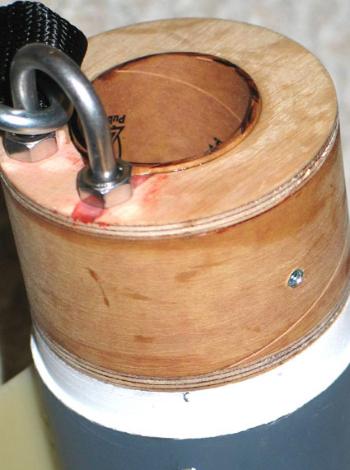
I then had a loop stitched into the end of the nylon strap so that I could attach it to the sustainer with a quick link, rather than epoxy it directly to the motor tube (this provides the option of removing the strap and piston in the future while being able to easily replace any part). The same would be done with the upper tubular nylon shock cord (again, PML suggested tying it permanently to the piston's D-ring). I also inverted the piston and epoxied the bulkhead to the bottom of the piston rather than the top. I feel I have more internal room for the recovery system and I have had perfect results.
|
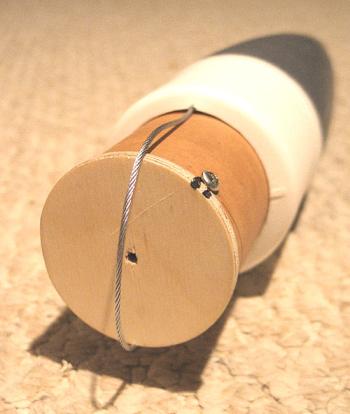
Next up, I worked on the Intellicone tube insert. This was a quick-n-easy step in the building process and only takes about 10 minutes or possibly longer depending on your epoxy cure time. First you need to glue the two cap circles together and drill either one or two 3/32" holes (through the phenolic tube as well) for an attachment point (PML provides two screws for you). On the other side of the tube, I epoxied the other provided bulkhead flush with the rear and I filled the center hole with Bondo. After it's all dry, that's all there is to it.
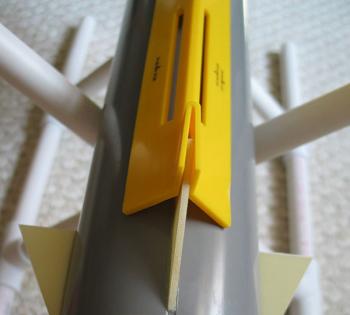
The next step was to add the canard fins by adding five minute epoxy to the fin base and dado slots. I used my Estes fin alignment jig to make sure they were on straight (yes, it works with high power rockets as well). Thirty minute epoxy fillets were added to them after all four were attached and cured. I use a method in which I place painter's tape to the sides of and on the fin, put epoxy along the joint, and then use the ¾" launch lugs that PML sent (since I would be using rail guides instead) to smooth out the fillets. I applied Bondo on top of the fillets to help smooth out the transition.
|
The fins were given a bevel using a Dremel "Lawn Mower and Garden Tool Sharpener" (a neat suggestion given to me by Darrell Mobley) and works particularly well when you have limited tools available for use. Remember to take care when using this tool while sanding fiberglass fins; it can really make a lot of dust, which can be quite harmful if an excessive amount is inhaled.
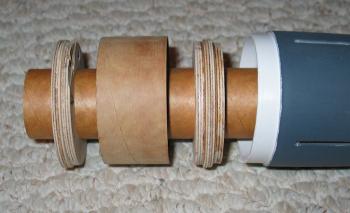
I next built and assembled the coupler extension that I would mount onto the tailcone. I decided to make the joint longer (2.5" rather than the stock 0.5") so I could easily attach and remove the tailcone/motor mount. I like to keep my rockets as modular as I can; if something happens to one part, I can swap it out much easier than many stock kits can. A U-bolt was added to the top centering ring and the parts were later assembled as you can see in the images (it is best to wait before attaching it completely so you have access to the inside of the tailcone which is useful for securing the fins, which you will see later).
|
The next step was to cut the motor mount to the right length and attach the Aeropack retainer body. I then sanded down the rear of the tailcone so the retainer would fit through the opening and be even with the retainer cap. I used JB Weld to adhere the retainer body into place. I glued it in separately so the retainer cap would align up perfectly flat with the cone when screwed on (when I dry fit the motor mount with the retainer attached, it was slightly cockeyed). After that had set, I used JB Weld again to secure the motor mount tube to the inside of the retainer.
The motor tube had cured and the fins were now ready to be mounted. Again, I used the Estes fin alignment tool to help keep them straight. I used 5 minute epoxy to join them to the motor mount and some CA to help keep them stiff while working. I am paranoid about fin strength, especially with the problems I've had with my past rockets, so I decided to make this one extra tough.
|
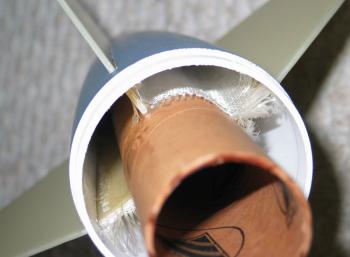
I cut out four sheets of heavy fiberglass cloth and used them to reinforce the attachment of the fins. It was harder than I had originally expected because of the small working space, but good use of a long dowel rod made it still possible. Not done yet though… I then filled the boattail with PML expanding foam to yet again make sure those fins are going to stay in place. And yes, external fin fillets are a must too.
After the foam had cured, I cut the excess down to allow the coupler extension to fit, which I then epoxied into place. I needed a secure way to fasten the rocket and fin can together so I decided to place a blind nut in the coupler. I placed the tube onto the fin can and drilled a hole through it and the coupler so they would align correctly. I then cut and sanded a small piece of plywood to match the curvature of the coupler and glued it and the blind nut into place. The top centering rings were then epoxied to seal off the top coupler, which concluded the fin can's construction.
The last steps in the construction of the PML Bull Puppy were under way. I filleted the rear fins with thirty minute epoxy and covered them with Bondo exactly as I did the front. They were sanded and filled repeatedly until the transitions were smooth. I was quite happy with the end result; it sure is looking good!
|
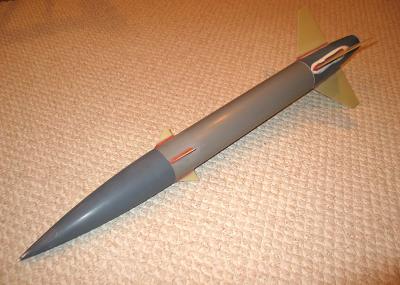
Painting the rocket isn't too difficult a task once it is completely built and ready. I used, like I had mentioned before, alternating layers of gray and white Krylon primer. I think it makes it easier to judge how thick to layer it and where I missed any spots. The top primer coat is of course white. I then used Krylon flat white paint as the top coat (I had a hard time choosing between the gloss and flat… I love the shiny rockets but I decided to stick with a more militaristic style, so the flat was my choice). Here you can see it primed in both the gray and white coats.
The top coat of flat white was very easy to apply. I sprayed on three thin layers and gave them about a week of cure time before moving it and applying the decals. The decal sheet is very detailed, including all decals similar to that of the Estes kit. The only things you must supply are the colored stripes. I chose to use Monokote Trim (they suggest colored electrical tape) but I prefer the Monokote for its thinness and clean look. After everything was complete, I sprayed a few final coats of satin clear coat and sanded it down to a smooth surface.
In my opinion, the kit is of top quality. It has superior strength when built, stunning appearance, and the ability to fly on a wide range of motor sizes. Do not hesitate to buy from Public Missiles. They are a top notch company who offer products that are hard to beat.
I flew the BullPup on a Loki Research I405-LW reload at MDRA's Red Glare III. I was thrilled with the flight performance, and especially Jeff's motors; they packed much more punch than I was expecting. At the RSO table, the rocket weighed in slightly over 5 pounds loaded. The motor tore off the pad and shot the bird to 4,474 feet AGL. I didn't have dual-deploy, so the rocket drifted about 1.5 miles. The only problem with the flight was that the Intellicone wire ripped off at ejection, so the nosecone fell by itself, but luckily, the cone was undamaged and the electronics tube was recovered still within the cone. It had a crack in the phenolic, but a small replacement will be easy. Other than that (and a few dings in the paint), I couldnt have asked for a better flight.
I have to give PML and Jeff from Loki Research props for their awesome products!
Other Reviews
- Public Missiles Bull Puppy By Casey Smith
Photo courtesty of PML Scale-like rocket of the big brother PML Bulldog. Excellent military styling, good experience here with boat-tails. The new Bull Puppy comes with the nice Quantum Tubing (pre slotted for TTW fin attachment), a PML nosecone, G-10 fiberglass main and canard fins, and piston ejection system. It comes with 2 centering rings, one that goes in the main 3" tube and ...

 |
 |
Flights
|
|