If you haven't got your Estes Saturn V kit yet, the instructions are available for viewing from the Estes website: http://www.estesrockets.com/assets/instructions/002157_SATURN_V.pdf These ... [Read More]
I put a lot of time into producing the instruction sheets for my Odd'l Rocket kits and other vendors . I know how much time it takes to get everything in it's place.
With all due respect to ... [Read More]
While I'm posting about the Saturn 1 kit-
Here's a favorite and one of the best kits available today.
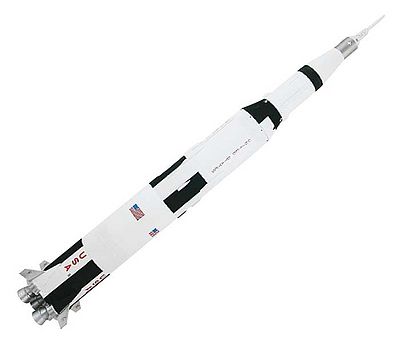
The Dr. Zooch Saturn V is a fun build and great flier.
This is close in ... [Read More]
Here's all the parts from the latest version of the Estes Saturn V kit, # 2157. The box is plenty big for what was inside. The length of the box accommodates the long BT -101 tube. These are some of ... [Read More]
The BT-101 tube wasn't cut clean. It wasn't a big deal to clean it up, just a few passes with some fine sandpaper on a block. I'm not faulting Estes, cutting a tube this size is difficult. There ... [Read More]
The instructions suggest making a stand from what's left over from the centering ring card stock. Estes suggests a piece of wood 4" wide X 15" long for the base piece. I opted for thick cardboard. ... [Read More]
You are directed to draw a line down the entire length of the BT-101 tube. The instructions show a line drawn using a door frame. This tube is wide! I found it hard to fit the tube into a door ... [Read More]
The instructions say to recess the mount inside the lower end of the BT-101 by 3 3/8". Many forums posts think this is too far inside and may cause the Krushnick Effect. Here's an explanation I found ... [Read More]
The card stock centering rings were a loose fit on the inside of the couplers. Once again I built up the outside diameters with a bead of white glue on the outside edges. These were "press-fitted" ... [Read More]
With all the tubes I knew I'd better get started on the tube seams. I started with my new method of laying the filler into the seam using a dull hobby knife blade. This will keep the filler only in ... [Read More]
Note: This is how I currently fill body tube seams. It's presented as another possible way to get the job done. Your results may vary! After the filler in the seam is dry, sand it down ALMOST to the ... [Read More]
Here's how George Gassaway suggested to fill the body tube spirals. Masking tape is set down just to either side of the seam. Primer is shot, concentrating on the seams. I sprayed the primer a ... [Read More]
Sorry this blog entry is out of sequence. I do most of my blogs in draft form, sometimes two weeks in advance. I skipped right over this entry, Part 7. After this post, scroll back down to Part 8 to ... [Read More]
In Step 4 you glue a reinforcing ring inside the lower end of the BT-101 tube. For too long, I tried to get it to slide in. It was too tight! I didn't want to ruin the BT-101 or reinforcement ring ... [Read More]
I scanned the two large shrouds and printed off two extra copies of each. Print the extra shrouds on 110 lb. cardstock. The cardstock I buy has a smooth side and the backside that is slightly ... [Read More]
Cut a piece of masking tape a little shorter than the height of the shroud. I set the tape on my jeans pant leg. Press and lift, press and lift. This leaves small thread fibers on the tape and ... [Read More]
Don't wait to long to remove the outside tape. Remove it just as the shroud is setting up before any glue can seep through the seam and into the masking tape. Remove the masking tape from the ... [Read More]
Here's one of the more demanding parts of the build, cutting out the vacuform body wraps. The older Centuri kit used these same vacuform wraps except theirs were die cut to shape. From reading the ... [Read More]
While you can cut the tops and bottoms of the wraps closer to the corrugations, leave the right and left sides long so they can be trimmed to fit when wrapped around their body tubes. The i ... [Read More]
The body wrap reduction piece will take some extra consideration. You can see initially I've cut it a bit oversize. It was set on the third stage wrap and the corrugations centered. Pencil tic marks ... [Read More]
The wraps with more details were saved for last. This way I could practice cutting on the less complex ones. I found it easier to make some "wedge" cuts around the complex raised areas. Again, use a ... [Read More]
The fins are all on one vacuform sheet. There is enough room between each fin to cut them with a straightedge guide. I did leave 1/16" around each fin half when cutting them out. Before sanding and ... [Read More]
In a nutshell, here's how I glued the fin halves together: After lining up the halves, tape the leading edge closed and use that as a "hinge". The rear of the fin is opened and only the back edges ... [Read More]
Sanding these fins is a touchy operation. You want to remove the glued flanges, but not sand through the thin plastic sheet. First cut off most of the flanges, leaving a lip to be sanded off. Don't ... [Read More]
I had an old can of Elmer's Craft Bond spray adhesive, #E-428. The can says "Extra Strength" and Permanent Bond. I'd had good luck with it in the past so I tested it on some scrap vacuform plastic ... [Read More]
Here's the tough one, the Interstage Wrapper. All the S-II LOX Tunnels were taped in hopes the spray adhesive would hold them down. From there, you draw tunnel alignment lines up from the Interstage ... [Read More]
Sorry there wasn't any blog entries this morning, Blogspot was down! While you could visit the site, I couldn't post anything. A few things are still messed up, hopefully it'll all come together ... [Read More]
To get that curve out of the tower side plastic, heat it in water. Heat water in a pan until it just starts to boil. You should practice with a scrap piece of plastic to check how pliable it'll be ... [Read More]
The side pieces took a little time to coax into position. The fit was pretty good after running a sanding block over the sides. After they were set and flush, CA on a toothpick tip glued everything ... [Read More]
To the left, here's the nozzles bells cut right off the plastic trees and dry fitted together. On the right how they'll fit after cleaning up the edges. Like all plastic parts, one side has ... [Read More]
Slightly flatten out the molding lines on the bottom of the supply tube base . Don't take off any height from the molding seams trying to get them too flat! Later, When gluing on the supply tube, I ... [Read More]
Cut the fairings off the vacuform sheet and leave 1/16" all the way around. Before cutting off the bottom ledge, trace over the edge with a pencil. It's easier to see the line instead of just ... [Read More]
This isn't part of the Estes Saturn V build, but it's something you might like to add to the display nozzle assembly. Raul (RoskoRacer) and RockItDad came across a carded model Saturn V model and ... [Read More]
I didn't trim the sides of the fairings, the 1/16" border edge was sanded off. 220 grit sandpaper was wrapped around the open area of the BT-101 and the fairing was moved up and down over it. Stay ... [Read More]
It surprised me how accurate the fin slot mold lines were. I purposely cut inside the lines making the fin slot smaller. I figured I'd trim to fit the width of the fins. In the end, after fitting ... [Read More]
On the forums, there have been concerns about the strength of the fins and fairings. I wanted to make this joint stronger than just plastic cement on the thin vacuformed plastic. I decided to glue ... [Read More]
In step 12, you are to apply a reinforcing coating of liquid cement to the fin joints. I was apprehensive about this, thinking it would leave melted plastic and glue trails. It didn't! I would just ... [Read More]
At the end of step 12, you "cut away the areas on the tube where shown." Like before, a pencil line was drawn. It's easier to see the line you want to cut against the white plastic. For consistency, ... [Read More]
Don't cut the half dowels to length yet! You'll be trimming to the length needed after getting them to right height. The half round dowel tunnels won't butt up against the lip on the vacuform wraps. ... [Read More]
Here you can see the difference in height before and after sanding. The half round on the left is the original, the right tunnel has been reduced in height to match the vacuform wrap. I've yet to ... [Read More]
In step 16, my plastic shim ended up being closer to 2 7/8" long instead of the 2 1/2" long suggested in the instructions. I cut it wider than what was needed. It was glued on, and then trimmed and ... [Read More]
Earlier I had glued the supply tube to the nozzle. Looking at the picture you can see the top of the supply tube is lower than the gluing nub on the nozzle top. If left like this, the nozzles ... [Read More]
There is a short piece of brass wire in the kit. This is bent into a hook to be attached to the 18" upper body parachute. The hook allows the upper section to hang at an angle, reducing the chance ... [Read More]
You can see the original Centuri Saturn V plans HERE It's a fascinating read. There are scans of the vacuform wraps as supplied in the Centuri kit, #KS-12. The wraps and fin edges were die-cut. Check ... [Read More]
Here's a corner from the parachute sheet. It's a copy of the older Centuri Saturn V kit parachutes. While the sheet corner directions show a shroud line simply looped under a tape disk, the supplied ... [Read More]
Nothing too special here, the classic Estes tri-fold mount. I do set the shock cord at an angle so the finished mount isn't too thick. This way the rubber lays beside itself in the folds instead of ... [Read More]
The lugs are glued to leftover tunnel wood standoffs. A slight curve was sanded to match the body tube. This shows the difference in the fits, unsanded on the left and contour sanded on the right. I ... [Read More]
Take a look at the box cover picture. There is a pretty substantial gap at the rounded front of the fairing. The fairing tip is raised from the height of the lowest wrap. I thought about filling the ... [Read More]
I didn't take any pictures of the model sprayed with gray primer. It always amazes me how many flaws show up when sprayed gray. Suffice to say, I had a bit of sanding to remove some glue spots and ... [Read More]
Oh boy - here comes the fun! The first mask should be the easiest - the upper 2nd stage wrapper. I'll be doing each masked section separately. If I were to mask the entire rocket in one sitting, ... [Read More]
After spraying, here's what I was left with. I pulled the tape before the paint had totally set up, maybe 15 minutes after spraying the black. So far, so good. There was glitches, a few small bits ... [Read More]
This is a tough part of the mask. Those raised nubs on the reduction wrap are rounded and not very high. Trying to get tape to adhere to the angled sides will take some extra consideration. First, a ... [Read More]
After removing all the tape, there was some expected rough edges. It didn't turn out badly, considering I used a generic masking tape. Some touch up was done with a fine point Sharpie. Around the ... [Read More]
I know, my build is a little out of sequence. After you've built a dozen rockets, most builders veer away from the order of the instructions. The R.C.S. nozzle marking guide is cut from the ... [Read More]
The instructions suggest using a scribe or sharp pencil to make a gluing hole for the R.C.S. nozzles. A sharp pencil? Don't try it, you'll never get it through the body tube wall. I started the hole ... [Read More]
The center of three R.C.S. nozzles had a molding dimple in them. I filled the hole with thick super glue, placed with a toothpick. After drying, the glue was sanded flat using 400 grit on a sanding ... [Read More]
NOTE! Just like the reduction wrap, the mask measurements for the interstage section are incorrect! The first picture shows one of the masking lines molded into the corrugation of the wrap. The ... [Read More]
After the tape was removed, here's the result. I still have some touching up to do, but overall the results were good. Next up - the final black areas around the fins and fairings. [Read More]
Again, I used Scotch tape for the flat surfaces. The edges were marked with a black Sharpie pen and new straight edges were cut with a strait edge. Pencil lines were drawn for reference and the tape ... [Read More]
After masking the root edges of all the fins, a paper cover was made to entirely cover the fin sides. In the back of the BT-101 tube, rolled paper was taped to the inside to keep out the black ... [Read More]
One tool used to clean off over spray is this cheap, white eraser. Beneath the end of the eraser is a little over spray on the back of the fairing. Before shot: The same fairing - After shot: The ... [Read More]
I had to take a break from the masking! Since the upper section of the Saturn is painted, I wanted to add silver areas of the service module. NOTE: In the Estes instructions, Step 23 Part D, you are ... [Read More]
After laying down the wrap, I noticed a difference from the Centuri instructions: The Centuri RCS nozzle locations are not the same as marked from the Estes RCS marking guide. This is not a big ... [Read More]
The last, lower end mask isn't quite as complicated as the last one. Silver will be the last color. It goes on both sides of he fins and the lower third of the fairings. Once again, use the raised ... [Read More]
Time to take a breather before the decals and final assembly. Before decals, I did have to go back, mask and re-spray the white section. Lots of handling and it got dirty. This is just another ... [Read More]
Instead of bouncing around, I'd recommend start from the top and working your way down. You'll have less chance of the decals shifting while they dry if you are working away from the ones already ... [Read More]
Be careful with these! One came off after I thought it was set down. After a minute of looking, I found it folded over on my fingertip. I set it back into the water dish to get it to open up. Notice ... [Read More]
Take a look at the "I" in UNITED STATES. It's off center! When setting something up vertically, that "I" should be centered like the vertical line in the "T" below it. I worked for years in a print ... [Read More]
You are not given any measurements to set the American flag decals in place. It simply says: "Align with white of roll pattern." I used the T.L.A.R. method (That Looks About Right) to figure out the ... [Read More]
There is a smaller, extra set of decals included with the kit. Apparently some decals were printed without the white backing. Working from the top down, these are the last decals to be placed. I'd ... [Read More]
I waited until the model was painted and decaled before tying on the parachutes. The instructions have you permanently tie the parachute to the upper section in Step 22, before finishing. Even ... [Read More]
Tie a long length of shroud line string to the snap swivel. Connect the snap swivel to the U shaped hook. Lay this string down the upper section and below the coupler. Mark this point on the line ... [Read More]
Step 21 has you loop the shroud lines over a double knot tied in the shock cord.I had concerns that this loop could loosen. I upgraded to snap swivels. It did take a little time to get all the eight ... [Read More]
Oy! Its finished! Definitely one of the longest builds and build blogs I've ever done. Lessons learned along the way: Take extra time sanding the fin fairings to the body contour, otherwise they ... [Read More]
Andrew B. emailed me about my build and asked for some Saturn V finished specs. Here's my stock build measures up next to the Estes numbers from the box spec card: Estes finished weight: 11.0 oz. ... [Read More]
The Dr. Zooch Saturn V gets more searches and blog hits than any other model kit! When I built my Zooch Saturn I never did a build thread. Back then I wasn't scanning the wraps. It's about time I ... [Read More]
This build will not be in the order shown on the Dr. Zooch instructions! I am buildiing the small details first.
This was one of the first Zooch kits I made and I didn’t scan the wrap ... [Read More]
I went "old school" on this one, using a tape border to help sand the taper sharp and straight. TIP: Instead of using masking tape, you can use a strip of clear packing tape. You can sand through ... [Read More]
Don’t remove the tape yet! The picture shows anexample of how the edge should look before removing the tape. Just a little thin line of black remains. When you sand off the remaining ... [Read More]
Lastly, cut the trailing edge using the extended lines. All four fins are ready for grain filling. Sanding the filler correctly will sharpen the taper line more before spraying on a primer.
[Read More]
Those small center curves are easier to cut with a large barrel on the rotary punch. I'm never able to cut anything that round and small with the tip of an X-Acto.
Here's the ... [Read More]
That upper engine bell piece has a very small closed end. I ended up using a toothpick to pre-form the shroud.
I didn't bring a tapered dowel with me on this cruise so I ended up using ... [Read More]
Apply a small line of glue to one side of the engine nozzle edge. Line up the two tab seams. You'll hide these seams later on when they are glued to the rear plate.
While the glue is still ... [Read More]
From the shroud line string, four lengths of line are cut. All are 8 1/4" long. I made the first (extra) nozzle as a practice piece, getting used to the wraps and spacing of the hatbands. Start ... [Read More]
The instruction drawings show six wraps. But with the recommended 8 1/4" length I was only able to make five thread wraps. This picture shows four wraps, getting ready for the fifth and last ... [Read More]
On my first Dr. Zooch Saturn V build, I had trouble making the F.G.P. or “ F unky G lue P utty”. I ended up using some of the “Fix-It” two-part epoxy I’d ordered from ... [Read More]
The heat exchanger dowel sits in a recess on the wide center of the F.G.P. exhaust manifold. Before the F.G.P. totally dries, make a round recess using the end of the supplied dowel. I had ... [Read More]
The "actual size" drawing in the instructions was a little too long when wrapped around the bell. The pencil lines show how much my pumps were shortened. Below the instruction drawing is one of ... [Read More]
In Step 10, the instructions say to “Apply few drops of cyanoacrylate glue to harden the whole thing.” By simply applying a few drops of glue, you might end up with visible drops of ... [Read More]
After the inside of the shroud is covered, go around the end edges. Don’t get the glue on the outside threaded surface. Lightly sand smooth the rear edge of the nozzle bells on some 400 ... [Read More]
There is a lot of information in Step 11 The detail parts build will go around the page from the top, 11 o'clock position around the page in a counter clockwise direction.
On the left are the ... [Read More]
The joints were cleaned up and the excess CA glue sanded smooth with the sides of the four sided file. Mark the underside taper shape 1/16" back from the top. Sand the front end to a triangle ... [Read More]
While the instructions don't tell you to do it, I sand the dowels (or toothpicks shown here) flat for a better fit against the wraps and body tube surface. This shows the toothpick before ... [Read More]
Next up are the S-II Lox Tunnels. Mark another flattened dowel to 1 3/16" long. Then mark the ends at 3/16" from each side. Continue the pencil line around the back flat ... [Read More]
File the underside from the 3/16" mark to the center tip on both sides. After forming the tip to a point.
Taper the to sides down to a point, rounding the sides along the 3/16" line. The ... [Read More]
You'll be making five, 1 3/16" long S-II LOX Tunnels and four, ½" long S–II Ullage Motors. In the next step we'll be sanding the round dowels to a half round shape for a better fit ... [Read More]
Sand the toothpicks or dowels smooth with 400 grit. Don’t take off too much off the surface, keep them close to the original diameter. If there is any deep pits or cuts on the surface, ... [Read More]
These motors are very small. I cut plenty of them and will pick the best two to use on the model. The cut motor is on the left, a finished Ullage Motor piece is on the right with the rounded ... [Read More]
Today we'll go back to Step 10B and finish up the nozzles: You’ll need five 3/8" long pieces of dowel for the heat exchangers, four for the build and one extra. The dowel is cut longer than ... [Read More]
Roll the spoof in place making sure the top edge is even with the top of the dowel end. The top of the spoof wrap should be even with the top of the upper shroud cone. I had to trim off quite a ... [Read More]
The engine block was dry fitted, slid down onto the engine hook without glue. After I'm sure it's in the right place, a fillet was applied using a Q-tip. I'm not a big fan of BT-20 tubes, they ... [Read More]
I'm back home and able to get back to the Dr. Zooch Saturn V. The engine mount is actually Step 2. Step 1 was the parts list and parts illustration. The tube is notched for the engine hook, two ... [Read More]
Step 2A has you dry assemble the body tubes and balsa adapters for a white primer coat. I don't feel a sanded primer coat would fill the balsa grain on the tapered section of the Apollo adapter. ... [Read More]
The large adapter had a bit of a "dip" on it's side surface. I sanded it down a little. This adapter will be covered by the S-II/S-IVB wrap. That dip won't be noticed. Still, I wanted a flatter ... [Read More]
For the past year I've been using Dupli-Color Automotive Filler Primer. I've read about other modelers doing three light coats of primer sanding between coats. Lately I've done only one thick ... [Read More]
The Step 3 illustration shows the Zooch Ant cutting the fairings out on the outside lines. I cut mine a little outside the lines. When they are glued onto the BT-20, you'll cut through both the ... [Read More]
After the fairings are cut out they are close to a good fit against the BT-60 main tube. The ends make contact but the the center area is raised in a slight arc. Note: This picture was ... [Read More]
The more models you build, the more you'll jump around the instructions. On this build I am jumping ahead to make the painting and masking easier. Only time and many builds will tell you where you ... [Read More]
With the rear wrap taped in place, the black areas were extended down the body tube using a pencil and aluminum angle. These lines will only go a little over an inch above the top of the wrap ... [Read More]
The instructions have you form and glue the adapter together and glue S-IVB tube before test fitting the wrap. The S-II / S-IVB adapter wrap was cut out and a test fit was done before ... [Read More]
Yep, there are more detail pieces than you'll need for this build. That was a LONG month on the ship, I had a lot of spare time. If I ever build another Zooch Saturn, much of the detail ... [Read More]
Here's where the Dr. Zooch models start to really look like something - the card stock wraps.
This picture better shows how the wrap edges cover up the painted edges.
Lightly sand down ... [Read More]
When rolling on wrap D, slide the adapter in place to be sure it is in line. Just be careful not to glue the adapter into the main body! This is my second Zooch Saturn V build. On this build, the ... [Read More]
I've already primed, sanded and painted the LES dowel. For no real reason, I decided to glue on the Boost Protective Cover wrap first.
Much like the adapter wrap in Step 4, the fit was a ... [Read More]
My service module wrap was a little tall. I wanted to fill the gap. A disk was cut from some scrap mat board. A hole was punched for the LES dowel with the rotary punch. The disk was sized ... [Read More]
The instructions say to "Use a large amount of glue inside the BPC when attaching it to the adapter . . . it will harden and form a solid nose cone." I didn't want to take the chance of the ... [Read More]
It's easier to score the fold lines before cutting out the tower. For a better reference line, I drew pencil lines beyond the edges of the tower folds. The tower didn't have a glue tab, I added ... [Read More]
TIP: It's easier to cut out the center of a small shroud first, then cut the outside. Leave as much stock on the outside of the shroud for something to hold onto.
After gluing the tab, the ... [Read More]
Sometimes when you pull pieces off the sticky side of a masking tape board, the paint and tape goo leave a uneven edge. Sand down the flat bottom of the detail pieces and fin root edges with 400 ... [Read More]
An earlier post talked about shaping the fairings for a better fit against the BT-60 main body tube. After test fitting, I had to go back and do some more forming. The instructions say to "use a ... [Read More]
I did mark the edges of the fairings so the white card stock sides wouldn't show after gluing to the body. Do this quickly and carefully, you don't want the marker ink to bleed onto the ... [Read More]
NOTE: Be careful about changing the fin surface area. These models are very stable as built by the directions. They require the template size fin area and installed nose weight to fly. The model ... [Read More]
A great thing about the Dr. Zooch Saturn V, the F-1 engines stay on for flight! I wanted to be sure they were well attached.
Earlier I neglected to paint the inside of the engine ... [Read More]
The S-IVB APM and S-IVB Ullage motors glued on. Simply center them above the black /white color separation lines on the adapter wrap.
When set over the wrap, the S-II LOX Tunnel front ends ... [Read More]
The upper and lower long cable tunnels were notched to fit over the wraps. Set the tunnel over the body and mark where it intersects the wrap edge. The square edge of the notch was cut with a ... [Read More]
Here's how the 5" long S-IC tunnel sits over the wraps and black areas. It will have to be painted black where it covers the black vertical strips.
I used Scotch tape for the masks. A small ... [Read More]
The bottom of the long tunnels were notched for a better fit over the wraps. On the right I'm scraping a little of the paint off down to the body tube for a better glue joint. Look all the ... [Read More]
Instead of just cutting the lugs in half, try to match their lengths to the wrap widths they'll be glued on. The lugs were filled and painted before cutting them to size.
Here a launch rod ... [Read More]
I wasn't happy with the way the fin cut outs looked. After correcting the angle of the fins (sanding the root edge) the root edge was shorter and didn't fit the cut out areas in the fairings. On ... [Read More]
Back tracking to Step 9, I waited to glue on the fin letters and Roman Numeral position markers. The paper letters and numbers were held with tweezers for gluing and positioning. Below the ... [Read More]
This is a great Zooch kit and a must have for any rocket enthusiast. A great flyer with Estes B6-4 and C6-5 engines. Don't use a Quest C engine in it! It will be on ... [Read More]
I'm doing a build of the Estes reissued Saturn V kit for a client. Here's a fin reinforcement I wish I'd done on my first build of the Saturn V with the vacuform fins. The hollow, vacuform fins are ... [Read More]
Immediately after the wedge piece was glued on, I ran the edge down a rut in my corrugated cardboard cutting board. This straight dip in the cardboard helped raise the sides of the glued piece up ... [Read More]
On the left, look at the "I" in "UNITED". It's not centered ! The type was set with the I a little to the left. It should be in line with the center line of the T. I spent a few years ... [Read More]
You can apply this tip whenever You have to make a bunch of bends the same length. In Step 17 of the Saturn V kit, you bend a brass wire into a "U" shape. (The wire is an attachment point for the ... [Read More]
After the last hard street landing, my older Zooch Saturn V was missing a fin. A few flights before that a nozzle had broken off. I didn't follow my rule of checking the landing area when flying ... [Read More]
On the DR. Zooch Saturn V kit you use quite a few printed wraps. This makes most of the masking and painting much easier and more detailed. At the bottom between the red USA decals, you do have to ... [Read More]
Just up on the Estes Website - CLICK HERE At the moment it is showing as "Out Of Stock". Retail price is lower than the last batch at $79.99. No news about parts changes. We can hope the fins aren't ... [Read More]
From the Estes website, the Saturn V kit page: " One new feature worth mentioning are the fins. This version now has two-piece injection molded plastic fins for added durability during flight!" I ... [Read More]
Estes has re-released the Saturn V kit - CLICK HERE This new version has injection molded two-piece plastic fins, a big improvement over the two-sided vacuform fins. There are probably other updates ... [Read More]
This afternoon on YORF, The Mole posted pictures of the new Saturn V instructions. It looks like the older instructions with the new two-piece fin drawings dropped in place of the older vacu-form ... [Read More]
With the re-release of the Estes Saturn V, I thought it would be interesting to do some quick comparisons between the original Centuri and Estes kits. Estes and Centuri both debuted their Saturn ... [Read More]
An email from Mike Rufener - Hi Chris! Just got a Saturn V (2157) and it has both vacuum formed fins, and hard plastic fins. I think I'll use the newer ones. I also noticed that the "yellow engine ... [Read More]
The first run of the Estes Saturn V kit only has the short yellow D engine block setting tube at 2 3/4" long. The model should be built for the 3 3/4" long E engines. If you don't have a E engine ... [Read More]
I finished up an Estes Saturn V build for a client. If you have a kit, look close at box picture. It is a picture of an actual build and not a C.G. image! Here's two things that could see i ... [Read More]
According to the BMS website, the BMS/Alway Saturn V kit has been out of production for eight years. The picture above is from a build I did a few years back. This is a very well engineered kit. ... [Read More]
This picture is from the first build I did, from a few years ago. The new kits have the red and white Odd'l Rockets style 18" parachute. After a few kits were sent out, Bill at BMS realized the ... [Read More]
I did use my hobby knife to free the middle from the centering rings. The small squares are for attachment of the F-1 nozzle assemblies. This is the bottom ring of the mount. I usually clean up any ... [Read More]
Inside the nozzle shrouds is a three-piece plywood frame. I pushed the rectangular center out of the bottom disk with the inside longer strut. At the top end of the shroud small disk. Looking at ... [Read More]
I did have to sand down the ring inside for it to slide down onto the lines on the nozzle shroud. The top (with the narrower laser cut side) was marked so I didn't sand out the slight inside taper. ... [Read More]
Small holes were punched in some scrap cardboard and the nozzles set in standing up. Just the top, flat surface got a shot of Duplicolor filler/primer and smooth sanding. The bottom of the centering ... [Read More]
The fins are removed from the sheet and the sides sanded clean. On the right the outside edges have been rounded. The plywood grain is fine but still needs to be filled. Here the root edge has been ... [Read More]
Cut out the fin slot first. Keep the small end cut corners clean. Here I'm cutting from the outside corners to the center of the small top and bottom. You don't want the corners cut wider than the ... [Read More]
More Scotch tape masks were cut over glass, this is the curved silver line mask on the low end of the fairing. The shroud guide was set over the black and white fairings and the edge lightly marked ... [Read More]
I skipped ahead to Step 48 figuring it would be easier to apply the bands to the smaller tube first. TIP: Mark the end of the laser cut self-adhesive strip. When the strips are cut off it's hard to ... [Read More]
The kit contains two half-round dowels to make the tunnels. Start by sanding the backs flat with 400 grit on a sanding block. TIP: You'll find it easier to smooth the round sides if the dowel halves ... [Read More]
The escape motor dowel was longer than the 1 1/2" needed. The tip was shaped to a cone and then cut to length. TIP: Why not cut the dowel to the 1 1/2" length first? Leave it long and you can have a ... [Read More]
You are supplied with a few extra escape motor shrouds. I would suggest making up a few and selecting the best one for your build. After carefully cutting out the shroud, you might still have an ... [Read More]
After the shroud dried it wasn't a perfect circle. TIP: A dowel end was carved and sanded to a cone shape, matching the angle of the shroud side. Set the shroud on the carved cone. With your ... [Read More]
The four RCS thrusters are removed from the 1/32" plywood sheet. These are also tiny so extras are included in the kit. Flip the sheet over and notice on one side the burn line is wider. The wider ... [Read More]
The Ullage Rockets are ridiculously small! You are supplied with four, you only need two. Before removing them from the sheet, sand the sides smooth. The top edge is sanded round. Tweezers help to ... [Read More]
Save the dowel lengths left over from the long tunnels. This is an over exaggeration - but cut the dowels over size, longer than the APS Unit Core center piece. Two set of dowels and the center ... [Read More]
Please note: I use clear Scotch tape for masking. If your surfaces aren't clean, you probably won't get a sharp masked line using Scotch tape. If in doubt, go with the Tamiya tape. I'm just cheap! ... [Read More]
The upper and lower vertical lines of the lower body mask are in line with each other. Use an aluminum angle to join light pencil lines between the top and bottom roll patterns. Here's the start of ... [Read More]
Finally you get to trim the low end of the body tube. Cut the hold-down tics. You might have to do some other trimming if the laser line didn't go all the way through. Here's how the low end looks ... [Read More]
Look at the shape of the fairing from the top. You want a good smooth curve of the outside edge. On the left is the before, on the right is after some very gentle forming. I set the fairing tip ... [Read More]
The five Liquid Hydrogen Lines are glued in place, centered on the masked rectangle areas. The instructions don't mention to do this, but I cut away the wrap strips under the glued on lines. The ... [Read More]
Most all the decals went on with no real problems. This post will concentrate on the small fin decals. The fin letter decals are tiny! TIP: To make the placement consistent on all fin sides, extend ... [Read More]
The fit of the fin fairings could have been better, three out of the four were good. I've mentioned before what a well engineered kit this is. It's a manageable sized Saturn V and flys well with a ... [Read More]
From the Facebook Model Rocketry Fanatics page: Aldo Spadoni to Model Rocketry Fanatics!!! I’m very excited and proud to announce that Estes Industries has licensed my artwork to ... [Read More]
On YORF, John Boren posted some information about the new #1969 Estes Saturn V: "The only thing that is the same on this kit from the last one are Most of the body tubes and the injection molded ... [Read More]
On the NAR Facebook page, James Duffy pointed out that Estes has added Saturn V parts to their website! CLICK HERE to see the listings. You can upgrade your old kit to the new specs. [Read More]
Looks like I'm building TWO Saturn V models! (After I finish these up I doubt I'll want to look at another Saturn V for a while.) With all the various Saturn V builds shown on this blog, this new ... [Read More]
Again, the older wraps are at the top, the new ones are at the bottom. In the older kit, these two wraps were on the same plastic sheet. Now they are separate. The older wrap was two different ... [Read More]
Check the ends of the body tubes to see if there are any cut "stringers". The larger diameter the tube, the harder it is for the vendor to cut clean. Sand the ends flat and square. The big BT-101 ... [Read More]
Some thoughts on yesterday's post: I know most builders want to dig right in and assemble the model - then think about filling the body tube seams. With all the wraps and tunnels on the tubes, ... [Read More]
The rear centering ring should end up 3 3/8" from the bottom of the main air frame tube. GOTCHA: Try a dry fit and you'll notice the rings seem small! The engine mount can slide right through the ... [Read More]
Most of this build series will be close to the order of assembly in the Estes instructions. While I wait for glued assemblies to dry I might bounce around the assembly steps. TIP: I used my sanding ... [Read More]
GOTCHA: On YORF, the great builder Jeffy Jeep noticed a measurement question in the instructions. The copy says the reinforcement ring should be 3/4" from the rear of the tube. The drawing ... [Read More]
The third stage assembly was slid into the upper end of the BT-101 tube for spraying with Duplicolor Filler/Primer. Sliding the centering ring assembly down inside the BT-101 will protect the shroud ... [Read More]
Here's the slightly larger shroud from the #2157 kit. TIP: Use scissors on the curves, a knife and straightedge on the straight cuts. On my thumb is a piece of sandpaper. I'm sanding the edges, ... [Read More]
Here's the final fit, ready for gluing. The large end overlaps the coupler slightly, making a "stop" going into the BT-101 lower tube. The assembly is straight, there is some camera distortion. The ... [Read More]
This is the type of glue you should be using - Bottled liquid plastic cement with the brush attached to the cap. Tube type plastic cement is iffy and not what it was fifty years ago. This ... [Read More]
To hold the nozzles for painting, I punched hole in cardboard with a pencil. The pins in the top were pressed into the pencil holes. I also had to flip over and spray the nozzles from the top. There ... [Read More]
The vacu-form wraps are cut out with a 1/16" border. That border gives you a small flat edge surface for the spray glue adhesion. I tend to cut the seam sides (right and left sides) wider than ... [Read More]
To show what a rocket nerd I am - I'm watching a re-run of the Big Bang Theory, the episode was centered around model rockets. Howard found a storage box of rockets from when he was a kid, twenty ... [Read More]
I went to the monthly NEFAR launch in Bunnell, Florida. The Fire and Forget rocket was one of my first out of eight launches today. The RSO read my description: "Anyone who finds it can keep it to ... [Read More]
I was going to do a model feature on the blog and had to clean a rocket up for pictures.
This Zooch Saturn V has a white finish, dirt and fingerprints show up easily.
Anytime I ... [Read More]
I recently bought the Quest MicroMaxx Super Value Starter Set (SVSS). Quest had a holiday sale and at $36.00 it was too good to pass up. This included 50 MicroMaxx engines, a controller, MMX launcher ... [Read More]
Estes has lowered the prices of it's Saturn V kit by 20%. On the Estes website, that puts the price down to $80.00 retail. I did some online searching and found the kit for under $50.00! I ordered ... [Read More]
George Gassaway is a master builder and competitive flyer. If you really want to see how it's done, check out his website at: http://homepage.mac.com/georgegassaway/GRP/GRP-home.htm On that website ... [Read More]
I've built a lot of towers over the years. For comparison, here's the Saturn towers from various kits. On the upper left is the BT-20 based Dr. Zooch Saturn V tower. It's really a silhouette tower, ... [Read More]
This model was a great break after the Saturn V build. I was ready for something different and this certainly fit the bill. I have to give credit to whomever the designer was. There are a few great ... [Read More]
Oh boy - another Saturn V! Actually, I'm building two Apogee Saturn Vs for a customer. In quality and size, this Saturn is a big step up from the Estes kit. Recently, I've been using the seam ... [Read More]
On a recent trip back home to California I found my old Estes Saturn V. The pictures of the unfinished Estes Saturn were taken in the attic of my Grandparents ranch house in Moss Landing, C ... [Read More]
I've used the Mr. Clean Magic Erasers with good results on the walls of my house. It never occurred to me to use them on light colored rockets. These Scotch Brite erasers less expensive than the Mr. ... [Read More]
Part 2: On a recent trip back home to California I found my old Estes Saturn V. The pictures of the unfinished Estes Saturn were taken in the attic of my Grandparents ranch house in Moss Landing, ... [Read More]
Recently I received an Email from Heinrich in South Africa. He came across my Estes Saturn V build when doing some image searches. I sent him the PDF scans of the shrouds and some downscaled ... [Read More]
Recently I received an Email from Heinrich in South Africa. He came across my Estes Saturn V build when doing some image searches. I sent him the PDF scans of the shrouds and some downscaled ... [Read More]
I bought one of these neck rings if I ever needed to take a nap in my car. I've found a second use for it. Recently I had to take an Apogee Saturn V to the UPS Store to have it weighed for shipping. ... [Read More]
I'm proud to announce a new vendor carrying Odd'l Rockets products: SIRIUS ROCKETRY Click on the logo to go to the Odd'l Rockets page. Be sure to check out all three Interogators, the U.S.S. ... [Read More]
I had 280 launches in the past year, 85 flights more than in 2010. Of the 24 builds completed in 2011, these are my top picks. Click on the BOLD NAME to go to the finished pictures or blog post. ... [Read More]
Only one post today - this is long one! I ended up printing two sizes of the Scavenger name and picked the smaller of the two. The only decal on this rocket is the name - big and simple. The name ... [Read More]
I jumped ahead to the engine fairings - I pre-formed the fairings so they might glue easier to the BT-5 sized tube. As I've done before, a dowel was rolled over the fairings with a dowel in the heel ... [Read More]
I decided to use the optional Saturn V style wraps supplied in the kit instead of the corrugated wraps shown below. It's up to you which to use but I wanted to show the gluing of the original ... [Read More]
The line at the top is your index line. The corrugated or Saturn V style wraps start on this line. The seam on your boattail shroud should also line up on the index line. This way the seam won't be ... [Read More]
I didn't glue on the lugs back in Step 2A. I waited for two reasons: 1. I fill the lug seams and knew the lugs would be painted white before gluing in place. Adding the Saturn V wraps changes the ... [Read More]
If using the Saturn V wraps, you have to wait to glue on the feeder line. The shaped feeder line dowel was sealed and sanded with two coats of varnish. It was painted before gluing on the core body. ... [Read More]
As far as I could tell, three NASA meatball logos are place 120 degrees from each other. You can see the small, vertical UNITED STATES decal set on either side of the upper core tube. The kit ... [Read More]
There's a LOT of decals to place on this model. A good reference is Jim Balls's Scale Data hosted by Rocketry Online: http://www.rocketryonline.com/jimball/jimball/aim-54a/aim-54a.htm
The ... [Read More]
If you can read the small print you know what I'll be working on while on the next cruise. I'll be gone for 30 days, four cruises on three different ships. One of the first Dr. Zooch kits I tried ... [Read More]
Today I went back and added a "DZ" to the labels on the Dr. Zooch Saturn V build posts. This will distinguish the Dr. Zooch Saturn build from the Estes Saturn V build done earlier. I'll try to make ... [Read More]
I drove to Oviedo, FL (JonRocket.com Headquarters) to pick up Roger Smith. He had a new camera and put it to good use today! Still pictures are mine, all action shots were taken by Roger. Roger's ... [Read More]
The original Estes S.P.E.V. was said to be a S pare P arts E limination V ehicle. The facecard called it a SP ace E xploration V ehicle. You can see the profile of the (then discontinued) Thor ... [Read More]
Lots of memories building this one. I built an Estes SPEV in 1972. Looking at it now it's easy to see the Thor Agena B and Little Joe parts being utilized. It's not a ... [Read More]
If you've ever made a Nike Smoke, to paint the fins you'll need: Fluorescent Yellow and Fluorescent Red / Orange I had already bought the Rustoleum Fluorescent Orange at Home Depot. I ... [Read More]
While the ship was docked in San Diego I took a shuttle to Balboa Park. I'd heard of the Balboa Park for years but had never been there. It was a great surprise! I stopped in at the Air and Space ... [Read More]
On TRF, HermanJC is making a scratch built Saturn V. He's even rolling his own body tubes! CLICK HERE Tube rolling is explained in this Instructables pictorial: CLICK HERE This could come in handy ... [Read More]
I always run across these wood models when doing searches on EBAY. This Saturn V is the same style I saw on display at the San Diego Air and Space Museum. "Meticulously Made by our Master ... [Read More]
In a comment, Jim asked to see some other models in the fleet.
Here's the Shelf Queens, the models that don't fly!
(Yes, they are in a kitchen cabinet. I'm single and ... [Read More]
While I deal with smaller, low power models, occasionally I have to transport something BIG. I bought one of these neck rings if I ever needed to take a nap in my car. I've found a second use for ... [Read More]
I went to the Estes website to buy two 1/100th Saturn V capsules. I was also going to purchase one of the Specials - the one with five rockets, two boosters, a launcher and controller. This was ... [Read More]
I formed the nozzle shrouds in the heel of my left hand using a tapered dowel. The shroud is glued with the tab overlapping. That seam will be towards the center engine mount tube and not n ... [Read More]
The fin fairings are painted white. I used gloss white. I can always use a flat clear coat later on. Here I'm lightly sanding the side that will get black in the next step with 400 grit sandpaper. ... [Read More]
The tunnels were set onto the laser cut line positions and taped in place. The strips were cut close to the tunnel edges with a razor blade. Remove the strip ends between the tunnel lines. A closeup ... [Read More]
Extend the lines out on the Actual Size drawings to mark the hydrogen line pieces. Taper the ends to a point first, then round the sides. The LOX Vent is shaped, the "flats" formed with 220 on a ... [Read More]
The glue areas for the fin assemblies and detail pieces are masked for gluing later on. On the fin fairings, set a masking tape strip on the diagonal line. A second piece goes on the lower right ... [Read More]
On the NAR Facebook page - John Wilkerson posted some pictures from the NARCON Manufacturers Presentation. I'm sure there were other products, these seemed the most interesting. Matt Steele ... [Read More]
On TRF, Winston posted a link to the 2020 NARCON Maunfacturer's Forum. The video was produced by Apogee. CLICK HERE At 0:01 - AEROTECH - Available in the Fall, Q-Jets will ... [Read More]
I tried to get i n on the virtual NARAM Manufacturer's Forum last night, but the NARAM website wouldn't load! Here's some of the comments from TRF this morning from some who did see it: ... [Read More]
On the Facebook Model Rocketry Fanatics page, Steven Carricato posted a parts picture from his new Saturn V and Saturn 1B kits. I noticed something interesting. In the center of the ... [Read More]

 If you haven't got your Estes Saturn V kit yet, the instructions are available for viewing from the Estes website: http://www.estesrockets.com/assets/instructions/002157_SATURN_V.pdf These ... [Read More]