Estes Saturn V
Estes - Saturn V {Kit} (2157) [1998-1998, 2010-2011, 2016]
Contributed by Mike Caplinger
| Construction Rating: | starstarstar_borderstar_borderstar_border |
| Flight Rating: | starstarstarstar_borderstar_border |
| Overall Rating: | starstarstarstar_borderstar_border |
| Published: | 2018-06-13 |
| Diameter: | 3.94 inches |
| Length: | 43.25 inches |
| Manufacturer: | Estes  |
| Skill Level: | 5 |
| Style: | Scale |
Brief
This is a short review of the Estes Apollo 11 Saturn V kit, number 2157. I purchased the kit in 2017.
There are several reviews of this kit in its various forms over the years on RR and tons of information on the web. Probably the definitive source of information is Chris Michielssen's build thread from 2011, which starts at http://modelrocketbuilding.blogspot.com/2011/04/estes-saturn-v-build-part-1-parts.html
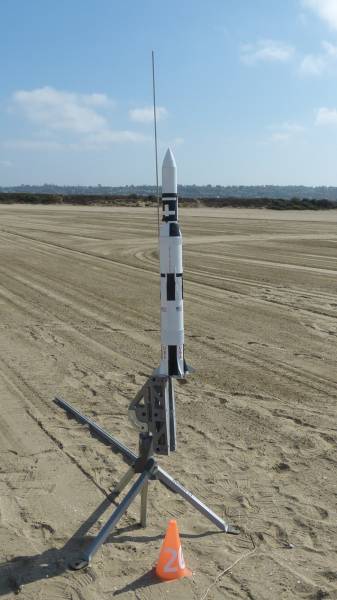
I'm going to focus only on a couple of major complaints I had about the kit. Also, I decided to build the model as the Skylab I launch vehicle, so I had Gordon (Sandman) at Roachworks Custom Turnings make me a balsa Skylab nose cone and I added some length to the BT-80 of the third stage, which allowed me to skip the parachute suspension system that the stock build uses.
Disclaimer: I'm going to describe a lot of problems I had with the build, and my overall rating is going to be pretty low. That said, many people are better builders than I am and there are many instances of great kit builds out there, so it's not like it can't be done. I just think that the kit is unnecessarily hard to build, so view this as constructive criticism. Or feel free to assume that I'm just lazy and not much of a craftsman, I won't argue.
Components
The kit uses vacuform plastic for four body tube wraps, the second-stage transition, and the first-stage fin fairings. Unlike earlier versions of the kit, at least the fins are regular plastic and come in two halves.
Construction
In theory the vacuform wraps are great for scale detail, but I found it basically impossible to get them properly glued on. I used 3M Super 77 spray adhesive, which proved to be the worst of all possible worlds: sticky enough to make it difficult or impossible to reposition the wraps, but not so sticky that it holds the edges of the wraps down permanently. I ended up trying to glue the edges down with CA or epoxy, which worked a little better but not perfectly. I don't know what the solution for getting the wraps on is, but it's not Super 77. (Some people have reported that 3M 90 works better; also note that the formulas for all of these may change without notice, so proceed with caution. At least the Super 77 didn't eat the vacuform plastic.)
The fin fairings have to be magically cut to shape to properly fit. The instructions don't really discuss how to do this. Chris' build thread describes a sanding process and shows the old Centuri instructions, which used a cutting template to trim the fairings. I don't think it's actually possible to trim the fairings with or without a template, but at least the older instructions acknowledged that it was complicated.
I spent hours trying to sand the fairings to fit, and declared victory once they were even close -- they still weren't very good, but I know my limits.
I'm not sure why they just didn't form the fairings to conform to the curve of the BT -- it would be about 1000x easier to deal with -- but probably vacuform technology doesn't easily permit it. Even better, the fairings and fins could be completely replaced with an injection-molded version like the Moldin' Oldies castings.
The cardstock transition at the top of the upper stage is as hard to fit as most paper transitions, with the added complication that you have to get the vacuform wrap over it to fit correctly and adhere.
Finishing
The Saturn V roll pattern involves masking. A lot of masking. A lot of masking over the corrugated ridges, bumps and details of the vacuform wraps. I spent about a week and nearly an entire roll of blue masking tape on this. Chris describes a process using scotch tape, and he seemed to have made it work, but it exceeded my patience. It's possible that masking tape made specifically for plastic models, like Tamiya tape, would make this more feasible.
At the end of the week when I pulled all the tape off, I had plenty of irregular lines, leaks, and overspray from the black. I scraped and sanded some of it off and painted over the rest with brush paint. The result was marginally acceptable from 10 feet away (see the picture and judge for yourself), but not one of my finest efforts.
Removing the four non-scale ullage motors from the upper first-stage wrap would reduce the amount of masking and be scale-correct. (Skylab didn't have any ullage motors at all but I didn't want to mess with trying to cut them off and fill the remnants.) I wouldn't object if there were masking guidelines molded into the wrap like there are for the transition wrap.
Alternatively, something like the Semroc Saturn 1B's embossed paper wraps and attached details would be easier to glue on and selectively paint and mask.
Flight
To get the CG as far forward as possible, the kit recesses the motor a little under 4 inches into the BT, and uses the 24mm MMT as a long stuffer tube. The result is that the amount of space for the three parachutes is surprisingly tight. This might be important if you were going to fly the rocket with Estes BP motors with their comparatively wimpy ejection charges, but most people at this point will be using composite motors like the Aerotech E15, which would have no problem pressurizing a much larger volume. So I suggest leaving more room for the chutes by cutting the MMT down and moving the upper centering ring down; I didn't but regretted it. One might also consider moving the motor back, which could require more nose weight, but would make it easier to access.
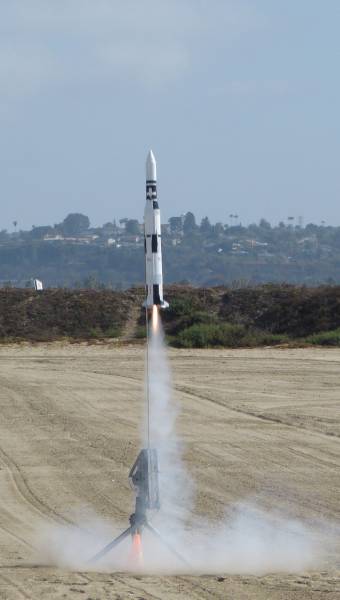
The first flight on an Aerotech E15-4 was nice and straight, went to about 350 feet, and the delay was dead on.
Recovery
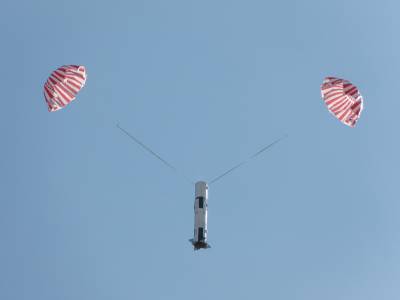
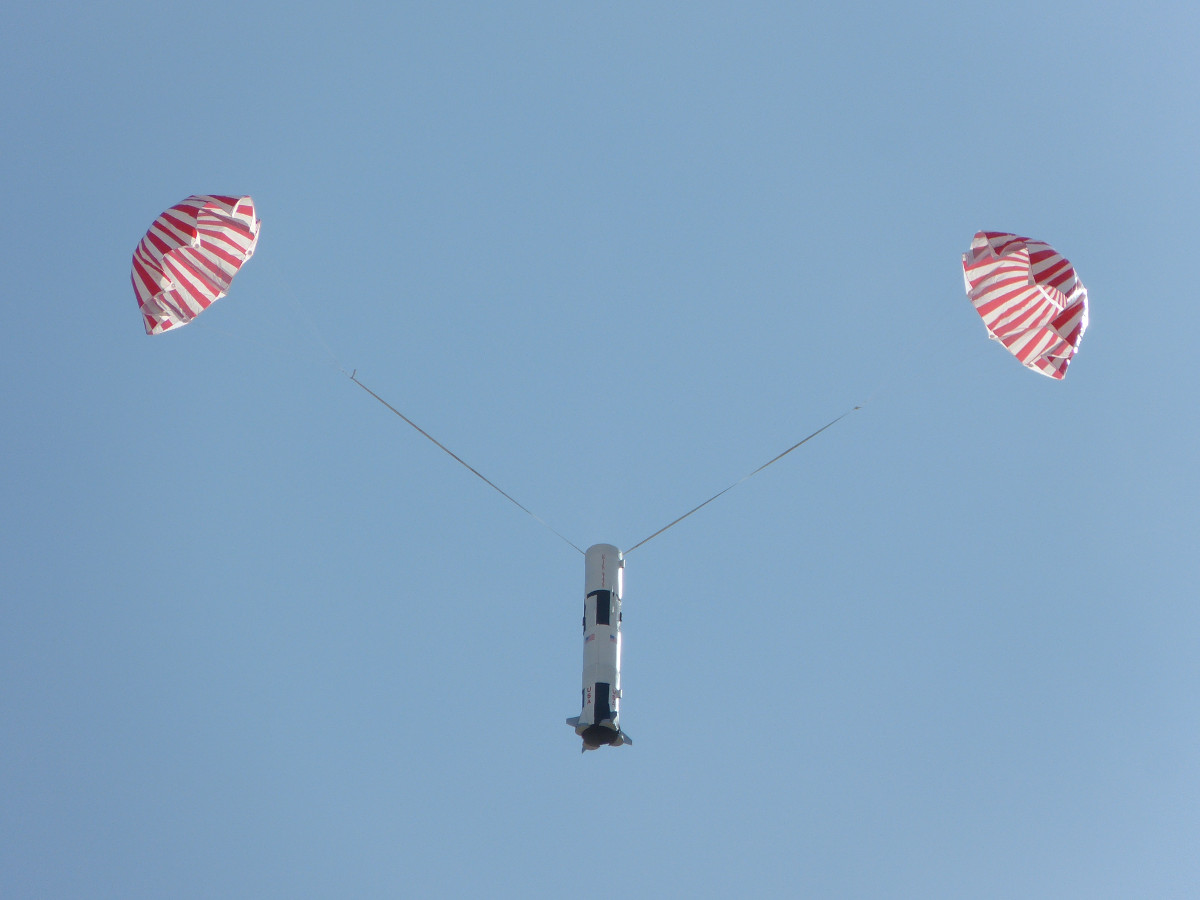
The kit has three standard Estes plastic parachutes, two 24" for the first and second stage section and one 18" for the third stage and Apollo.
The two booster chutes opened perfectly and the booster section descended slowly and majestically, but even so one fin and one fairing were partially broken off, and this was landing on soft sand. Not the most robust rocket I've ever built.
Despite my best efforts in packing, the third stage parachute was hopelessly tangled and the stage came in nose first. My Skylab mod proved robust, though, and the rocket escaped any damage beyond a slight dent on the nose cone.
You might consider replacing the plastic chutes with thin-mill nylon chutes, maybe just one large one for the booster.
Summary
Pros: It's a Saturn V in a large size and reasonably priced compared to the alternatives. In the hands of someone who knows what they're doing and is willing to invest the time, the results can be outstanding. It's also very light for its size -- mine came in at about 13 ounces and it might even be marginally flyable on a D12 on a calm day.
Cons: it's a very complicated build, and IMHO not in a very enjoyable way. To me the vacuform wraps and the masking were mostly just exercises in frustration.
Other Reviews
- Estes Saturn-V/Apollo 11 By Jim Stuckman
First Impressions: 10/31/98 - Tonight I had a large package waiting for me when I got home - a beta-version of the soon to be released Saturn V!The kit is packed in a NCR style box with a cool graphic of the Saturn V. The specs on the label are: 43.25" Long 3.938" Diameter 10.2 oz weight Motor D12-3 Est. Max Alt - 100' Upon opening the box, it quickly becomes ...
#Related Reviews
Related Products
 |
 |
Flights


|
|
Mike Caplinger (June 20, 2018)
Some people swear by contact cement. Others used epoxy or CA exclusively. I considered some kind of double-sided bonding tape, which could be positioned with one side not exposed yet (like the way an Accur8 vinyl wrap is positioned), but I was too lazy to search for an appropriate product and had the Super 77 available. I just can't make anything that requires you to get one edge lined up perfectly with no repositioning come out right when you get to the other edge.
Philip Nubel (December 21, 2018)
I discovered a good solution to bonding the wraps - use 30-minute epoxy. I brushed a thin layer of it on the backs of the wraps, positioned them on the tubes, then used rubber bands to hold the wraps in place overnight to dry. The 30-min epoxy allowed plenty of time to position the wraps properly, put on the rubber bands, and wipe off excess epoxy before it started to set. Once the epoxy cures the wraps are permanently bonded. My Saturn is over 2 years old now with 3 flights and none of the wraps have even partially detached. (Note - I also used this method to glue the wraps on my Estes Little Joe II and Mercury Atlas).
|
|
David Montgomery (June 16, 2018)
Did you consider using contact cement (the kind that comes in a small brown bottle and had an attached brush under the cap)? When I built both my 1/100 scale Saturn - V's from Centuri and Estes, contact cement worked just fine. You really have to make sure you have wraps correctly lined up before applying the two surfaces together.