Sunward Aerospace Gravity Rider
Sunward Aerospace - Gravity Rider {Kit}
Contributed by Preston Hoover
| Construction Rating: | starstarstarstarstar_border |
| Flight Rating: | starstarstarstar_borderstar_border |
| Overall Rating: | starstarstarstar_borderstar_border |
| Published: | 2010-05-16 |
| Manufacturer: | Sunward Aerospace  |
Brief:
The Sunward Aerospace Ltd kit the Gravity Rider is a kit for the future. The duel cluster motor,
dovetail design and slanted end tube cuts give the rocket a sleek futuristic look. The kit boasts High Quality Laser
Cut Balsa, Safe 18" parachute recovery, HUGE - Length 40" / 101cm , Wingspan 10 1/2" / 26cm , includes
metal motor retaining clip , build as a cluster or as a single engine unit, Instructions, and Self Adhesive Decals. It
is rated a skill level 3
Construction:
The parts in the kit include:
- Two BT-50 tubes.
- Two BT-20 tubes.
- Parts to build two 18 mm motor mounts with engine hooks.
- Three, two piece plastic nose cones. two BT-50 and one BT-20.
- Four 50-20 centering rings.
- Two Laser Cut Fin Sheets.
- Launch Lug.
- One 18” parachute, string and reinforcements.
- Two rubber shock cords.
- Instructions and Decal Sheet.

The Gravity Rider kit came with all the parts specified in the instructions. There were no broken parts.
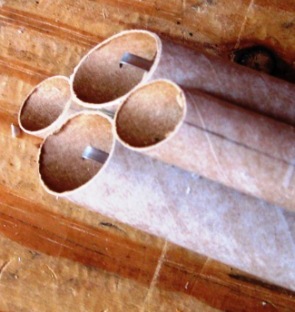
First step is cutting out the tube cutting guides. The cut one of the BT-20 tubes in half. Tape the cutting
guides to the ends of the tubes and cut. Then you glue the tubes together.
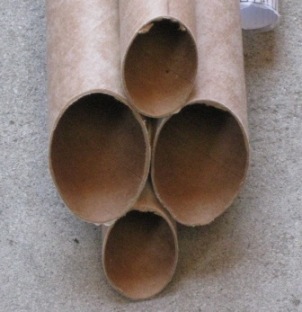 When
dressing the ends of the tubes do not go crazy. You can lose the angle you just tried to achieve with the guide. Also
changing the angle affects the looks of the rocket when you glue the BT-50 tubes together in the next step. When the
angles are not true the lengths are affected.
When
dressing the ends of the tubes do not go crazy. You can lose the angle you just tried to achieve with the guide. Also
changing the angle affects the looks of the rocket when you glue the BT-50 tubes together in the next step. When the
angles are not true the lengths are affected.
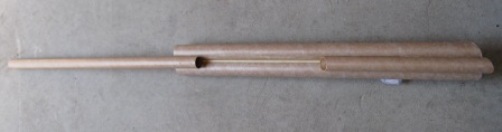
Next you glue the two main body tubes together so they are side by side.
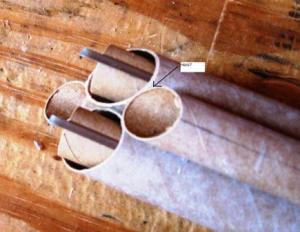
Glue the two short BT-20 tubes to the aft end of the main body tubes. Ensure the tube cuts matchup. One goes on top the other on the bottom.
Measuring two inches form the forward end you glue the long BT-20 tube between the two main body tubes.

Fin preparation and mounting is next. I built a jig for the 45° angle.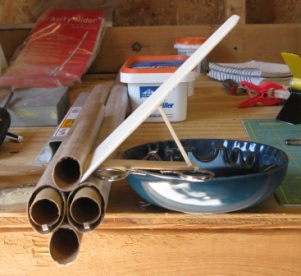
Pros building:
1.The tube cuts challenging and fun!
2.The Main fins and Lower fins were also a challenge, getting them to hold a 45° angle. I had to fashion a jig.
3.You are given a choice to build a one or two motor rocket.
I consider a choice or a challenge a Con. The challenge builds our skills and the choice builds your imagination.
Building Cons:
1.Instructions for the forward fins are totally unclear and I had to e-mail the company for clarification. The problem is, the directions state to glue the forward fins at a 90° angle. Then show a picture of the laying flat. Also the picture for mounting the forward fins to the rocket is vague and I had to get help with this also. The Sunward Company is very helpful and prompt in answering their email.
2.Motor mount placement. The instructions say to mount the motor mounts, but not where and the illustration is not helpful. I sent an email to the company with pictures of the mounts. I was told to mount them as I wished. The instructions should state this.
3.Instruction illustrations are not very illustrative. They could be clearer, so you can understand the pictures.
4.After flying the rocket several times, I found that you should place your engine hooks away from the body tubes for better access.
Finishing: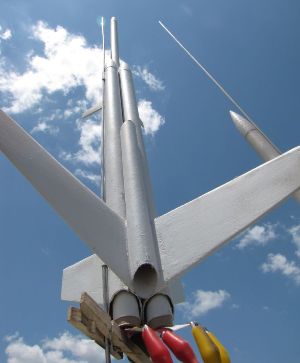
Painting and Finishing: All the body tube spirals and fin fillets were filled. When dry I
sanded all the fin fillets and the body tube fillets smooth. The rocket was then primed and set aside to let dry. When
the primer was dry I then sanded lightly and applied two coats of Krylon White paint. No Decals have been added yet. I
wanted to fly the rocket before I totally finished it, I will apply the decals at a later date.
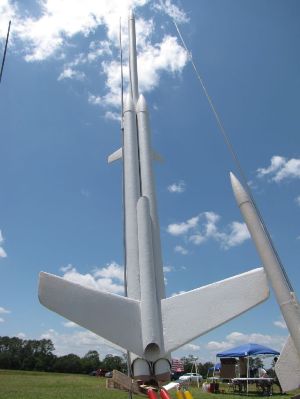
The Gravity Rider is a sleek looking rocket design.
Pros for finishing:
1. I am not a big finish guy, so it is hard for me to find cons in this area. One thing is that the rocket has many tubes and fins, allowing you to find a paint scheme that you like.
Cons for finishing:
1. Lots and Lots of fillets.
2. Rocket is long, making it a challenge to paint, without runs.
Construction Rating: 4 out of 5
Flight:
I flew the rocket four times. Twice before the rocket was painted and twice after painting. The
last flight, one of the main fins broke and needs replacing. I will do this and it will fly again.
Pros for flying:
1.The rocket goes into the air with giant spirals.
2.It is easy to see on the air.
3.It does not fly so high, so you can fly it in a small area.
Cons for flight:
1.Loading the chute is hard. The length of the rocket and the double tube design makes it hard to hold while loading the chute. It really needs four hands.
2.The way I mounted the motor mounts the engine hooks are hard to move. Next build I will ensure the engine hooks are facing away from the body tube. This is technically my build error not the rockets design. It is still something to consider if you are building the rocket.
Recovery:
The rocket comes down great with the suppiled parachute. It drifts at an appropriate descent
rate. One fin did get damaged on the last flight. It was the main fin and it broke almost in half. It can be fixed. I
think it was due to the wind. The rocket drifted and landed in a ditch.
Flight Rating: 3 out of 5
Summary:
The Sunward Aerospace Ltd. rocket the Gravity Rider was a fun rocket to build. It flies true
and recovers nicely. The build is challenging due to the body tube cuts and fin placements. It is a nice looking rocket
and everyone should try it once.
Overall Rating: 3 out of 5
Other:
Build a 45° angle jig out of scrap balsa for proper fin placement. If you cannot understand
the instructions, ask Sunward they are always on the ball about answering your questions.
Other Reviews
- Sunward Aerospace Gravity Rider By Chan Stevens
Brief: Sunward has come up with a very cool multi-tube futuristic design, however, this kit will need minor modifications to be flight worthy. At 6.1 ounces empty, it is more than 50% over the maximum recommended liftoff weight for a C6-3 and trying to fly it on the recommended B4-2 for the first flight would likely be the rocket's last. Construction: Parts arrived in good ...
 |
 |
Flights
|
|
A.C. (May 18, 2006)
|
|
W.J.E. (March 13, 2006)