| Construction Rating: | starstarstarstarstar |
| Flight Rating: | starstarstarstarstar |
| Overall Rating: | starstarstarstarstar |
| Published: | 2022-02-01 |
| Manufacturer: | The Launch Pad  |
 Brief
Brief
With The launch Pad possibly in permanent hiatus, I had no way of satisfying my craving for cool scale-like kits. Bummer, but since the website and all the face cards from the kits were still online, I decided to try building something using just the dimensions and kit pics, and settled on the Anubis as my first project. It wasn't until midway through the build that I deciphered the code and realized that "Launch Pad original" meant "something we made up". Still, this was a cool project that I'll be revisiting in the not distant future. (And I've since discovered the existence of Plan Packs for some of the Launch Pad kits, one of them being the Anubis.)
Components
- PNC-60AH nose cone
- 18" BT-60 body tube
- E motor mount
- 36" Kevlar shock cord
- 36" sewing elastic shock cord
- 3/32" balsa fin stock
- BB nose weight
Construction
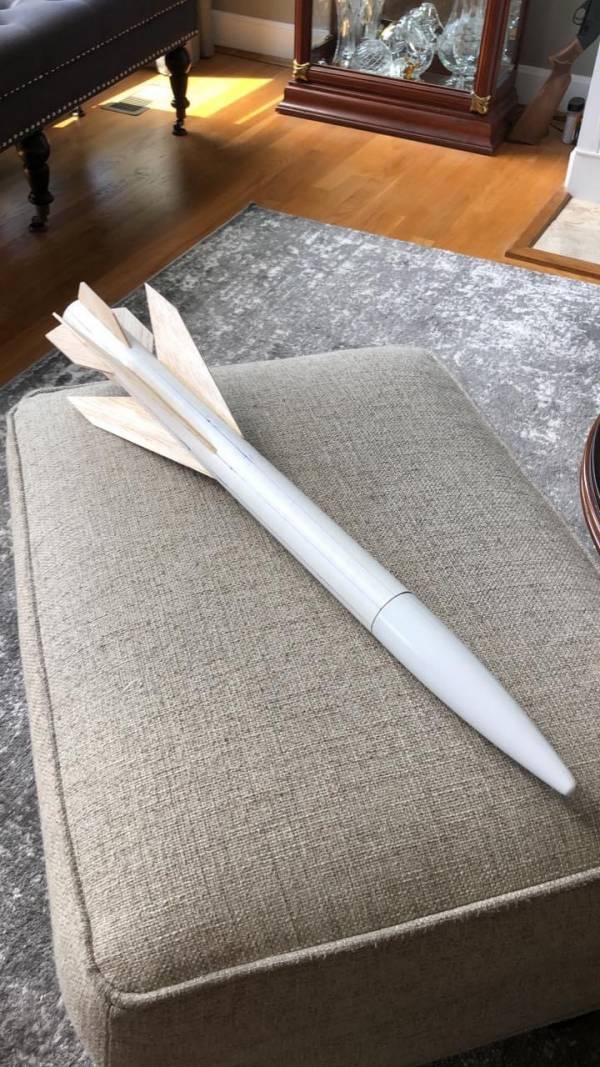
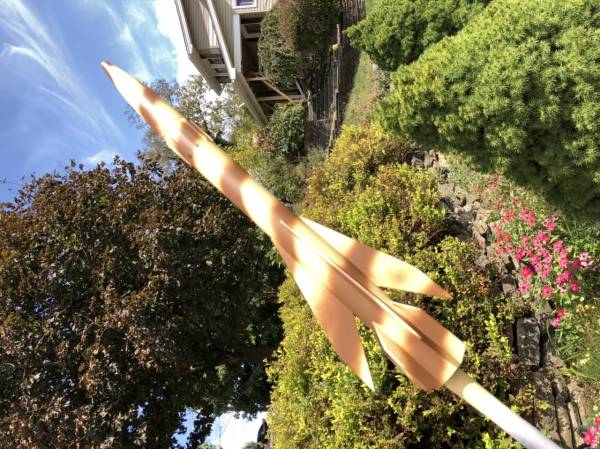
As I said earlier, this build was scratched out on scrap paper and after looking at what I needed vs. what I had on hand, I decided that it would be cheaper and easier to just buy an Estes Hi-Flier XL kit and cannibalize it. Cheap thrills, and nowhere near the Monkee house. I managed to eke out a fin pattern by the hugely complicated process of mathing and algebraing out how much I'd need to blow up the printed kit card photo on the copier in the next cube. Having never seen another Anubis at the pads, I have no idea how close I came, but I was pleased with the results. I used the fin wrap tool at Payload Bay to make up 4 and 8 fin BT-60 wraps, the 4 fin for the actual fins, the 8 fin for the strakes at the top of the body tube. Fins were cut from my collection of scrap 3/32" balsa, and the strakes were cut from a 3/32" balsa stick that I went back to Hobby Lobby the day after buying the Hi-Flier XL kit.
Finishing
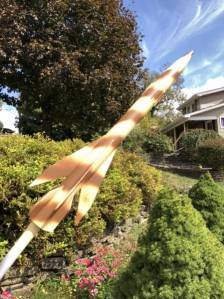
The finished rocket was primered, sanded, primered and sanded again, then covered with thinned Elmers Carpenter's Wood Filler, sanded a final time, then primered again. The whole rocket was then sprayed with Model Masters Sand Tan, and once dry, the body tube was sprayed freehand top to bottom with a barber pole design in Afrika Mustard.
Flight
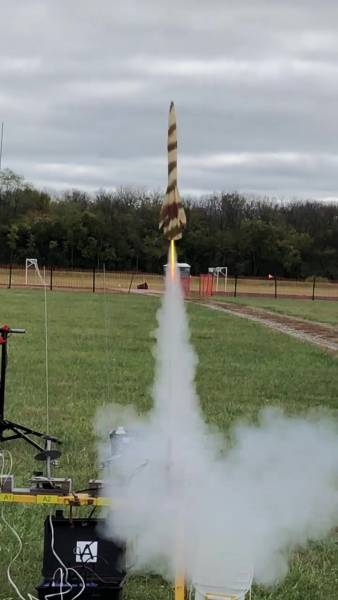
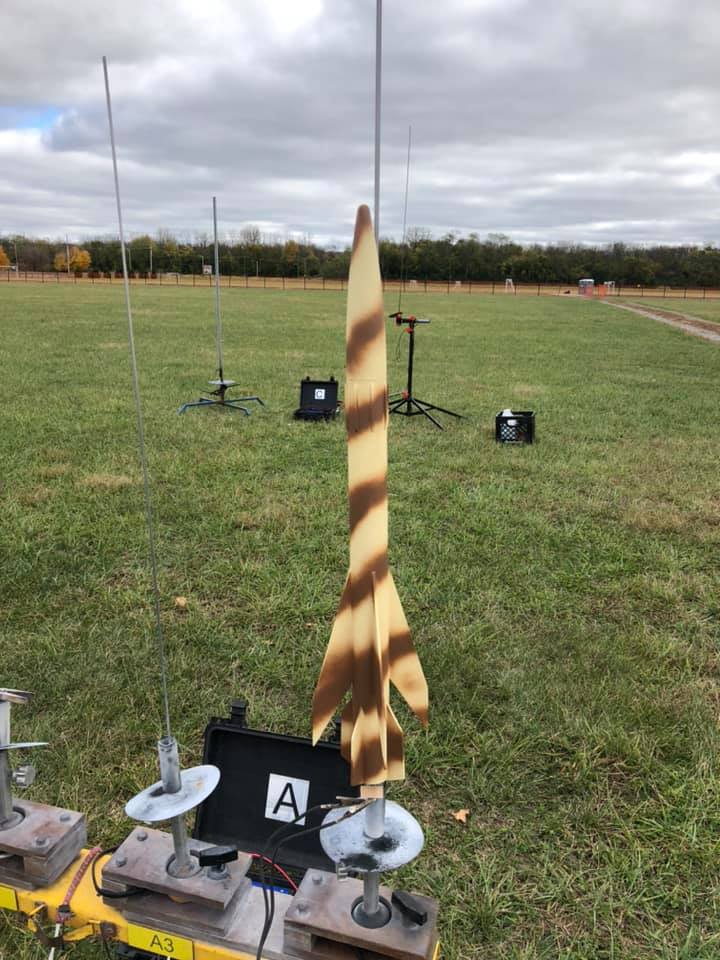
I was pumped for the first flight, which came on the eRockets Field in Dayton with the Wright Stuff Rocketeers in October of 2020. First flight on the day was an upscale of the Estes Star Blazer on a D12-5. The Blazer windcocked fairly severely to the left and away from us, then recovered to our right a good ways beyond the mid-power pads. Based on this I felt confident that the Anubis flight would follow a similar flightpath. Same rod. Same rod angle. I prepared for an inspirational flight. The Anubis didn't get the message. The E12-6 flight windcocked left, but more back behind us than out into the field. It topped out around the 1000-1100' mark and immediately began riding the breeze back across Rip Rap Road, over the eRockets building v.1, and into the back yards of one of the houses just down the street. I knocked on the door to ask permission to search the back yard of the most likely landing spot. Being that it was a momentous flight, I had packed it with my favorite parachute, a neon yellow nylon one that i saved for good. I walked into the back yard and found the ground littered with bright yellow leaves. The trees around the house were full of similarly colored leaves. I scanned the trees for a camo colored rocket with a bright yellow chute for about a half hour before giving in to the obvious. I'm currently planning Anubis v.2. I guess I need to get shopping for another Hi-Flier XL.
Recovery
Summary
Pros: Turned out way better than I'd hoped. Flight was exceptionally stable and looked great.
Cons: Who flies a camo colored rocket in the fall when the big yellow leaves fall? Me. Ouch.
Other Reviews
- The Launch Pad Anubis By Jeff Cowles (March 1, 2011)
The Anubis is the first time I've attempted a kit from a company other than Estes. It arrived in the common long clear plastic bag, and upon inspection all of the parts were there, although there was no actual parts list with the kit. The instructions are basically two pages. The first page being a diagram of the rocket, fins, and motor mount. The second page was instructions on how to assemble ...
Related Products

 |
 |
Flights

|
|
 Flying Model Rocket Kit - Sealed")
 Russian Anti-Ship Missile Model Rocket Kit")

 FREE SHIPPING")
 FREE SHIPPING")


|
|
Jeff Curtis (March 20, 2022)
An easier way to get the fin patterns is with Open Rocket. An Anubis file exists and if you choose print, one of the options is the fin patterns. That's how I scratch built mine. I had to add a fair amount of nose weight.