Cliff's Review of Estes Magician #2240
Estes - Magician {Kit} (1943, 2440) [2010-]
Contributed by woody
| Construction Rating: | starstarstarstarstar_border |
| Flight Rating: | starstarstarstarstar_border |
| Overall Rating: | starstarstarstarstar |
| Published: | 2011-04-23 |
| Diameter: | 1.33 inches |
| Length: | 33.50 inches |
| Manufacturer: | Estes  |
| Skill Level: | 3 |
| Style: | Payload, Sport |
 Brief
Brief
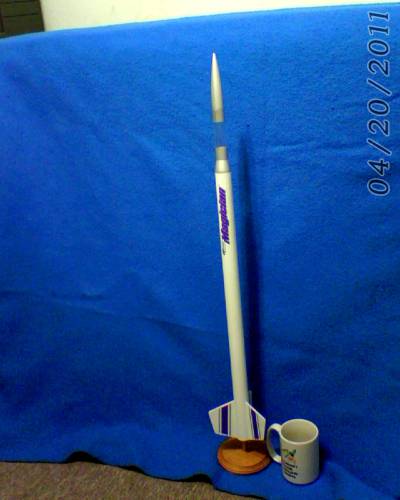
The Estes Magician is a Skill Level 3, three-finned 24mm rocket with a small playload scection. At 33 inches tall, it is said to fly to 1600 feet.
 Components
The components in this kit are of good quality as Estes has been doing this for years.
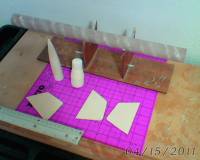
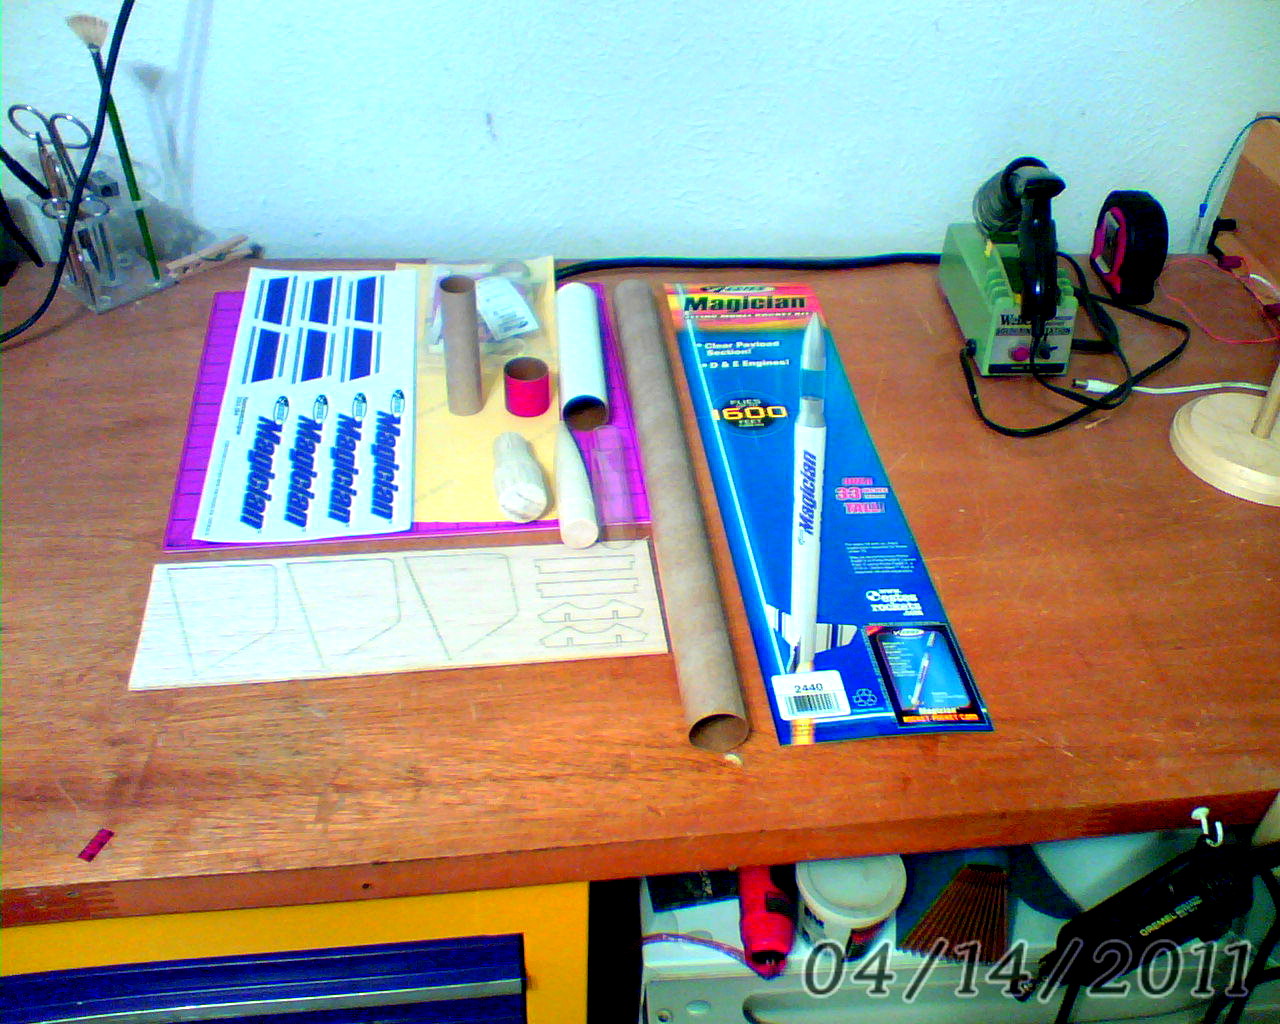
The parts consist of the basic balsa wood nose cone, transition, laser-cut fins and, as bonus, a neat fin guide tool you assemble to use and keep for other rockets with the same fin/tube design.
The Magician kit comes with a 4" long engine mount for E-engines. The mount consists of green centering rings, an E-size engine hook, and an orange D spacer so you can fly those shorter D motors. Recovery is via a red 18-inch plastic parachute with 30" rubber shock cord. The main body of the rocket consists of a lower white body tube 6" long and a longer upper body tube 18" long that is joined together with a red coupler.
Construction
The "PRO" for this kit is that it's an E capable rocket with a simple straight-forward build that assembles quickly with clear instructions. This will make a great first E-sized rocket. It builds like any other smaller rocket and the instructions are easy to to follow.
One "CON" I found with this one particular kit (not other Magicaian kits just this one) was a very soft balsa wood nose cone that required some thinned epoxy coatings to give it a hard egg-like shell. I just mix 30-minute epoxy then add some lacquer thinner to thin.
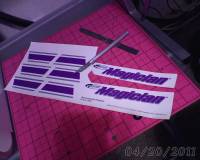
One CON, or rather "Major Gotcha" would be for people who have never worked with a large decal or have trouble with them. The Magician decal is one decal that wraps around as a whole. This could be disastrous for some of us less-skilled with decals. So with my knowledge of my own skills I decided to separate the decal into four parts - or you could do it as two. It worked very well and, if needed, some Decal Set can be used to secure thedecals in place.
 Finishing
Oh the horrors of sanding! Yes, if a good finsh is required (which it always is), fill the nose cone, fins, transition, and spirals on the body tube with thinned Elmer's wood filler then sand with 400-600 grit sandpaper. Repeat if necesssary to fill the wood grain.
The most time consuming thing about this rocket was sanding. I spent about 140 mintes just sanding. I used 600 grit between the first two primer coats, guide coated and wet sanded 800 for the last coat of primer. Next I used white Krylon and I would have rather have used Rustoleum, but was out. I then sprayed the rocket and wet-sanded between the two coats of white paint with 800 grit then a second final coat with 1500 grit. When dry and suface clean, I clear coated the rocket with one thin coat of clear. I then applied the decals. After the decals were dry, I let the rocket sit for 30 hours. I next sprayed two final coats of clear, pausing just eight minutes between coats to reduce solvent popping. Next, I wet sanded the Magician with 2000 grit to remove some texture in the clear coat. Then I used light buffing compound to polish off the rocket and then I waxed it.
I decided to separate the Magician decal into four parts as it is one large decal which I would not been able to handle as one peice.
After prepping the rocket parts, assembly goes quickly. This rocket, with a perfect finsh, can be finished within 6 or 7 hours -n ot a long build at all.
Flight
I would not recommend using this rocket on smaller launch pads because of rod whip; use the right size launching rod. I used a D12-5 which worked perfect a good straight flight with ejection near apogee. I had no problems with recovery except for descent being a little fast. During preparation for flight, I used talcum powder on the 'chute and "dog barf" to protect it from the ejection charge. I only had one launch due to Texas weather and Red Flag warning, something that was brought to my attention after my only launch.
Recovery
The recovery materials in this kit are the basic 18-inch red plastic parachute with a 30" shock cord which worked okay, but the descent was a little fast for me. I have access to a large field, so a slower descent is more acceptable and I don't mind going for a long walk when it comes to flawless recovery .
.
My Magician could not have picked a better spot to land, right next to a small pond with tall green vegetation.
Flight Rating: 4
Summary
The Estes Magician with its 33 inches of length stands out tall and the quick assembly for such a big rocket model rocket is wonderful.
Other Reviews
- Estes Magician By Philip Wentz (August 16, 2015)
The Estes Magician is a Skill Level 3 kit that features a clear payload section and is powered by C11, D and E engines. A tall rocket, it measures 33 1/2 inches from end to end. Components The kit has a main body tube topped by a narrower payload section. Components are as follows: 1 NC-50 ogive plastic nosecone 1 BT-50 payload section 1 BT-50 to BT-55 balsa ...
- Estes Magician By Evan (July 15, 2011)
The Magician is a typicial Estes rocket with D and E engine power. Some of the parrts had to be sanded down to fit. The only problem was the coupler and the main body tube and lower body tube was a very tight fit and was hard to push down. All the parts were good the balsa fins were excellent. Components Engine mount tube Engine hook Green centering rings Engine ...
 |
 |
Flights


|
|
|
|
Steve Lindeman (January 2, 2016)
I just received this kit for Christmas 2015 and the main card is stamped 12/03/14 making this kit about a year old but upon examination I discovered that both nose cone and transducer are now made of plastic rather than balsa wood. Will make finishing much easier.