Modification Patriot to Little John Modification
Modification - Patriot to Little John
Contributed by Jim Bassham
| Published: | 2010-05-12 |
| Manufacturer: | Modification |
| Style: | Scale |
Brief:
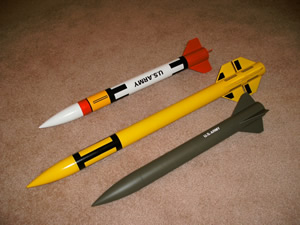
This is a modification of the Estes Patriot kit into a semi-scale model of the Little John tactical nuclear missile
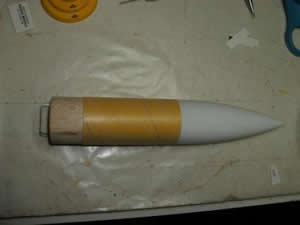
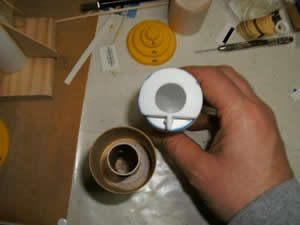
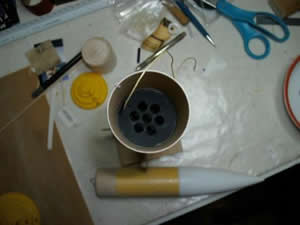
The motor mount was built and installed in the shortened body tube as per the instructions (LJ01). The yellow tube was modified into a payload section by use of a balsa nose block from Balsa machining. I formed a "eye hook" from a paperclip and ran it through the balsa block and bent the ends over inside the payload bay so that it couldn't come out(LJ02). I used a spare BT20 tube cut to 3" long and two BT60 to BT 20 centering rings to make a holder for a PerfectFlite ALK15 Altimeter.
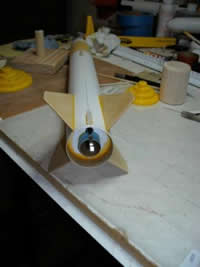
I cut a hole in the base of the nosecone to allow the altimeter to fit and held it in with a foam plug(LJ03). The FlisKits baffle served as the shock cord mount (LJ04)
The fins were made from 1/16" balsa and mounted on the same lines as the patriot fins, 1/8" from the back of the rocket.
Click here for the fin pattern.
I cut the launch lug into two 3/4" pieces and mounted them at the top and bottom of the main tube, on the same line as the Patriot marking guide.
Construction:
- BT-60 body tube 10 15/16" long (made from the two patriot white tubes cut to length)
- Yellow Patriot Body tube
- Patriot Nosecone
- BT 60 Balsa nose block from Balsa Machining Co.
- BT 60 Ejection Baffle from FlisKits
- Patriot motor mount
- Paperclip
- Plastic 12" Parachute from patriot kit
- (optional for altimeter mount)
- BT-20 cut to 3" length
- (2) BT60 to BT20 Centering rings
Aside from the addition of a payload bay, the rocket goes together very much like the patriot kit.
 Painting is relatively simple since the entire rocket is olive drab. I used Tamiya AS-6 Olive drab paint.
The "U.S. Army" letters are vinyl 1/4" R/C aircraft lettering that I laid out on wax paper and then cut slivers out of to simulate the look of army stencils.
I then laid masking tape over the letters and peeled them off of the wax paper and transferred them to the rocket.
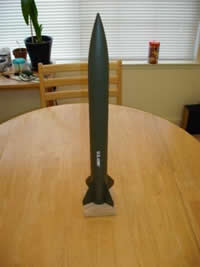 The finished rocket turned out to look a lot like the real thing, I felt (LJ05).
This was my second modification of a Patriot kit. The first was a two-stage kit bash I built for the 2009 EMRR challenge called the "Yellow Jacket" (LJ07)
Flight: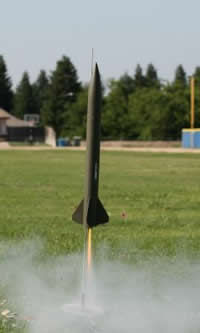
The rocket flew very well (LJ06). And I made several successful altimeter flights. It flew pretty consistently to around 550' on a C6-5. But after a few flights it was clear that I needed a more positive retention for the altimeter and nosecone. On most flights, the altimeter slammed forward at ejection and wedged into the nosecone, and twice, the force was strong enough to dislodge the nosecone and it (with the altimeter) fell free of the rocket for a tumble recovery. I think a longer tube, with a BT20 nose block and a small pin run through it would be a better retention system.
On one long road trip, the rocket got crushed in a box, and despite straightening out OK for display, it just doesn't fly straight anymore. So, after 7 flights, I retired it.
Summary:
I think this is a good conversion that builds into a sweet looking rocket. It needs a more positive nosecone and altimeter retention method though.
Other:
This kit taught me a lot about the importance of really securing things like altimeters and nose cones. Friction fit is just not enough over time.
#Related Reviews
Related Products
 |
 |