Lester Anderson's Page
Location: Tulsa, Oklahoma
Favorite Rockets: Pemberton Tech "Space ark" and Extes "X-Wing"
Biography:
I have ben doing the "BAR" thing since about April 2008. I was fortunate enough to get the picture of my Estes Maxi Brute X-Wing on the home page of Rocketry planet in 2009. Too bad that Rocketry Planet is no longer out there.
I have been having a lot of fun building and flying rockets. This is a great resource.
Facebook Page: https://www.facebook.com/lester.anderson.9
RocketReviews.com Pages:
2017-06-01
Estes #1929 - Stealth - Re-dressed decals

Build Entry
[More]
2016-08-02
Excelsior Rocketry '57 Goony (Plan)
Review
A kitbash modification of an Estes Baby Bertha kit. It looks like a sci-fi version of a 1957 Chevy Bel-Air.
Components
The usual standard of Estes parts found in the Baby Bertha kit.
/h2
Pretty easy build. You end up cutting 2 of the stock fins to make the primary ... [More]
2016-06-26
USS Enterprise - Finished
Build Entry
And here it is finished. This is by no means a difficult kit, I would not classify it as a skill level 2, as a matter of fact the MPC labeling states that this kit is for ages 10 and up.
. [More]
USS Enterprise - Launch lugs and parachute
Build Entry
Applying the launch lugs to the body tube was easy. Just glue them on to the seam in the outer label.
.
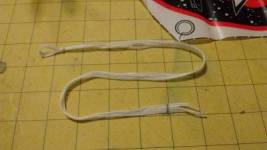
Next is the last flight step, the parachute. The existing shroud lines broke while I was assembling the chute, so I had to sub in a replacement.
And here is the finished parachute. ... [More]
2016-06-19
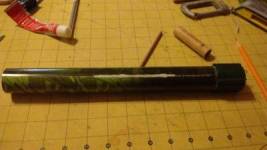
USS Enterprise - Body tubes and fins
Build Entry
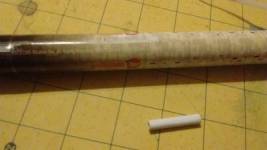
Moving on, we now need to assemble the main body.
That grey tube coupler gets inserted between the two pieces of body tube. The instructions call for using plastic model cement. Because I epoxied motor mount together, I decided that epoxing that joint together would be a good idea too. Next ... [More]
2016-05-07
USS Enterprise - Fin can modification.
Build Entry
First thing first, power. My edited RocSim file said this rocket would fall back to the ground on an A motor, about 150 ft on a B6-4, and 250 on a C6-3. Parachute deployment was way lower than I liked. So modifying the fincan for 24mm motors seemed like a good idea.
The first thing that ... [More]
2016-05-03
MPC/Round 2 - Star Trek USS Enterprise 1701-A

Rocksim Design
[More]
2016-05-02
USS Enterprise
Build
One of the three MPC / round 2 Star Trek model rocket kits. [More]
2016-04-12
USS Reliant
Rocksim Design
[More]
2016-04-11
Klingon Bird of Prey - Stickers and parachute
Build Entry
Here is a quick picture of the stickers attached to the fins.
A picture of the assembled parachute.
And of the completed rocket.
And that's it. She is done. An attached RocSim file is at the end of the build. It more correctly reflects the actual weight's ... [More]
2016-04-09
Klingon Bird of Prey
Rocksim Design
[More]
2016-03-13
Klingon Bird of Prey - Launch lug & Fin assembly
Build Entry
First mark the body tube @ 3¾ inch up from the bottom of the fin can, then a second mark at 7⅜ up. Scuff the body tube between the marks, then glue the lug on. I chose to use the seam where the body wrap seam is.
And here we show the actual fins being installed. ... [More]
2016-03-06
Klingon Bird of Prey - Engine mount
Build Entry
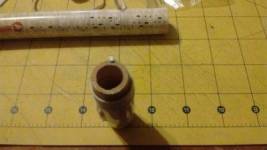
here we have two views of the motor mount for this rocket. I have added a thrust ring to the top of it, both as a motor stop and as a anchor for the shock cord mount.
And here is the motor mount glued into the bottom fin can. I used the generous portion of plastic model cement to ... [More]
2016-02-21
Klingon Bird of Prey
Build
One of the three Star Trek themed rockets licensed by MPC/round two. It is essentially a rebranding of the Chinese brand Sky rocket Dynamo.(https://www.apogeerockets.com/Rocket_Kits/Skill_Level_1_Kits/Dynamo_Rocket_Kit) [More]
2016-02-08
U.S.S. RELIANT - Sticker placement
Build Entry
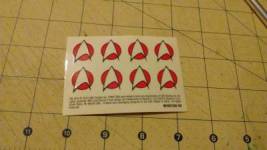
Surprisingly, this kit comes with 8 stickers for the fins. That actually means you get two stickers for each fin, one for each side. This is a refreshing change for me from the Estes standard of only giving enough decals to recreate the header card.
And with that the build is ... [More]
U.S.S. RELIANT - Step 3, Parachute assembly
Build Entry
First thing I did for parachute assembly was to build myself a harness from the shroud lines. This helps to keep all of the shroud lines even. Next we apply all of the tape disc's to the corners of the parachute.
Next, tie all of the shroud lines to the corners of the ... [More]
2016-02-07
U.S.S. RELIANT - Step 4 nose cone assembly
Build Entry
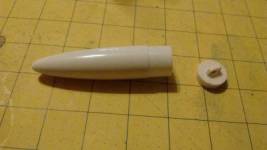
The instructions have you install the parachute to the nose cone before the nose cone is assembled. Kinda backwards.
The nose cone is a 2 piece affair. Both pieces just get glued together.
Lastly, tie the elastic shock cord to the nose cone.
[More]
2016-02-05
U.S.S. RELIANT - Step 2, launch lug & Fin assembly
Build Entry
Applying the launch lug is rather straightforward. The instructions have you measure from the bottom of the body tube 4 3/8 of an inch. Mark the tube there, then glue the launch lug on.
And now we have the fins glued on.
[More]
2016-02-04
U.S.S. RELIANT - Step 1, fin.can & engine hook assy.
Build Entry
As per previous people who have built variations of this rocket, I decided to inspect the level of engagement of the top of the motor hook. I found that I had less than a 16th of an inch of motor hook engagement on the top of a dummy casing. Not exactly safe in my opinion.
So because of this ... [More]
2016-02-02
U.S.S. RELIANT
Build
A small, simple, Star Trek themed rocket kit. It is essentially a rebranding of the Sky brand rocket kit East Wind.(https://www.apogeerockets.com/Rocket_Kits/Skill_Level_2_Kits/East_Wind) [More]
U.S.S. RELIANT - Parts
Build Entry
I am going to be building the MPC U.S.S. RELIANT. It is essentially a rebranding of the Sky Rockets East Wind kit. [More]
2016-01-14
Estes Night Wing - Decals
Build Entry
Applied the "pressure sensitive ddecals". More commonly known as stickers. For being over 15 years old, the adhesive was still plenty sticky. The decal sheet came with 2 decals for around the canopy. A silver one for the traditional look, and orange for the "Go Wild" paint scheme. I used the ... [More]
2016-01-10
Estes Night Wing - Final assembly
Build Entry
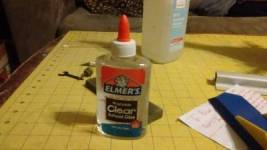
Glueing together of the last couple of pieces. For the sake of the paint, I am using Elmer's washable Clear school glue.
Here we have the gluing together of the upper engine nacelles to the main wing.
Next comes the bottom nacelle and fins.
... [More]
2015-12-03
Estes Night Wing - Paint and finishing
Build Entry
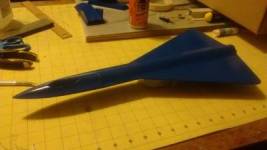
I had a very, very short opportunity for priming and painting. So there are no pictures of the priming process. Priming was pretty straightforward though, clean everything off, spray it on, buff it smooth. Then clean the dust off it, and sprayed some blue on it.
For those of you ... [More]
2015-11-14
Estes Night Wing - Body Wraps
Build Entry
Application of the top body wrap. I used a glue stick on both the wrap and body assembly to prevent wrinkles.
And here we have the bottom body wrap. It does not curve like the top one does, rather it follows a straight taper to the edge of the forward fin.
Now, after the local weather ... [More]
2015-10-13
Estes Night Wing - Fins and "engine nacelles"
Build Entry
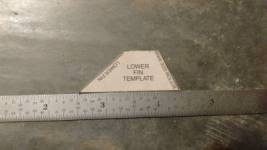
Step 3 of the instructions has you prep and assemble the balsa fins and decorations. Sand the outer surfaces, and use the included angle gauge from the header card to cant the outer box sides to the correct angle.
Glue is drying on the lower nacelle. This almost takes 3 hands to ... [More]
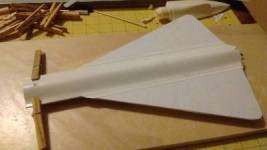
2015-10-12
Estes Night Wing
 .
. Build
An interesting looking fighter jet style rocket from Estes. It uses the SR-71 kit nose cone, and main body tube. Most everything else is unique to the kit.
[More]
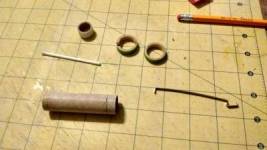
Estes Night Wing - Motor mount
Build Entry
Per my usual process, I'm starting with the motor mount. This kit uses standard Estes engines of the 18 millimeter variety. So we have a short piece of bt20 motor mount tube, two centering rings, a thrust block, in an engine clip. I am going to be adding a Kevlar anchor on the engine mount for the ... [More]
Estes Night Wing - Parts
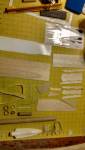
Build Entry
To start with we have our parts layout. This kit pre dates the industry using laser cut fins, so all the fin sheets are die cut. Surprisingly for mine , all of the line from the die cut are very thin. This one must have been an earlier one from the production run while all of the dies were ... [More]