Public Missiles Little Lunar Express
Public Missiles - Little Lunar Express {Kit}
Contributed by Bob Morstadt
| Construction Rating: | starstarstarstar_borderstar_border |
| Flight Rating: | starstarstarstar_borderstar_border |
| Overall Rating: | starstarstarstarstar_border |
| Diameter: | 3.90 inches |
| Length: | 35.00 inches |
| Manufacturer: | Public Missiles  |
| Style: | Futuristic/Exotic |
![[Rocket Pic]](images2/rp_pml_lunar_jr02.jpg) Brief
Brief
The Lunar Express Jr. is a model based on the 1950s Sci-Fi concept of a single stage rocket that could go to the moon and back. The model is capable of taking a 38mm motor, but has an adapter to accommodate a 29mm motor.
Construction
The kit has high quality like all the PML kits and the completed rocket is capable of taking a beating without damage. There are some tricky steps in the directions, where epoxy must be poured into the model between some small gaps. Be sure to follow the directions carefully. The model has no motor retention system, so be aware of this short-coming at the beginning of the construction.
I used the 29mm adapter kit and made a retro-fit for the motor retention system. I drilled a 3/32 inch hole through the body and the adaptor tube 1/2 inch from the end of the rocket with the adapter tube in place. I then made a bracket 2-3/8 inch long from 1/16" x 1/4" brass stock that I bought from a local hobby shop. A 3/32 inch metal drill bit was used to drill a hole through the brass stock about 7/16" from the forward end. I bent the strip at about 2" to form a retraining hook for the motor. A 3/32" x 1/2" threaded bolt completes the retention system. ![[Motor Retention]](images2/rp_pml_lunar_jr03.jpg)
Finishing:
As usual one should use disposable rubber gloves to build the fillets on the fins. The short main body tube required sanding in order to have a good match with the nose cone and the boat-tail part. I did not use the kit decals. I wanted a 1950's Sci-Fi look, so I painted the model with Dutch Boy Instant Chrome (chrome aluminum 4101) paint. This gave the desired look, but the finish was susceptible to finger-prints no matter how long the the paint dried. Currently, I am thinking of trying clear coat on top of the chrome, but this will require some experimentation to be sure that it will work.
Construction Rating: 3 out of 5
 Flight
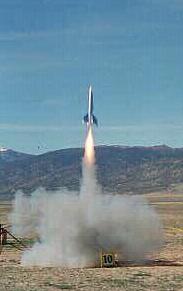
The rocket flies straight with 6 oz. of weight added to the nose.
My retention system worked well on the maiden flight. I used an H180-M for the maiden flight, but this time delay is too long. An H180-S should work better. As a result the elastic came undone from the nose cone "Kwik-Link". The nose cone buried itself in dirt, but did survive the fall. Obviously, this is something that should not be repeated.
Recovery
The piston ejection system works great. Be sure to choose a time delay that is not too long. Otherwise, too much stress may cause the nose cone to separate. A separate parachute for the nose cone and body might be a good idea.
Flight Rating: 3 out of 5
Summary
The design of the rocket is a real eye-catcher and will appeal to the nostalgic Sci-Fi and fun days of the 1950s. A retention system is needed and separate parachutes for the nose cone and body might be a good idea.
Overall Rating: 4 out of 5
Other Reviews
- Public Missiles Little Lunar Express By Gary Sinclair
PML's Little Lunar Express is a well known HPR kit which has a 50's SciFi look. Recovery is via parachute which is ejected from the airframe using a PML piston. This kit comes with the following components: (1) 4" OD Ogive nosecone (a good one too) which has NO bottom (i.e. the bottom of the shoulder is missing allowing access to the inside of the nosecone). (1) 4" OD , 5.5" long ...
 |
 |
Flights
|
|
G.A.F. (October 2, 2003)
R.A.M. (August 28, 2005)
|
|
R.V. (July 1, 2001)