| Construction Rating: | starstarstarstarstar_border |
| Flight Rating: | starstarstarstarstar |
| Overall Rating: | starstarstarstarstar_border |
| Diameter: | 3.90 inches |
| Manufacturer: | Public Missiles  |
| Style: | Sport |
 Brief:
Mostly stock rocket for my Level One certification. This is my first rocket higher than an Estes kit. First Flight on this rocket was my L1 attempt as built weight was too heavy for a "G" test flight.
Construction:
The kit includes:
- 1 36" x 4" PML Quantum body tube
- Piston ejection system
- 3 G-10 .093" fins
- 2 1/4" plywood centering rings
- 54mm Kwik-Switch motor mount with 38mm & 29mm adapters
- Plastic 4" nose cone
- Welded closed metal D-ring for shock attachment at piston
- 12' 9/16" tubular nylon shock
- 48" PML chute
- Two 3/8" brass launch lugs
- Very easy to follow instructions
The kit has a logical assembly order and excellent fit of all components although some minor sanding of the centering rings and bulkhead. It is very important to follow the instructions regarding sanding the Quantum tubing for fin and launch lug attachment! Sanding the G10 fins is also a good idea.
And don't forget to add two .093" vent holes. One through the body tube right above upper MM centering ring is and another right below the installed nosecone shoulder.
I added a PML Quick Switch motor retainer during construction before painting it.
Finishing:
You want to lightly sand all Quantum tubing, nose cone, and G10 fins before painting so that the paint has something to "bite" into. Must fill imperfections along mold split lines and associated flow lines in plastic and also fill ejector pin marks for a good finish. Finally wash nosecone with isopropyl alcohol just before primer application to remove any last amounts of mold release.
I primed the entire rocket with 6 to 8 coats of Krylon White Primer sanding between coats, then sprayed with Krylon color coats, and another 6 to 8 thin coats of Krylon Clear to finish it. Only one PML decal was supplied but I did not use it.
Construction Rating: 4 out of 5
Flight:
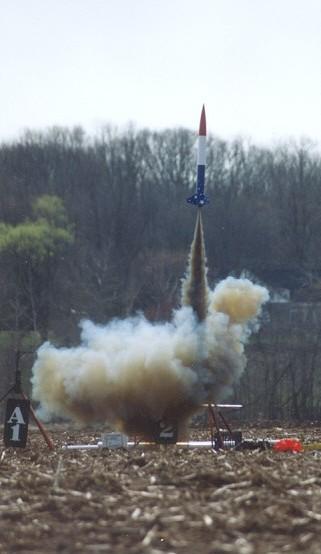
My cert flight (and the rockets first flight) was with a Pro38 2-grain Smokey Sam 247H143SS. This was my first motor larger than an Estes "D". Perfect and straight flight. I choose a six second delay but maybe eight would have been better. There is no seven second option which would probably be optimum. Approximate altitude was 1,000 feet.
Second flight was on an Aerotech H238T 29/180 with an another six second delay. Perfect again. 800 foot estimate.
Recovery:
Make sure piston fit is loose and free. I added a 36" Top Flight Nomex heat shield post construction to the piston strap and replaced the 12' supplied shock cord with a 24' 9/16" tubular nylon shock. Loops were sewn in at both ends and 1/3 along the length for parachute attachment and I used 5/32" Stainless Delta Quicklinks for all attachments and a 1,000lb swivel to the parachute.
One recommendation: Do not use the plastic attachment points on the nose cone! Instead, use a 1/4-20 expanding metal lag or a 1/4-20 toggle bolt epoxied inside the nose for attachment.
Even with my heavy rocket weight - the supplied 48" chute was adequate. Piston protected the chute perfectly!!
Flight Rating: 5 out of 5
Summary:
Excellent kit that is very sturdy and durable.
I would highly recommend the PML kits to beginners. The Quantum tubing is great. It finishes very nicely. I liked it so much I just got my PML Eclipse in the mail for my second HPR.
With all the changes, extra sturdy attach points, extra shock length, swivel, heavy fillets at all six areas and nearly 24 (thin/light) coats of paint, my Tethys weighed in at 75 ounces where kit specifications is 53 oz. I feel the overbuilding is worth every penny and ounce it added even though I could not test fly my rocket on a "G" motor due to being too heavy which was my original plan. After two flights and landing both times on hard-packed plowed fields, there is hardly a mark or scratch to be found anywhere on the rocket. One must look hard to tell she has two flights on her.
Overall Rating: 4 out of 5
Other Reviews
- Public Missiles Tethys By Scott Weihe (July 3, 2007)
This is a big beautiful stock PML kit with 3 fins, parachute recovery, and would be perfect for level 1 attempts. The kit came with a 36" x 4" PML Quantum body tube, G10 fins, plywood centering rings, PML's 54/38/29 Kwik-Switch motor mounts, a tough plastic nose cone, PML's piston ejection system, 12 feet tubular nylon shock cord, a 48 inch chute, 2 brass lugs, and some very good ins ...
- Public Missiles Tethys By Kevin Drayson
Photo Courtesy of PML The Tethys is a basic 3FNC kit, capable of flying on G motors or bigger. The Tethys came with a single length of airframe tubing (phenolic, per my request), 3 pre-cut G10 fins (the thickest fiberglass fins I've used to date), a 4:1 ogive plastic nose cone, a thick nylon strap, a length of tubular nylon, piston kit, a 48" parachute, two brass launch lugs, and the 54mm ...
 |
 |
Flights
|
|
A.D.W. of PML (January 1, 2001)
(January 3, 2001)
G.S. (April 1, 2001)
D.B.M. (August 17, 2005)
|
|
D.J. (November 1, 2000)