| Construction Rating: | starstarstarstarstar_border |
| Flight Rating: | starstarstarstarstar_border |
| Overall Rating: | starstarstarstarstar_border |
| Diameter: | 0.98 inches |
| Length: | 22.80 inches |
| Manufacturer: | Quest  |
| Skill Level: | 3 |
| Style: | Multi-Stage |
Brief:
This is a two-staged payload rocket. I highly recommend streamer recovery in 2-stage configuration. Flies on A-C
engines.
Construction:
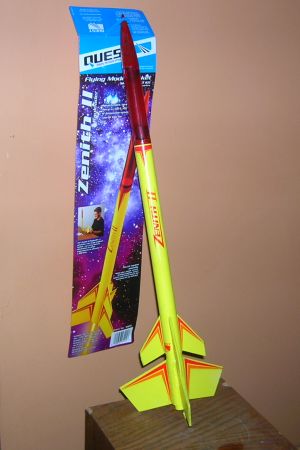
The parts include: 1 bodytube, 1 red plastic payload section. 3 fins per stage, 18mm engine mounts, with hook.
Kevlar®
shock cord attaches to engine mount up through the body and is attached to an elastic shock cord then to the chute and
payload section. Plastic nosecone is attached by friction fit or can be glued in. (Mine is glued in.)
Very easy to follow instructions in logical order. Popular opinion: skip engine hooks and use friction fit. Mount fins to main rocket first. Then install booster and use a 1' piece of wood clamped to main fin to align each booster fin.
Finishing:
This is one of my prettiest rockets in factory color scheme with decals. Reinforce the fin joints, especially on
booster. I started with wood glue fillets, then make epoxy fillets.
Construction Rating: 4 out of 5
Flight:
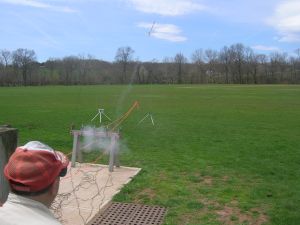
My first flight was: B6-0 and a B6-4. Unfortunately, after a terrific booster stage, the shock shook loose on the
payload section and became unstable. (Now I see why another user strongly recommended omitting the coupler and go with
a standard bulkhead and screw eye. The darn coupler is too loose by itself, and it's hard to get a nice fit with tape.
I'm going to try clear tape next.)
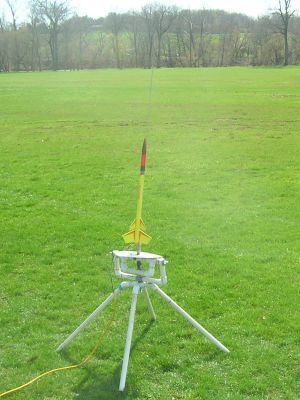
Second flight used a powerful C6-0 and a B6-4 sustainer. ****recovery: 4 flourescent streamers, 2 ft long. Angeled into wind with "tape on payload" for a tight fit. Worth the Wait! What a nice flight! Use plenty of wadding. (streamers slightly singed). Did use motor hooks but, u can do without. Just use "friction fit".
Nice straight flight! My 1st "kit" 2-stager.
Recovery:
Anything over a "B" and u want to stay with "streamer." Shock cord is Kevlar®
from motormount attached to elastic. Recovery was fine, aslong as u follow my lead and use two sets of
"fillets." First a glue fillet, followed by epoxy. If u do that on both booster and main, u want have any
cracked or damaged fins.
Flight Rating: 4 out of 5
Summary:
Nice 1st time 2-stager. Consider a "standard bulkhead" from balsa. Beef up "fin fillets and use a
"streamer" on 2-stage scenario, "unless really cal day."
Overall Rating: 4 out of 5
Other Reviews
- Quest Zenith II By Alan Tiessen (October 28, 2012)
A nice looking two-stage payload rocket. /h2 I modified it by skipping the see-through plastic payload bay and just going with a standard tube payload bay of the same size. Easy to build. Finishing Construction Score: 4 Flight Recovery Like most everyone else, I recommend streamer recovery if you're going for altitude. I used a ...
- Quest Zenith II By Kris Henderson
Brief: Two stage rocket with 14" parachute recovery. 22" tall with the payload section and booster section on. The package says it's a level three (advanced) rocket but really it's more like a level 2. The only reason I can see that it's considered a level three is because you have to line up the fins on the body tube along with the booster's fins. Construction: The kit ...
- Quest Zenith II By Paul Gray
This is a two-stage payload rocket. Kit says dual parachute in some advertising but is only a single chute recovery. Flies on A through C engines. One (1) body tube, One (1) plastic payload section which is red. Three (3) fins per stage both stages use a 18mm engine mount with a hook. Kevlar shock cord attaches to engine mount and pulls up through the body which then attaches to an elastic ...
 |
 |
Flights
|
|
T.B. (July 7, 2003)
A.K.S. (December 10, 2005)
|
|
T.E.W. (September 18, 2001)