North Coast Rocketry Eliminator (Mod)
North Coast Rocketry - Eliminator {Kit} (K-45) [1987-]
Contributed by Gary Sinclair
| Published: | 2010-12-01 |
| Manufacturer: | North Coast Rocketry  |
Modifications: I bought this kit thinking that this is a really sharp looking rocket that deserves to be built and flown on an I200. The kit comes with recommendations on flight using F and G motors. Well if I was going to fly this on H and I motors it needed a fin can and airframe that would stay in place when 20+g's of force was applied. The airframe was laid up with Kevlar (using a Kevlar sock) and vacuum bagged. A second layer of fiberglass was used to provide a finishing veil. A payload section was created afterwards by cutting the newly reinforced tube. I should have cut the tube prior to laying up the Kevlar and fiberglass as this proved very difficult. I used my trusty Dremel for most of the cutting work. The body tube was also slotted all the way down to allow the fin-can assembly to be inserted and epoxied in place. The fin-can assembly was easy and I used Kevlar tape to reinforce the plastic centering ring fin-lock joints with the previously fiberglassed fins. The fin-can was inserted into the body tube and epoxied in place using thickened West Systems epoxy.
Once dry I found that the fins were rock solid (no way these fins are going to suffer flutter). The airframe was like concrete when dry. This only left the coupler tube for the payload section which had to be cut from a PML 3" coupler. I reduced the coupler accordingly by using my Dremel router to slot the coupler down its entire length. The coupler was then pressed together to re-seal the slot thus reducing the diameter of the coupler. The resulting seam was sealed using un-thickened epoxy and tape. Further reinforcement of the coupler was achieved by fiberglassing the inside of the coupler. At this time the coupler bulkhead was trimmed using my Dremel sanding drum to fit the now reduced diameter coupler. The bulkhead was eventually epoxied into the coupler along with an eyebolt/washer/nut assembly. This was in turn epoxied into payload section of the airframe. I used PML rivets to attach the nosecone to the payload section (after drilling the appropriate holes as well as a vent hole in the payload section). All that was left was paint and decals which followed the kit (except for the blue -- I like metallic colors). Finally I used a BSD vent and CP decal along with my own decal to give it the final appearance. Since I don't know if I will loose a rocket I also put on a special decal informing the finder of my email address and to contact me. Construction: Decals were a self-adhesive mylar trim. These went on with no problem as long as you use a little warm water with some washing up liquid in a bowl. Once the decals have been wetted with the solution you have a minute or so before they begin to stick This should give you time to position the decals correctly. PRO: Great looking rocket with nice decals. The size of the rocket makes for a stable design which gives greater scope to vary the engines used. I liked the fin-lock as this made alignment easy. CONS: Well, since I didn't build it stock I can't say too much. However, I didn't like the elastic shock cord and the long body tube built stock would be probably zipper after a few launches. The plastic centering rings are probably fine for F and G motors but for H and I motors it remains to be seen if they will hold up.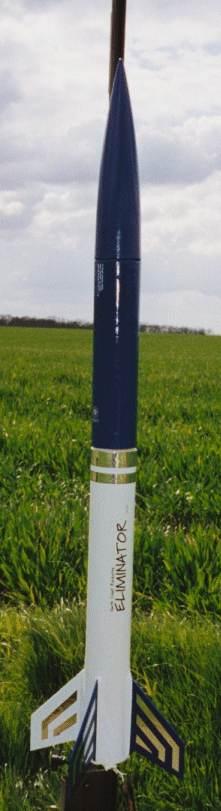 Brief:
Kevlar sock reinforcement, payload bay created, fully slotted body tube for external fin can assembly. Modified to take Aerotech 29mm reloads up to an I200.
The list of modifications for this kit included:
The NCR box had a nice large picture of the Eliminator on the front (I have actually saved this as a collectors item). The contents of the box showed all parts intact. Instruction manual was clear and comprehensive.
 Flight:
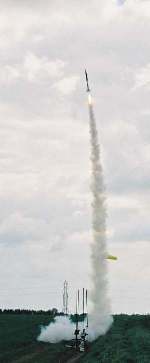
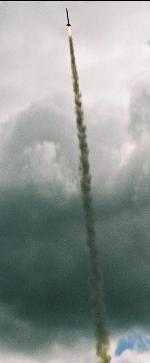
I have only flown this rocket once on an H180-10 (with the 44oz weight it really ripped off the pad). I Rocksim'd it extensively to ensure that it was going to deploy at apogee on the motors I was considering. As it turned out it deployed perfectly in a 15mph wind (with a subsequent 3/4 mile walk) with lots of oohs and aaahs. Since it is an apogee only rocket it was easy to prep. I used a Nomex shock cord protector along with a Nomex chute protector to provide 'wadding'. The next launch will be the ultimate test using the I200 motor.
Summary:
Summary: The NCR Eliminator looks mean on the box so it is only fitting to give it the right motor. Easy to modify with a little planning and the right materials. Lots of fun to fly.
Other:
Cut your body tubes before you reinforce them.
Other Reviews
- North Coast Rocketry Eliminator By Nick Hills
(by Paul Gray - 07/01/02) Background The Eliminator is NCR's highest flying rocket. It gains a lot of altitude for its size, making it one of the most popular mid power rockets in the model rocketry world. The rocket itself has been made by North Coast Rocketry for many years. However, the design was improved and new features were added when North Coast Rocketry was bought by Estes. ...
- North Coast Rocketry Eliminator By Nick Hills
Brief: This is a simple 3 fin and a nose cone rocket. It is straight forward and easy to build. It would make a fairly good first mid-power rocket. Construction: Upon opening the box everything looked to be in good shape, but when I laid the plywood fins down on a table, I noticed that they were warped. So they were put under a few hundred pounds of pellet bags for a few days and they ...
 |
 |
Flights
|
|