Aerospace Speciality Products Sonda II B (Micro)
Aerospace Specialty Products - Micro Sonda II B {Kit} (KSON-MM)
Contributed by Chan Stevens
| Construction Rating: | starstarstarstarstar_border |
| Flight Rating: | starstarstarstarstar_border |
| Overall Rating: | starstarstarstarstar_border |
| Diameter: | 0.28 inches |
| Length: | 5.38 inches |
| Manufacturer: | Aerospace Specialty Products  |
| Skill Level: | 2 |
| Style: | MicroMaxx, Scale |
Brief:
After scoring a large quantity of very cheap MicroMaxx motors, I looked over the less-than-stellar-flying fleet of RTF's, and realized I need some real MicroMaxx rockets. ASP to the rescue, with a series of impressive micro scale offerings suitable for the craftsman.
Construction:
At $5, you'll either ask yourself "why did I pay more for this kit than the Quest starter kits are going for at clearance sales?" or you can look at the quality of components and scale accuracy and ask yourself "Why have I been paying $20+ for decent scale kits?". ASP packs a lot of quality into this kit.
Parts list includes:
- 2 7.16mm body tubes
- 2 tube couplers
- Styrene fin stock
- Styrene launch lug & standoff
- Styrene angle (for tube marking)
- Wood nose cone (beautiful quality)
- Kevlarshock cord
- Waterslide decal
ASP's directions are clear and easy to follow but tend to be a bit shy on illustrations. Still if you're a reasonably experienced builder you'll have no trouble with this, other than scaling down your skills accordingly. Everything about this is tiny and requires careful attention to detail for a good finish.
Before beginning construction, I decided to fill the tube spirals with Elmer's Fill 'n' Finish. Definitely overkill but I might eventually need a peanut sport scale contest bird so I wanted to do a decent job on the craftsmanship on this one.
Next, I marked the tubes using the wraparound marking guide. ASP provides a handy tiny styrene angle for use in marking the tubes. The tubes are way too small to use the doorjamb method or even the Estes tube marking tool.
The fins are then cut from styrene stock using patterns cut from the instruction sheet. This is a little tricky and the instructions offer a good tip: use two-sided tape to hold the stock in place and more two-sided tape to hold the pattern on. Lightly scoring the styrene is sufficient as the fins can then be broken away. I went a little farther along the obsessive-compulsive path by rounding my leading and trailing edges a bit.
Fins are attached to the body tube using CA. I've had mixed results bonding plastic or G10 fins using CA and used a CA specifically designed for plastic to do this. I also followed up with small fillets.
Assembly of the upper section consists of tying Kevlar onto a tube coupler piece, then gluing that into the upper body tube. The nose cone is glued to the other end. The Kevlaris then tied to a smaller piece of tube coupler that goes into the lower tube, acting as an engine block.
The launch lug is attached using a standoff, which enables it to fit into the standard Quest launch system using rod position #1.
All told, you can probably build this in under an hour, assuming you skip some of the detailed finishing work.
Finishing:
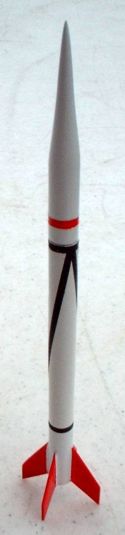
I shot mine with two coats of Krylon primer then sanded it down using 600 grit wet/dry paper followed by two coats of gloss white. Next, I masked off around the fins and the upper body tube where a 1/8" band of red is applied.
Masking this is a real pain as the sections of tube between fins is too small to work in very well. I cut down some blue tape to fit fairly well and pressed it in place using a toothpick. I then attempted to seal it using a light coat of gloss white again, hoping that whatever bleeds under would match the base coat. After allowing that to dry, I shot the red coat. The results weren't nearly as good as I'd hoped so I had a couple of spots where the red bled under the mask. This was removed carefully using a dulled utility knife blade to scrape it off. (This can be done easily if you get on it before the paint cures.)
After cleaning up the runs, I then applied the waterslide decal. It might just be me, but I thought the decal was a bit oversized for this kit. I feel my finished rocket doesn't quite look like the scale photos I've seen, nor the cover art on the kit.
Construction Rating: 4 out of 5
Flight:
Not a lot of motor choices here. MMX is it.
First flight was on a windy day (10-14mph). I flew at our club launch, where even our MicroMaxx pad gets hooked up to a heavy duty 12V system, so there's plenty of juice.
As with most MMX kits, this thing popped off the pad to apogee about 150 feet up almost instantly. You don't "see" these fly as much as hear or sense them. I didn't see apogee, but I picked up the puff of smoke and managed to follow the rocket back down, recovering it intact.
Recovery:
The streamer is a bit too large for the tube and jammed instead of deploying. Still, this is a fairly harmless rocket.
Flight Rating: 4 out of 5
Summary:
PROs: Excellent scale detail packed into a micro body. Good value. Decals are amazing for such a low price.
CONs: Shock cord/streamer fit problem.
Overall Rating: 4 out of 5
Other Reviews
- Aerospace Speciality Products Sonda II B (Micro) By Peter Stanley
Brief: This is a Micro-Maxx powered scale model of the Sonda II B from ASP. The real Sonda II B is a Brazilian sounding rocket first used in the 1970s. Construction: The kit contains 1 long body tube, 2 tube couplers, 1 styrene fin stock, 1 styrene launch lug, 1 styrene launch lug standoff, 1 wood nose cone, 1 Kevlar ® shock cord, 1 decal, and 1 mylar streamer. T ...
 |
 |
Flights
|
|