| Construction Rating: | starstarstarstarstar_border |
| Flight Rating: | starstarstarstarstar |
| Overall Rating: | starstarstarstarstar_border |
| Diameter: | 1.33 inches |
| Manufacturer: | Semroc  |
| Skill Level: | 2 |
| Style: | Futuristic/Exotic |
Brief:
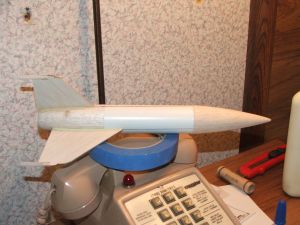
Recognizable by almost everyone as either the spaceship from the sci-fi classic "Destination Moon" or as
the cover model from the 1961 Estes catalog, the Semroc VF-261 is both a quick and challenging build. It's quick
because it has relatively few parts but challenging because of a couple of non-traditional steps.
Construction:
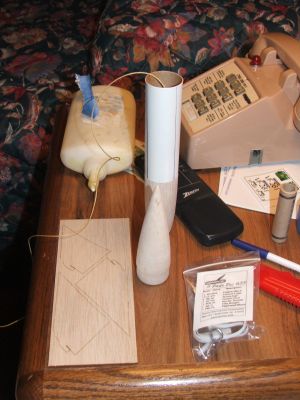
The kit includes:
- BNC-55FD balsa nose cone
- BT-55S body tube
- BTC-55Z balsa tail cone
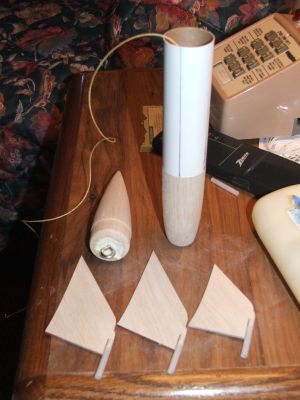
- 3/32" laser cut fin stock
- EB-20A engine block
- SE-12 screw eye
- PB-75 plywood block
- LL-2A launch lugs (4)
- WC-5 clay weight
- Kevlar® shock cord
- Elastic shock cord
- 12" parachute kit
The first thing I did upon arriving at the Nation Sport Launch in Muncie was head to the Semroc booth and buy a VF-261. Since I was staying at the Passport Inn in the south end of town, I figured that I'd be out of the action as far as post-launch activities were concerned. I also figured that the VF-261 would make a great project to work on while I was "locked in" my room at night. How right I was.
Instructions for this kit are up to the normal standards of Semroc excellence, but I think this kit might be mislabeled as a skill level 1 project. Construction in general was pretty standard, but there were two steps that caused me to stand back and take stock of the project to that point. The first of these was step #9 which said "Using a small amount of balsa dust or tissue, form a small aerodynamic shape on the tip of each fin." In my hotel room, dust was plentiful, only the bulk of it wasn't balsa dust. It was dirt. I took some of the spare balsa and sanded it like I was Survivorman trying to start a fire in the Canadian wilderness. I took some wood glue and mixed it with the dust then tried to place it on the fin tip in something that resembled an aerodynamic shape. The instructions said "This should look like the cross section on the fin and rounded like a miniature nose cone." It didn't. It looked like a booger. I spent the next ten minutes sanding and wiping the area down, trying to get all traces of the offending booger off of the rocket. I didn't, but you have to be looking for it to notice it.
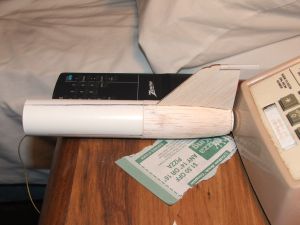
The second area of concern was the fin attachment. First of all I had trouble extending the line from the body tube straight down the boat tail. My line always seemed to have a pronounced curve to them as they neared the engine mount. The only ruler/straight edge I had brought with me was my Estes tube marking guide, which was nowhere near flexible enough to allow it to conform to the tapered surface. In the end I eyeballed the rudder and glued it in place with gel CA. When this had dried I took each fin and placed them onto the body until I was satisfied that they were on straight then marked the end of the boat tail. I placed the rocket body onto a piece of scrap balsa as suggested in the instructions, coated the root edge of the fin with gel CA, and lined it up on my marks while allowing the fin tip to touch the tabletop. Worked great.

Finishing:
Finishing was not a problem. I had envisioned standing in the parking lot outside my room and doing my sanding and
painting, but my room overlooked the "courtyard" (which looked as though a gang war may have been fought
there. Possibly the previous night.) Once I was in my room for the night, I literally didn't emerge until morning. It
was that bad. All of my glue fillets had dried by the time I woke on Saturday morning so before I took my shower, I
used the bathroom as a paint booth and sprayed on the first coat of primer. Because of the dry air in the room, the
primer was dry to the touch by the time I had dressed and I slathered on the first coat of Elmer's Fill 'n' Finish
before leaving for the AMA Field. When I returned that night I once again locked myself in, sanded the Fill 'n' Finish,
and sprayed on another coat of primer before I took my shower. After the shower I applied more Fill 'n' Finish to the
problem areas, sanded them when they were dry, and sprayed the final coat of primer on before I turned in for the
night. Conditions were still dry and breezy when I arrived at the field on Sunday, which allowed me to do the painting
on the VF-261 between flights. I first sprayed the entire rocket with Valspar silver metallic, the perfect paint for
the conditions because it dries extremely fast. Once it had dried to the touch, I masked off everything but the tail
fin, which I then sprayed with Valspar gloss black. More painting would be necessary later but having it look close to
the kit card art was all I was hoping for on flight #1.
Construction Rating: 4 out of 5
Flight and Recovery:
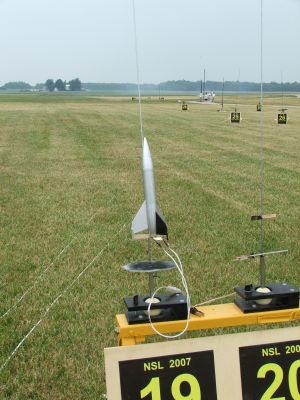
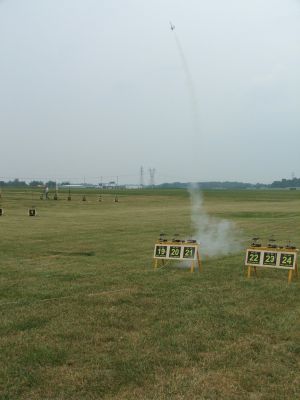
As I had hoped, the first flight was at NSL 2007 outside of Muncie, IN. Despite the size of the field, I somewhat
puzzlingly went with a B6-4 for the first flight. (I may have wanted to cut down on the inevitable post-flight walk or
I just may have been out of C6-7s.) As it turned out, the B6-4 was plenty of motor for the AMA field and the flight was
straight and surprisingly high, momentarily going out of sight. Recovery occurred a long way downrange, but even from
our vantage point on the flight line it was obvious that it was going to be a Bill Eichelberger signature recovery
either on or very near the access road. One long walk later I found it within three feet of the road but luckily
without damage.
Flight #2 was at a QUARK launch at the VOA, another good sized field. This time I chose an A8-3, once again because I probably had no C6-7s and was running low on B6-4s. This flight was also quite straight but never out of sight. Ejection occurred right at apogee and it was immediately apparent that something wasn't right. From the looks of things, the weight of the rocket and the lack of wind weren't enough to get the chute to completely deploy. Instead it acted like a bulky streamer and was perfect under the conditions as the landing happened in the heavy grass to the east of the field. No damage, but I wonder if future flights would be that lucky. On a happy note, the A8-3 flight would have been perfect for flights at B6-4 Field. Now if I can just find a day without ball games.
Flight Rating: 5 out of 5
Summary:
PROs: Vintage styling. Fairly quick build. Good performer. Would make for a cool upscale!
CONs: Hit or miss fin attachment method. Balsa dust boogers.
Overall Rating: 4 out of 5
Other Reviews
- Semroc VF-261 By Chan Stevens (April 1, 2009)
This is a Semroc original design, although it is inspired by the 1961 Estes catalog #261 (the VF stands for Vern's Fanttsay), which in turn was inspired by the Luna 3 from "Destination Moon". The futuristic model shares many parts with the V-2 and flies fine. Parts are top quality: Balsa nose cone, screw eye anchor BT-55 body tube Balsa boat tail Laser-cut balsa fins (3) ...
- Semroc VF-261 By Patrick Bissonnette (September 23, 2007)
Brief: This is a cool retro style rocket that is sure to please everyone with its looks and flying. Construction: If you like quality balsa parts, this kit has it. Here is what the VF-261 comes with: Balsa nose cone BT-55 tube Balsa tail cone 18mm motor tube Laser cut fins Engine block Screw eye Plywood block 4 launch lugs Clay Kevlar ...
 |
 |
Flights
|
|
|
|
J.B.B.Jr (December 27, 2007)