| Construction Rating: | starstarstarstarstar_border |
| Flight Rating: | starstarstarstarstar |
| Overall Rating: | starstarstarstarstar_border |
| Published: | 2013-06-19 |
| Manufacturer: | LOC/Precision  |
 Brief
Brief
LOC Vulcanite H76 is a 2.2" diameter high power rocket kit. It is a sleek rocket capable of flights well over one mile in altitude and supports 38mm diameter motors (29mm can be used with an adapter).
Components
Most components are of high quality. Airframe tubing is thick and robust. Fins are aircraft quality plywood. Nose cone - ogive, very strong. The 28" parachute is made from Nylon. So, quite a few positives regarding components.
You will have to purchase motor retention hardware, I bought an Aero-Pak retainer, it works very well. Also, the kit comes with an elastic shock cord. Many high power rocketry experts (in my local club and through articles I've read on the web) don't like elastic for high power shock cords since they can break in some situations, and they tend to snap the nose section and the main section back together after stretched. I replaced the elastic cord with tubular nylon ordered from LOC Precision.
Construction
The instructions for this kit are very minimal. They are text-heavy with few diagrams. It's best to have some experience with using epoxy and with constructing a high power rocket. The instructions are not like Estes model rocket instructions where every step is spelled out in detail with supporting diagrams.
The following is a list of items I modified based on advice from experienced members of my local rocketry club. My goal was to 'build it right' using enough of the techniques recommended without overbuilding the rocket. It is flying well these days so I believe the build is good.
Bottom section (fin can) portion of the rocket:
1) Motor mount. I purchased an extra centering ring in addition to the standard components included in the kit. (See Rick VanVoorhis article on Rocketreviews.com for LOC Vulcanite and see note [a] below, motor mount details.)
2) Per recommendations from my local rocketry club, I used a “Zipperless” design (see article written by Stu Barrett at http://www.info-central.org/?article=132). Extra components purchased:
- U-Bolt (Home Depot or Lowes)
- LOC bulkhead (holes drilled for U-Bolt and for ejection gas pressure conduit)
- LOC coupler
- LOC stiffy
3) Fillets, epoxy. Use gloves see internet article. No extra components needed, simply use 15 minute Epoxy.
4) Rail buttons in addition to launch lugs. Check with your local rocketry club to determine which size rail buttons to use. These can be ordered from LOC Precision or Apogee Components.
5) Motor retention, this is a must have for this rocket. Extra component purchased: Aero-Pack 38mm retainer
Middle section main airframe:
I ordered another LOC 2.26” Airframe. The intent is to provide a middle section to house the harness and parachute. The main airframe, as ordered from LOC Precision, has 3 slots for fins near one end of the tuble. I cut the tube off about 2 inches above the point where the slotted fins are. Cut to length of ~ 28”.
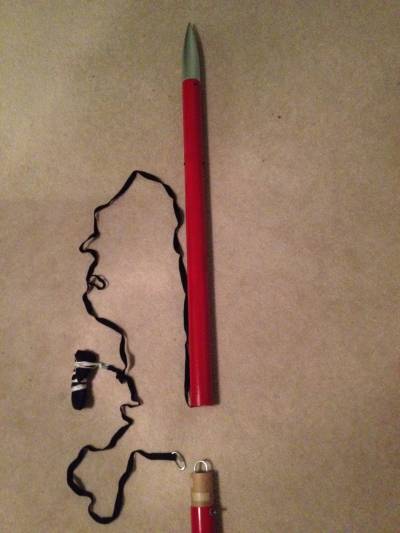
Harness:
- Throw away the elastic, or you can use it to repair your old underwear.
- Order, from LOC Precision, 12’ of tubular nylon, with loops sewn in each end.
- Buy quick releases (2) from Home Depot or Lowes
- 28” Chute (with the kit)
- Attach quick releases to each end of the tubular nylon.
- Tie loop knot about 4’ from one end of the harness
- Attach small quick release to chute, attach the chute, via the quick release to the loop knot in the harness.
- Before launching, thread the longer section of the harness through the middle airfram section. Fasten, using the quick release, the harness to the eye bolt coming out from the top section bulkhead. Then insert the top section coupler into the middle section main airframe. Make sure there is either a lot of friction on this fit, or use positive retention (rivets, screws) to keep the middle section attached to the top section. You don't want these two sections separating at deployment.
Top section (payload) and nose cone:
Use standard LOC Precision parts from the Vulcanite kit (bulkhead, coupler, eye-bolt, 10” tubing, nose cone). Simply follow the LOC instructions for this section.
[a] Motor Mount details:
I read an article on rocketreviews.com written by Rick VanVoorhis on his construction of the motor tube. I'll copy a section of that review here:
"The construction was very straight forward and simple but I changed a couple of steps for my modifications. In constructing the motor mount I measured the mount tube and installed the extra centering ring at the front of the through the wall cuts for the fins and installed the mount in the airframe with only the two forward centering rings on the motor tube. This allowed me to install the fins and fully fillet the inside of the airframe and the fin joint to the motor tube before fitting the rear centering ring into place. This way the fins are joined to the inside of the rocket at the motor tube, leading edge to a centering ring, trailing edge to a centering ring, and the body tube."
I used Rick's method, although I found it difficult to cleanly apply epoxy for an internal fillet in between the airframe and motor mount.
Other Notes:
Component quality and fit are both good, so there was very little sanding needed.
Make sure to sand any surface of the airframe tubing and motor tubing where you plan to apply adhesive. This gives epoxy a better chance to grab on. Tubing is rather slick unless you sand it.
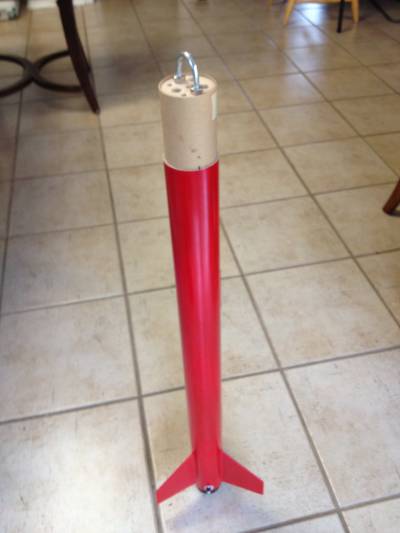
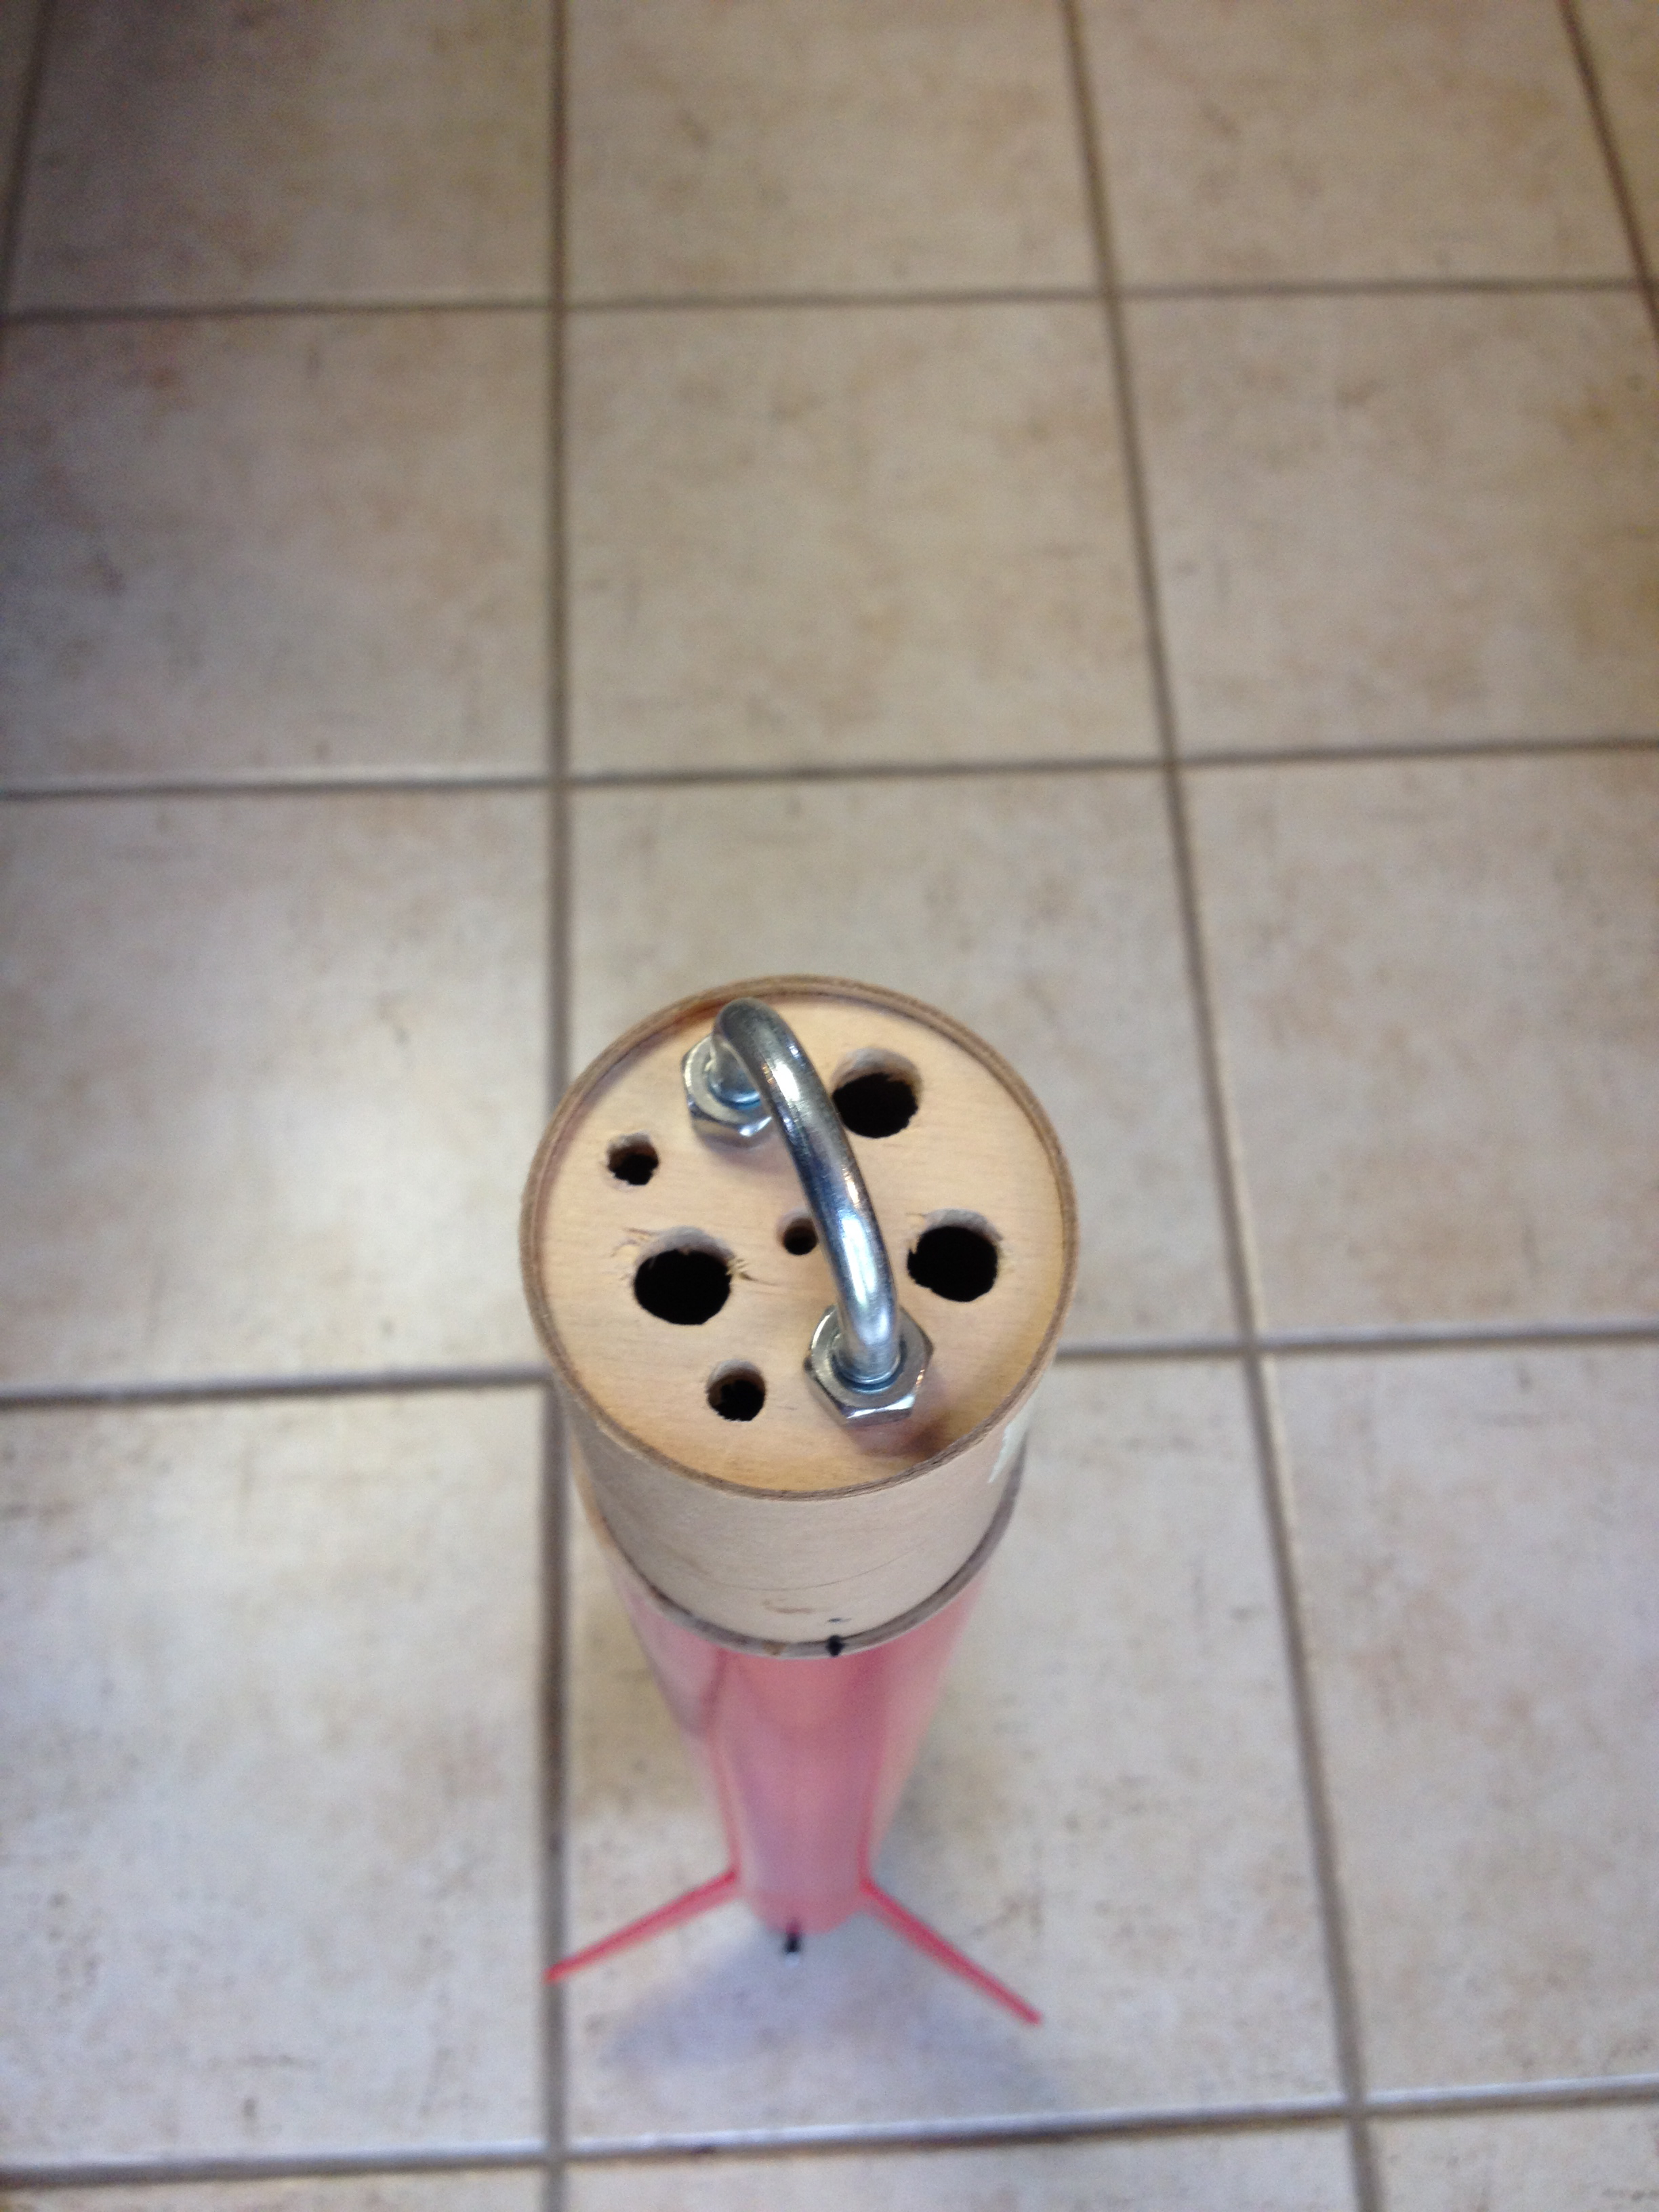
The 1st photo below shows the bottom section with coupler, bulkhead, and u-bolt for the zipperless configuration. The 2nd photo shows some detail of vent holes for ejection charge.

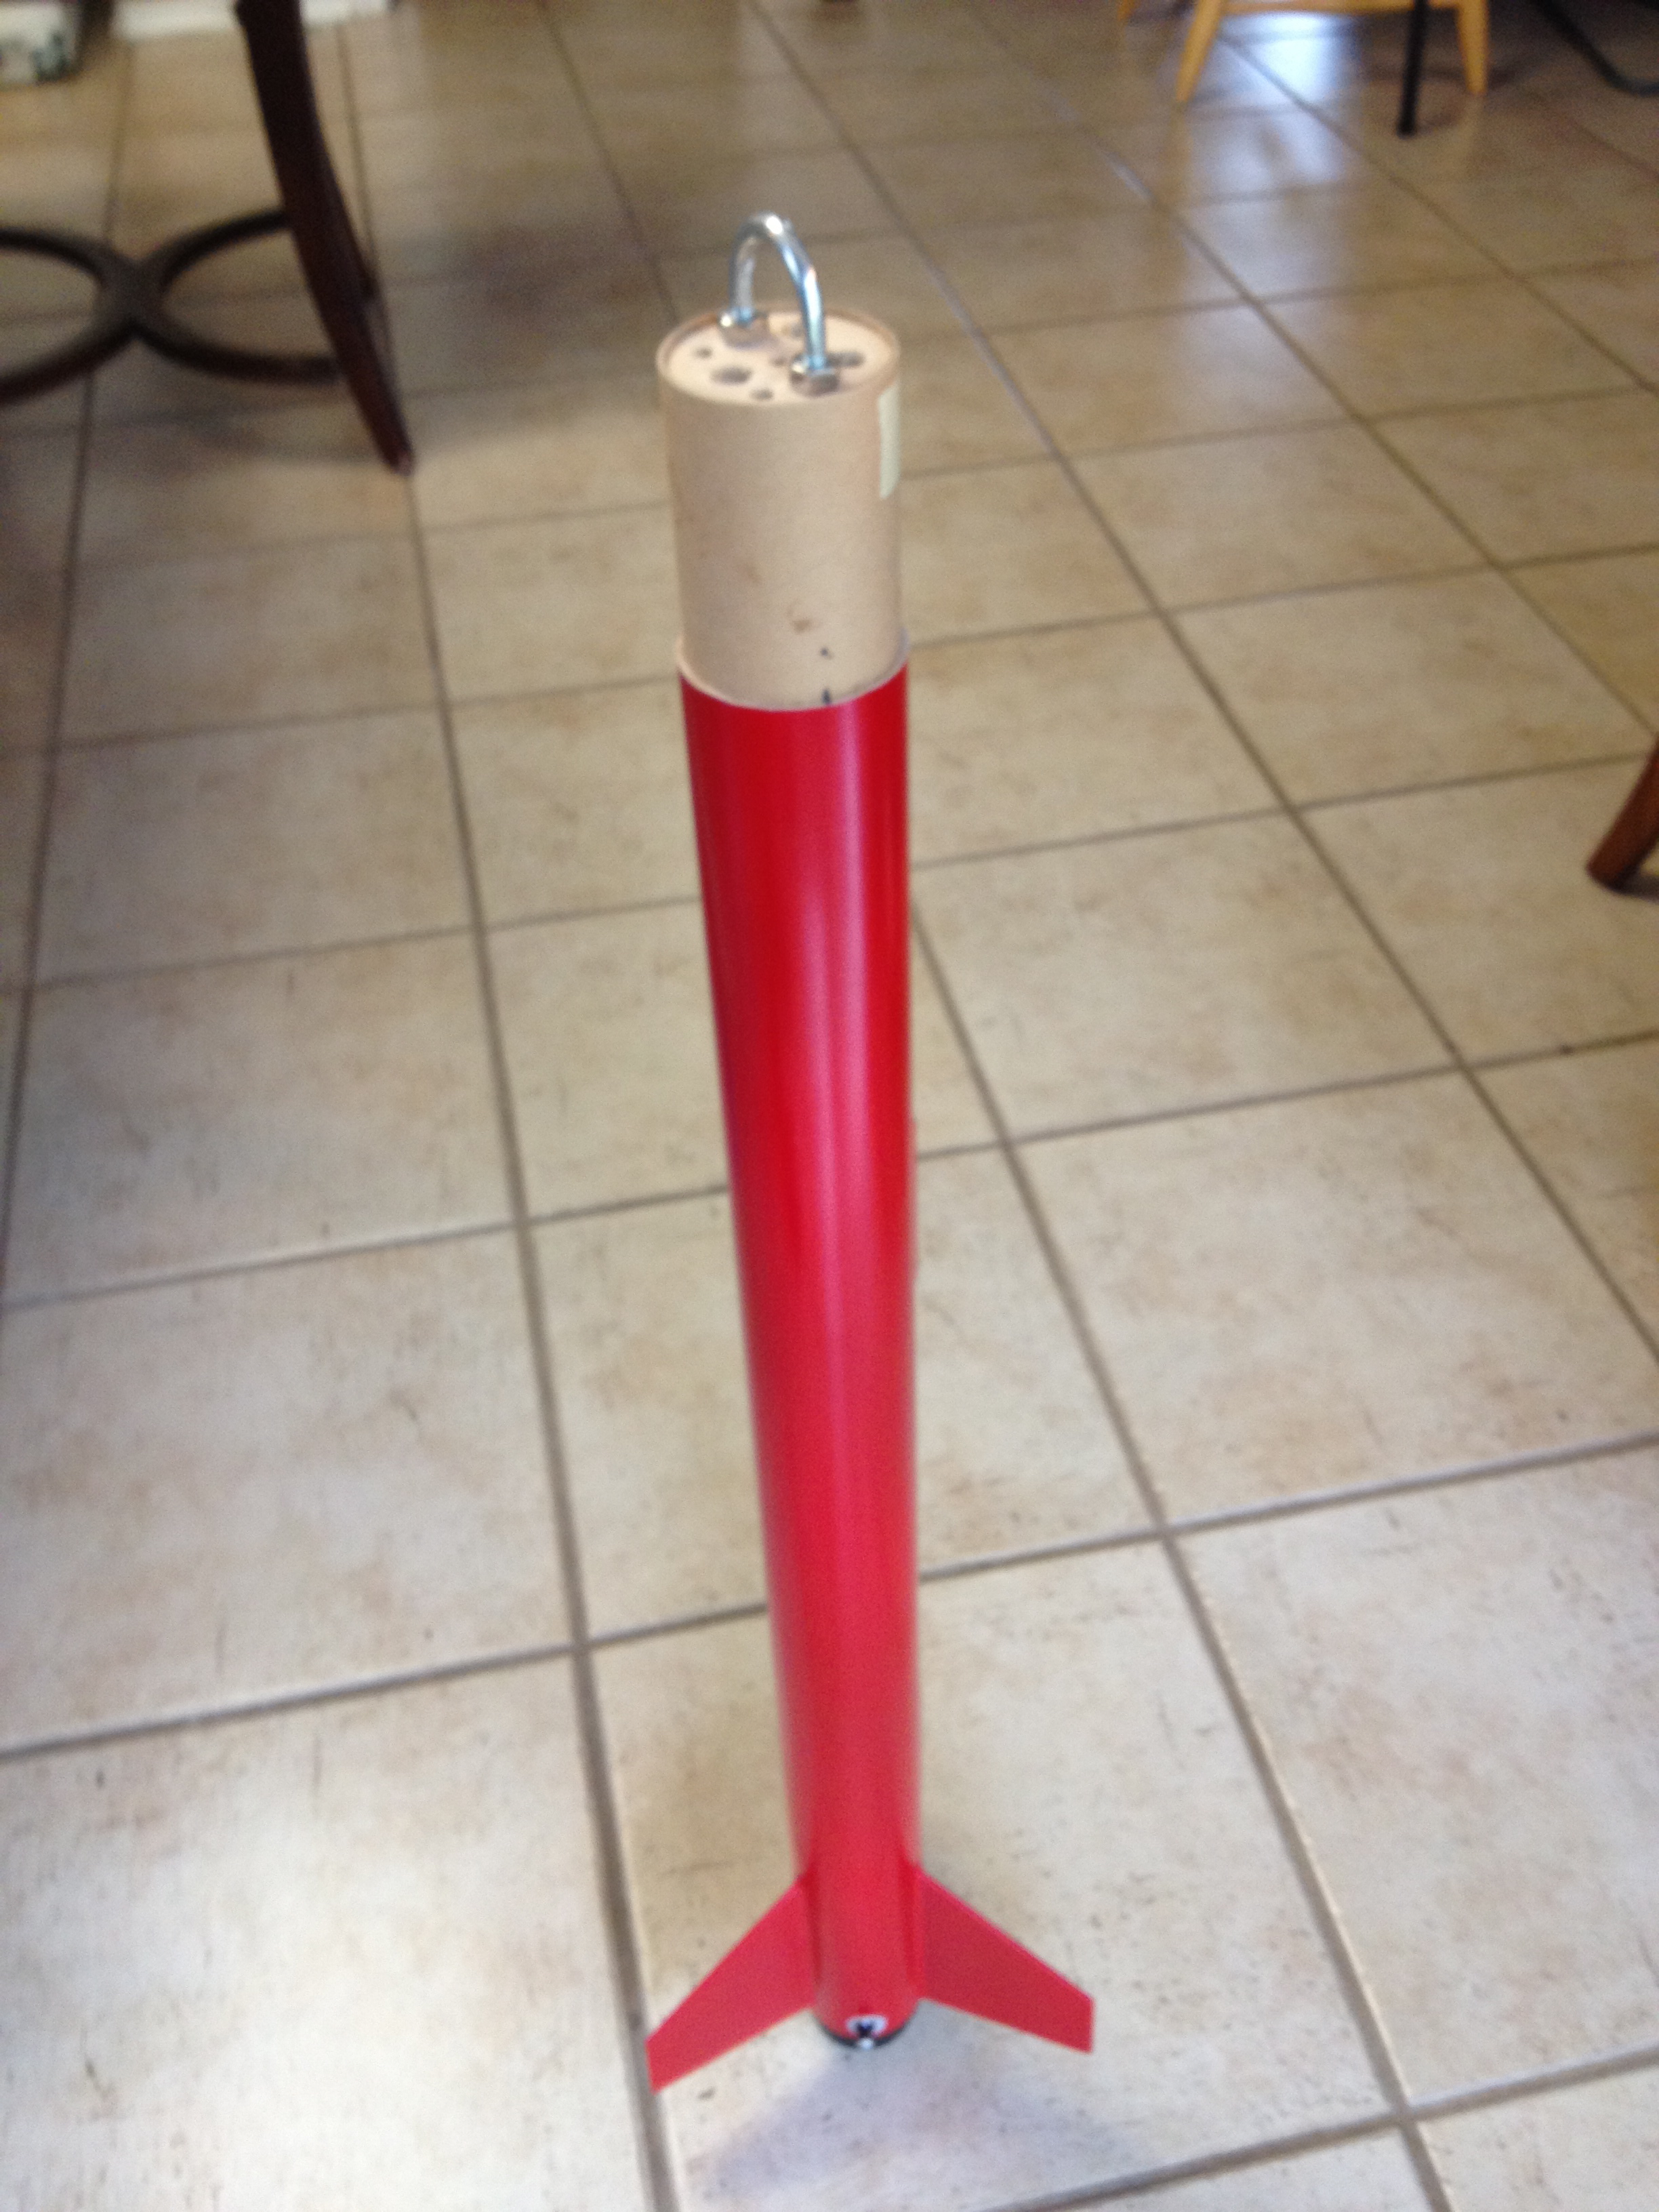
The photos below show the Vulcanite in its completed and improved configuration.

Finishing
I did not buy the LOC Precision decal kit, choosing to finish the rocket in a simple red body and silver nose cone. No special techniques are required. I used Krylon spray paint from Wal Mart for both the primer and the finish coats of paints. The red looks great against a blue sky.
Flight
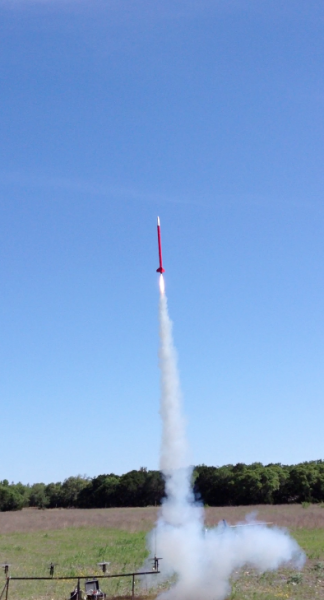
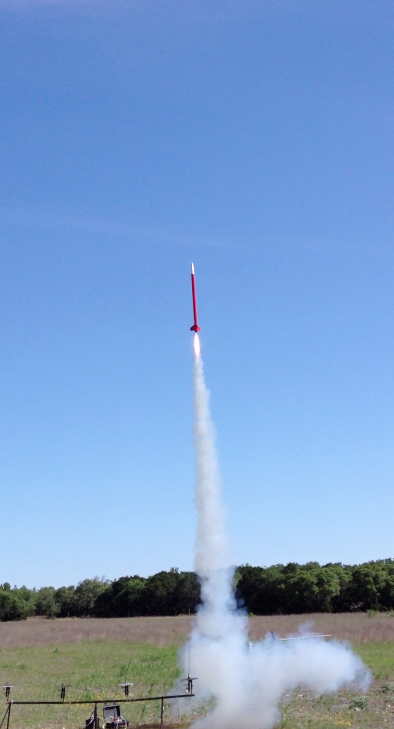
The rocket flies well. First flight was on an F50-6T from Estes. My field was small and I wanted to get a good idea of how the rocket flew without launching to a high altitude. Launch and recovery successful. I've also flown it on a G40-7W (Estes) and on a 289H152-10 (BS) CTI motor. The H152 flight was really great. This launch occurred after some of the rebuild (zipperless design, extended middle section, improved harness). Simulated altitude was 2800 feet, winds calm, excellent launch and successful recovery.
I plan to launch on a J350W in the near future. My Level 1 advisor will assist me with analyzing fin flutter at near mach speeds to ensure I don't rip the fins off when travelling 0.95 to 1.0 mach.
Photo below is with the stock configuration on a G40-7W Estes motor.

Recovery
The 28" chute quality is quite good (Nylon chute and cords). It's black and shows up well against a blue sky or overcast sky. I replaced the elastic with tublar nylong from LOC Precision.
Summary
This was my first true high-power kit. I quickly learned that most high-power kits get you some of what you need for a quailty HPR build, but to do it right, there is more investigation and additional components to buy.
The rocket can be flown as specified in the instructions, with the addition of positive motor retention (for example, with an Aero-Pack retainer). You can even fly it with the elastic shock cord.
For longer term, and for higher power motors, I'm glad I made some improvements to make the design more robust, most notably the zipperless design.
I really like the 2.2" outside diameter coupled with a 38mm (about 1.5") motor diameter. It makes achieving high altitudes possible. I'm looking forward to launching to one mile altitude with the rocket.
Other Reviews
- LOC/Precision Vulcanite H76 By Rick VanVoorhis
After some consideration of a smaller kit for general purpose flying I chose the LOC Precision Vulcanite kit. Since I was going to be flying it on higher powered motors also I ordered it with one extra centering ring for the motor mount. After getting the kit I opened the package and inventoried the parts, all were there and in good order. I had decided to make some changes to the design for ...
 |
 |
Flights
|
|