| Construction Rating: | starstarstarstarstar_border |
| Flight Rating: | starstarstarstarstar_border |
| Overall Rating: | starstarstarstarstar_border |
| Diameter: | 0.98 inches |
| Manufacturer: | Estes  |
| Skill Level: | 2 |
| Style: | Glider |
Hobby Knife, Sand Paper (220 grit), Glue (I used Thick CA), Ruler, Pen or Pencil, Desired paint etc..
Assembly
![[Rocket Pic]](images/archive/images_est/rp_est_arvc005.jpg) Compare the parts in the box with the parts list in the instructions. Separate all balsa parts from balsa stock and sand trim as needed. Assemble wings, there are two and make sure you make a left and right for each wing set. You will use the included template to get proper dihedral on the outer wings. Important for the center dihedral: read ahead in the instructions before gluing especially if you use CA glue!
Compare the parts in the box with the parts list in the instructions. Separate all balsa parts from balsa stock and sand trim as needed. Assemble wings, there are two and make sure you make a left and right for each wing set. You will use the included template to get proper dihedral on the outer wings. Important for the center dihedral: read ahead in the instructions before gluing especially if you use CA glue!
Attach dowel rods to rear of each glider body (BT-5's). Be careful, my marking guide was not large enough for the tubes and so the dowel lines and wing line did not line up properly!
Attach vertical stabilizers and wing panels to body tubes and attach wing panels to body tubes and you have the finished gliders. Make measurement, and cut for engine hook. Install slide adapter in place. Glue and slide engine block into place and glue as well.
Glue nose cone base into nose cone for main body tube. Smear glue inside body tube and slide engine mount quickly into place so rear of motor mount tube is flush with rear of main body tube. Tie shock cord to nose cone. Glue nose cone into place after sliding shock cord down longer tube. Be careful to minimize the amount of glue you get on the shock cord.
![[Rocket Pic]](images/archive/images_est/rp_est_arvc015.jpg) I made my modification here. I installed the shock cord through the tube adapter and then glued adapter in place (much stronger). Glue adapter into bottom (shorter) tube. DO NOT GLUE into top (longer) tube because it needs to separate here!
I made my modification here. I installed the shock cord through the tube adapter and then glued adapter in place (much stronger). Glue adapter into bottom (shorter) tube. DO NOT GLUE into top (longer) tube because it needs to separate here!![[Rocket Pic]](images/archive/images_est/rp_est_arvc016.jpg)
Using the marking guide, mark the main body tube. Cut out and carefully trim plastic parts for glider retention. Test fit these and trim as needed. Glue plastic components into place carefully . . . alignment is critical. Glue launch lugs into place as well. Attach streamer to shock cord now. ![[Rocket Pic]](images/archive/images_est/rp_est_arvc021.jpg)
Finishing
Since I wanted to maintain some performance I used one coat of glossy white paint and no primer and sealer to save weight. I choose to use Glossy White Spray paint (Testor's) although I would have preferred a slight Pearl Gray White. This color was handy and close enough.
![[Rocket Pic]](images/archive/images_est/rp_est_arvc025.jpg)
Personal Notes
It is definitely a level 2 kit. I would make it a level 3 kit. I had no problem assembling but the average level 2 person may experience problems.
![[Rocket Pic]](images/archive/images_est/rp_est_arvc006.jpg) The portion of the directions on the wing panel assembly needs to be updated. Although I was aware of it, no one reads the booklet first and then builds and the part on wing dihedral came too late especially if you use a fast glue like CA. If you assemble the wings by placing them on flat surface, like directions say, and then read the part about placing a tube under one wing for correct dihedral, it is probably too late since the glue is now dry!
The portion of the directions on the wing panel assembly needs to be updated. Although I was aware of it, no one reads the booklet first and then builds and the part on wing dihedral came too late especially if you use a fast glue like CA. If you assemble the wings by placing them on flat surface, like directions say, and then read the part about placing a tube under one wing for correct dihedral, it is probably too late since the glue is now dry!
Otherwise, good directions and good parts. I had trouble with old balsa and old decals. I attribute this to the fact that the kit sat in my basement for over 3 years. I have no doubt it would
be fine if I went out right now and bought one.
As illustrated above I was not satisfied with shock cord installation so I modified this from what the direction with the model suggested.
Be sure to note that the marking guide for the small glider tube on my kit did not fit right. Be sure to note this and make appropriate changes as needed on your model.
![[Rocket Pic]](images/archive/images_est/rp_est_arvc008.jpg) Dowel rod placement is critical for this determines how tight the glider is held by the booster and therefore how easily the booster will release the glider in flight.
Dowel rod placement is critical for this determines how tight the glider is held by the booster and therefore how easily the booster will release the glider in flight.
Decals are water transfer and a pain. I ripped a lot of them. Either they were way too thin (I like pressure sensitive and ones I don't have to cut out) or the fact that this model was rather old (sat in my room downstairs for about 3 years since I bought it still sealed in plastic . . . I bought two since I liked it so much . . . I never finished the first and lost many parts so I built this one).
Flight Report
I had a tough time trimming for flight since I goofed on main wing dihedral (not enough). Be careful on this part. Flight trimming is important and I advise you to trim and beat it up before painting so that when you paint it you cover up any repairs from test flying the gliders. They will usually need a little tail weight and every one I have made OR saw fly has always been left wing heavy, therefore, you may need to add a little weight to right wing. Also when you trim fly, don't just toss it . . . really heave them, like baseballs, straight up. You may prang it until you balance it but it is worth it once you get it going right.
Straight up boost and release and "Man, it is COOOL . . . " to watch these things fly and properly trimmed they land within 50 feet of each other as they circle each other. Word of advise: they really glide well when trimmed properly. Do not fly on a "C" motor unless you have a lot of field to fly it in. You may not get a glider or 2 back!
We plan to do a 3-way Drag race next time with 2 others who have this kit and have 6 gliders in the air at once.
This kit is also begging to be upscaled to RC size with two radio systems and two pilots for double the fun!
Overall rating is 4 out of 5, only because of the pain of trimming that plastic and the direction's "blind spot" (at least have the two steps on the same page).
Other Reviews
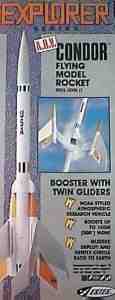
- Estes A.R.V. Condor By Hank Helmen
Single stage piggy back boost launch glider design with two gliders. The glider's wings act as rocket fins during boost then separate using the ejection charge to deploy the gliders. The rocket booster body recovers with a streamer. The kit includes 4 body tubes. Two larger ones are for the booster and two smaller tubes for the glider fuselages. Also supplied are 3 plastic nose cones and ...
- Estes A.R.V. Condor By Andy Sola
The A.R.V Condor is a single staged rocket that is about 19 inches long. . At apogee, two drones detach for a gliding return to Earth. Booster returns on a streamer! Recommended motors are B4-2 (First Flight), B6-2, and C6-3. The construction on this rocket wasn't as hard as I had thought it would be. After reading all the reviews I thought it would be impossible to make especially because ...
- Estes A.R.V. Condor By Eric Miller
I recently received an A. R. V. Condor as a gift from my wife. The A. R. V. Condor is an Estes Explorer series rocket (Intermediate level). This kit was packaged in plastic and came in a box and was probably around $15. 99. All the parts were included and none were damaged. The instructions were typical Estes and were excellent. The special feature of this rocket is at apogee ...
- Estes A.R.V. Condor By Carl Tulanko
The Estes Condor is a very slick kit which incorporates a sustainer with two gliders attached to the sides. The glider's airfoils act as fins for the model during boost and detach at ejection, then each glider spirals in for a landing while the main sustainer lands with the aid of a streamer. USAF insignia helps dress up this little beauty and makes it a esthetically pleasing kit to launch or ...
 |
 |
Flights
|
|