| Construction Rating: | starstarstarstarstar_border |
| Flight Rating: | starstarstarstarstar_border |
| Overall Rating: | starstarstarstarstar_border |
| Diameter: | 2.60 inches |
| Manufacturer: | The Launch Pad  |
| Style: | Scale |
Brief:
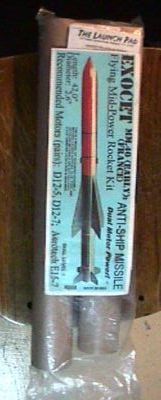
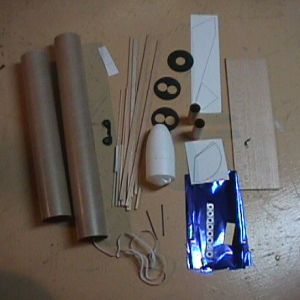
The Launch Pad Exocet MM.40 (Early Version) is a Skill level 3 project and they mean it. There is no pre-cut balsa wood parts and the instructions I received did not have an inventory list of parts, so I wasn't even sure when I started that I had everything. Instructions were on 5 pages and half of every page included diagrams to help with the assembly.
Construction:
If you have built a few rockets in your time you can figure out if you have all the components. Some of the components are more for design rather than stability, making this product enjoyable for the scale enthusiast as well. Some of the structural parts, such as fillets, use strips of balsa rather than a lot of glue.
Also, in Canada, almost all mid to high powered rockets must be flown with rail buttons rather than rod lugs so I replaced the lugs with buttons on this rocket.
On the first step of the build, I found my first problem. I was to slit the engine tube and install the engine clips into the slits and secure them with the manilla cardboard patches provided. I suspect that the manufacturers glue on the back of the patches had hardened as I couldn't get the backing to separate. I eventually had to use masking tape for the job. After that though, the two motor mount tubes fit together well and I was very impressed.
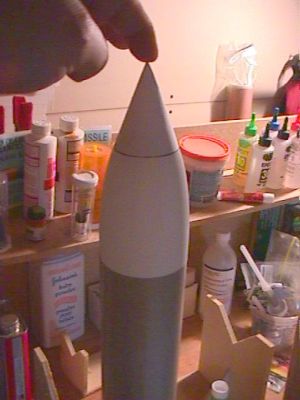 The tip of the nose cone has to be formed from a paper shroud and glued to the plastic nose cone to make it into a point. I'm not sure I liked that idea. Forming points with paper is always troublesome and I'm unsure of how it will react to a hard landing (even with CA reinforcement). I tried to include this on the nose cone but in the end I never liked the way it looked. I bent the paper on the side of the fold and it had that "pushed in" look. In the end, I cut the nose cone off and sanded it again.
Also, the coupler was stuck inside of one of the tubes. I had to loosen it with a X-Acto knife and pull the rest of it out with a pair of long nose pliers. The coupler still had a good shape to it so I didn't call the manufacturer to complain.
Finishing:
No decals and there is one paragraph describing painting. I was rushed to get the rocket out to our next launch and even with the unprofessional job I did painting the rocket, this rocket with it unique design still turns some heads when it's sitting on the pad.
Construction Rating: 4 out of 5
Flight:
I flew this rocket only once that day on two D12-5s. The RSO was new at the table and was a little aggressive checking the fins. He snapped one of the tail fins during the inspection and I had to repair it with CA before the flight.
I used about 1" of cocoon insulation as wadding (which meets the Canadian Rocketry Standards for fire protection and environment concerns). I also included a Perfectflite altimeter. I had simmed this rocket to 900' and wanted to check it. The motors were retained with the clips provided and no additional retention was necessary.
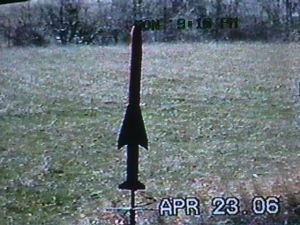
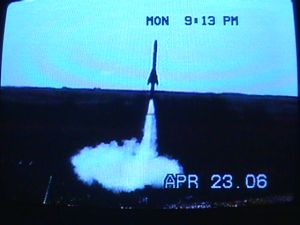
With the dual motor system, there was a lot of smoke off the pad and the slow take off gave this bird a very realistic look. A slight wind caused some weathercocking. I videotaped the flight and love to watch the playback.
My altimeter reported 615'. I'm unsure if the lack of altitude was due to the broken fin.
Recovery:
Ejection at apogee was perfect. I considered using a nylon chute but I was very happy with the 18" Mylar parachute provided. No burns, rips, or tears.
The patch I made on the rear fin did not hold on landing. The fin was crushed and laid near the rocket. I would have liked to try this bird a few more flights that day but it was not to be. Once it is repaired I will update this log.
Flight Rating: 4 out of 5
Summary:
As mentioned before, this kit is a level 3 challenge. I thought my building technique was pretty good but I can see that in order to do justice to the kit, I would have to take my time when building it. My son bought me this rocket for my birthday and I was so impressed I bought The Launch Pad Scimitar. I have very few clustered rockets in my collection and these will make great additions.
Overall Rating: 4 out of 5
Other Reviews
- The Launch Pad Exocet MM.40 By Tom Augustyn (July 28, 2015)
Brief This is a dual motor scale version of the French-built surface to surface anti-ship missile designed in 1967 and still in service today. This is a true modeler's kit that should only be attempted if you have previous building experience. There are lots of diagrams to reference but not the Estes type of "hold your hand through each step " instructions. Still, if you follow ...
- The Launch Pad Exocet MM.40 By Andrew Bronfein (May 1, 2011)
I purchased the Launch Pad Exocet because of it's odd fin shape that I think look really neat. As all Launch Pad Kits I have purchased, not a part was missing and the instructions were definitely top rate. However, I hate leaving things the way they are and decided to follow Chuck's word for once and I'll be damned if he wasn't correct. Painting the fins with finishing epoxy instead of CA ...
 |
 |
Flights
|
|
G.C.B. (May 17, 2006)
|
|
K.M.J. (June 24, 2005)