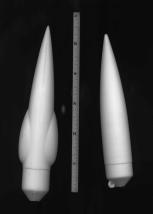
How to Make Large Nosecones Inexpensively - Without Using a Hotwire CutterAs my build team and I keep growing toward larger and larger projects, one of the problems that we have had to overcome is the unavailability of many of the different styles of cones that we want to use. Our project for Plaster Blaster last year was a 6.44x upscale of the classic Estes Starfighter combo, the Torellian Invader and the Orion Starfighter. The original kits used PNC-50 cones that we needed to upscale to match up with a 6.28" diameter tube. To do this we have developed a technique for making large cones with a reasonable amount of equipment and at a reasonable cost.
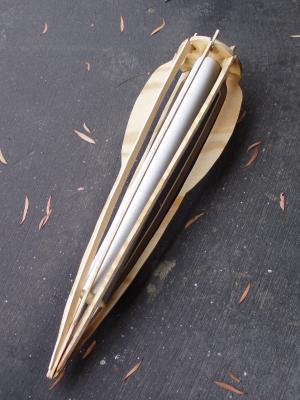
After plotting out the patterns, they were traced onto ¼" plywood and cut out with a jigsaw. We made four U-shaped ribs per cone, notching the points of each to interlock with each other. At the base of the cone is a ½" plywood centering ring that is notched to accept the ribs. We sized the centering ring to accept a 54mm tube in the middle to allow for ballasting if needed. The end of the tube was capped with a thin plywood disk to prevent the expanding foam from leaking in when we poured the "meat" of the cone.
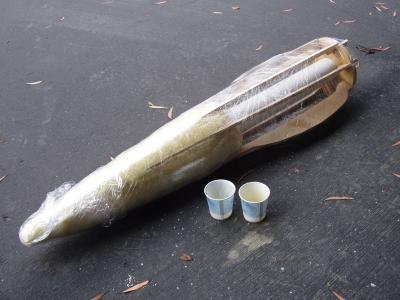
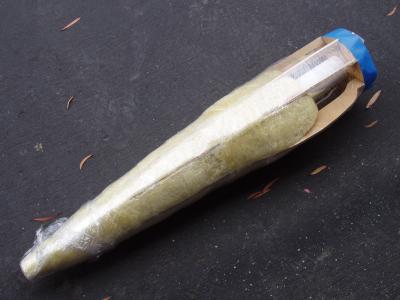
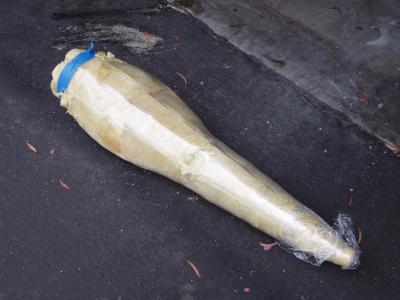
After the rib framework was tacked together with CA and epoxy, we wrap the frame in plastic. For this project (and article) we decided to try plastic wrap so that the foam could be seen. DO NOT USE PLASTIC WRAP! It sticks to the expanding foam badly! The plastic that we have had the best luck with that seems to release well is the plastic grocery store bags with the seams tightly taped. Expanding foam is quite easy to work with, even if you have never tried it before. Just mix the two parts equally and pour into the plastic lined framework, being careful not to get it into the ballast tube. The caveat to the process is to work in small quantities. Sometimes the foam expands a LOT more than you expect it to! The cones for or project used three small Dixie cups of each part to make the entire cone! The foam sets quickly (about 5 minutes a batch) so a whole cone can be poured in under an hour! After your final pour, set the cone aside for at least several days or more to give it a chance to cure thoroughly. The foam may shrink slightly in this time so you don’t want to start to sand it immediately. On a quick side note, use the two part liquid foam as opposed to the stuff in the spray can for your local hardware store. The liquid is far superior and the spray foam shrinks dramatically more.
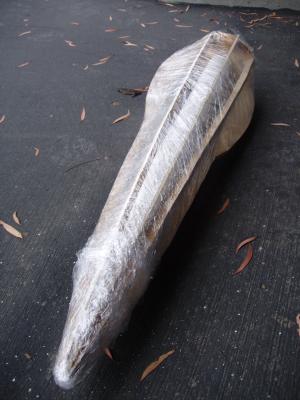
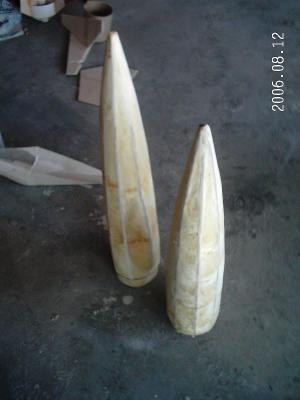
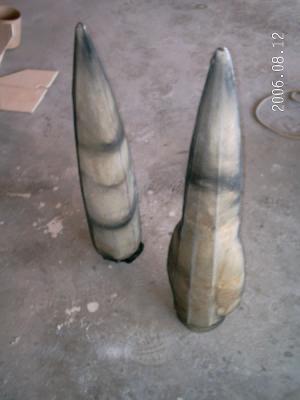
After the foam cures, the foam sands easily. Sand it carefully down to the shape of the frame. Be careful not to sand to deeply between the ribs or you will need to build the area back up with filler putty. To toughen up the cone it now needs to be covered. Fiberglass would be an option, but we have found another inexpensive, easy option. We have done this by using nylons (or thicker tights). Yes, you might feel a little weird about going to the store and buying nylons in the largest size you can find, but they work great! Stretch the nylons over the cone carefully, so as not to damage the foam or the nylons (you don’t want a run in your nylons, do you?). Trim the excess off and secure it with a knot, clamp or wrap of tape to keep them tight.
Our team then puts on a couple of coats of Kilz to get a really smooth finished base. Then a coat of automotive primer and auto paint (at least on large scale projects) get paint-gunned onto the cone! Contributed by Todd Mullin
What You Can Do |
|||
|
|