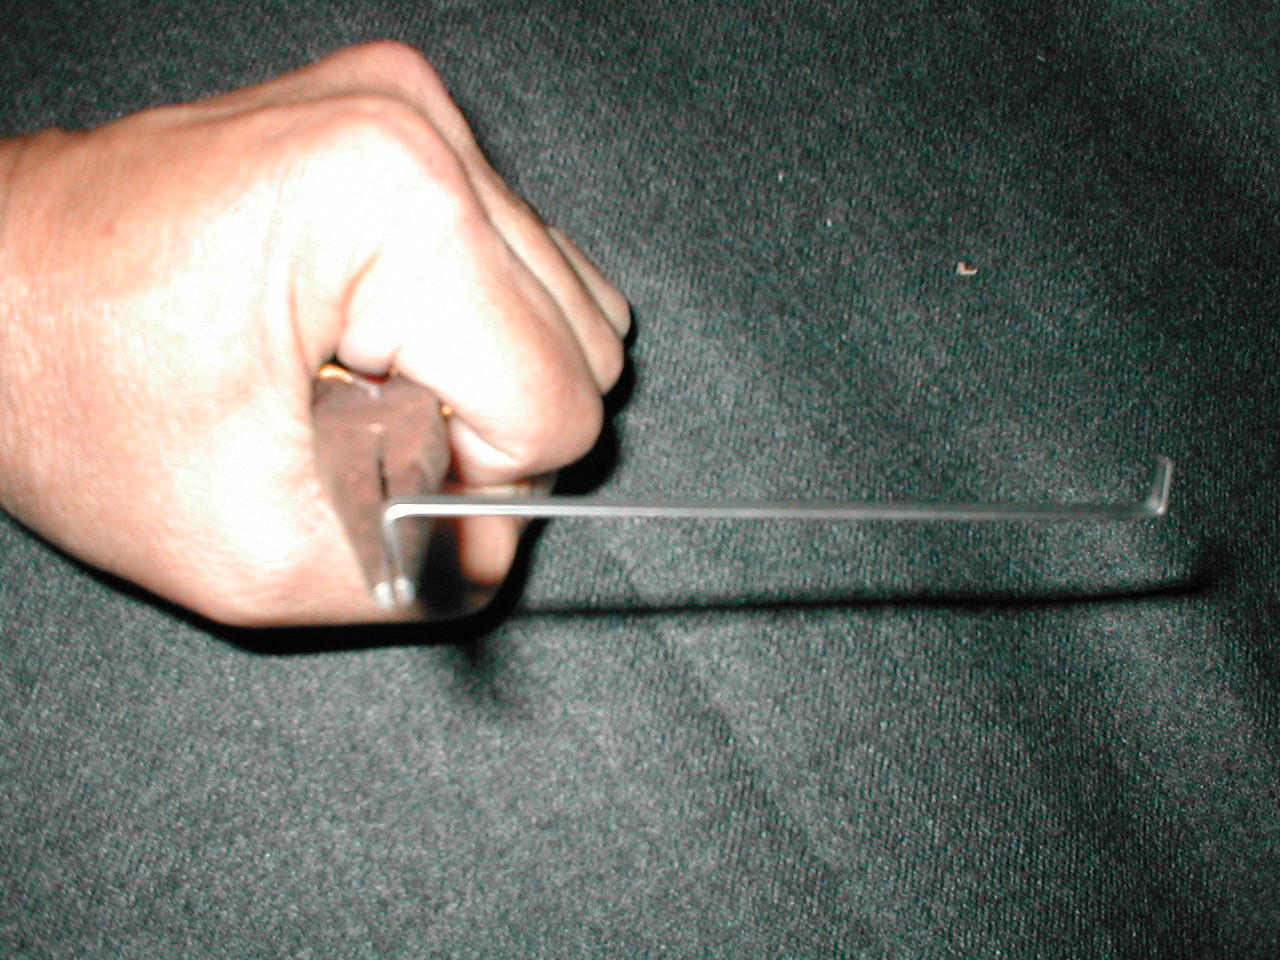
Engine Hook Modification for 18/24mm RMSFor those who use the smaller reloadable motors (18mm and 24mm) and want a simple motor retention device, the engine hook is a viable alternative. No, the engine hook isn’t installed in the normal manner, so it won’t get in the way of the delay element. Step 1 – Grasp one end of the engine hook with a pair of needle nose pliers, just short of ¼" below the original bend in the engine hook. Step 2 – With a firm grasp, bend the engine hook back 90 degrees the opposite way of the original bend.
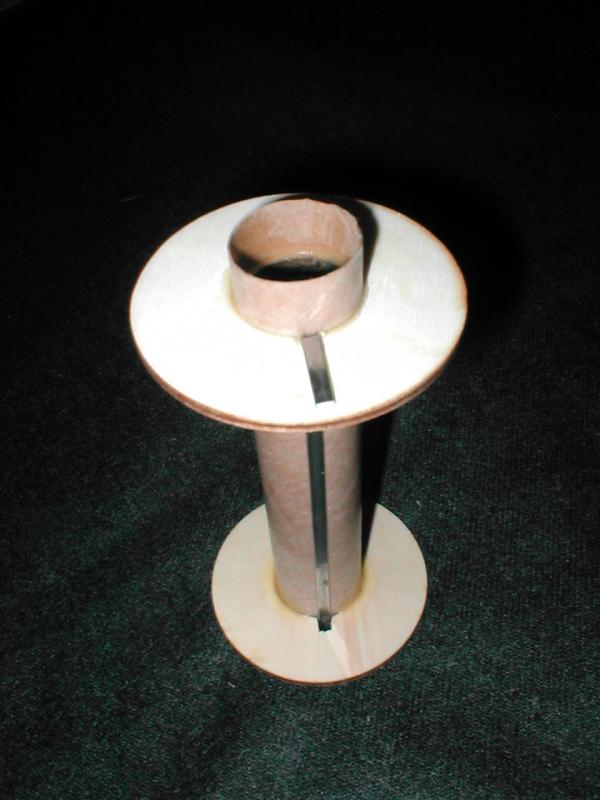
Step 3 – Grasp the original bend with the needle nose pliers and straighten the entire end out (the original hook may break off when reversing the bend, but that’s OK). Step 4 – Cut a small slit in the forward centering ring for the engine hook to fit under. Step 5 – Position the engine hook straight along your motor tube, with ¼" of the non-modified end hanging below the rear of the motor tube as normal, and then put a drop of CA half way up the engine hook to secure it to the body. Step 6 – Place a bead of glue around the motor tube, ½" behind the other end of the motor hook, and push the centering ring up until it is flush with the motor hook and centered around the tube. Step 7 – Epoxy or CA the engine hook to the back of the centering ring and half way down the length of the engine hook. Step 8 – Install the rear centering ring as normal. Note: if there isn’t a notch in the rear centering ring, cut one out to allow the motor hook to be lifted up sufficiently to allow insertion of the motor into the motor tube.
Contributed by James Gartrell
What You Can Do |
|||
|
|