

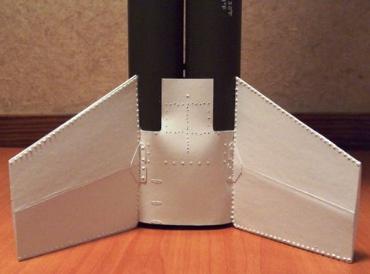
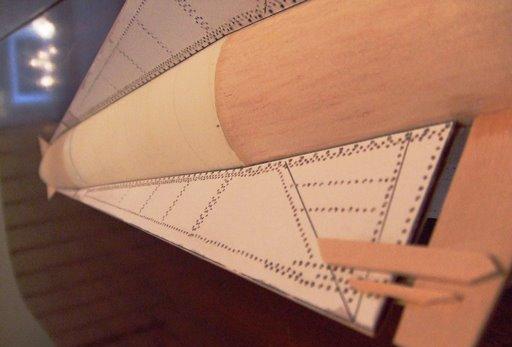
Scale Rocket Rivets and Bolts
To pull off the effects, there were two different techniques used. The easiest was simply drilling tiny dimples into, but not through, the fin surface to achieve the recessed rivet appearance. The second effect was to apply a tiny droplet of white glue for a raised rivet or bolt head look.
In order to properly locate all the rivets and bolts, I simply ran off several copies of the scale drawings supplied in the kit on computer paper, and glued the printed skins to each fin surface.
For the recessed rivets, I used a Dremel and incredibly tiny drill bit - the kind you'll never find at the big box retail outlets, but you might find at a local hobby shop or very well stocked local hardware store. I wound up picking up a Testor's pin vise/drill bit combination pack (p/n 50629c) for about $12, which included 6 incredibly tiny drills. It took a bit of practice, but I found myself quickly falling into a comfort zone of just barely scratching into the surface with the drill rather than boring all the way through the thin fins.
For the glue dots, I picked up a set of really amazing syringes from Lee Valley Tools. They sell a 5-syringe set (p/n 25K07.31, link) for $10 that includes both 18 gauge and 20 gauge tips. I poured some thinned white glue (roughly 20% water, 80% glue) into the syringe and attached the 20 gauge tip. Applying just a little pressure to the plunger, I was able to "dot" about 100 bolt heads a minute. I had to let each side dry for a couple hours, which was fine and offered time to rest my eyes between sessions…
The drilled dimples and glue dots as applied to the skins looked a bit rough at first, but once I shot them with a couple light coats of paint, I was amazed at the results. I had spent maybe 8 hours total on these details, but they helped jump from "nice" to "outstanding" on the finish. A few sample photos are clipped below, and detail photos of the model can be seen online. Contributed by Chan Stevens
What You Can Do |
|||
|
|

Rick Reid (January 6, 2015)