

Repairing Body Tubes Damaged in ShippingI hope you have better luck than me, but I seem to get a lot of kits shipped to me with damaged body tubes. I'll assume you realize that a crushed body tube both looks ugly and will never be as strong as an uncompromised tube and not very aerodynamic. After receiving my third busted tube this year, I'm tired of the same old routine of asking for a replacement, I've even received crushed replacement tubes. (although some places understand it's not worth the shipping sending back a damaged tube, and sometimes I've received whole new kits for free - spare parts!). So with this last kit, I figured out a way to repair a wrinkled tube that wasn't crushed so badly. If the crushed area is small enough, you can cut out the offending part and use a coupler to put it back together. But sometimes that just won't work satisfactorly.
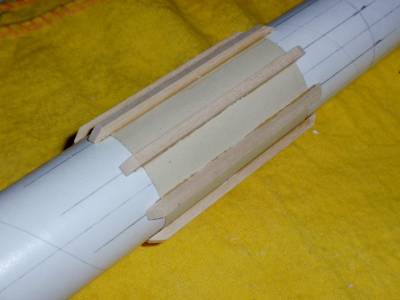
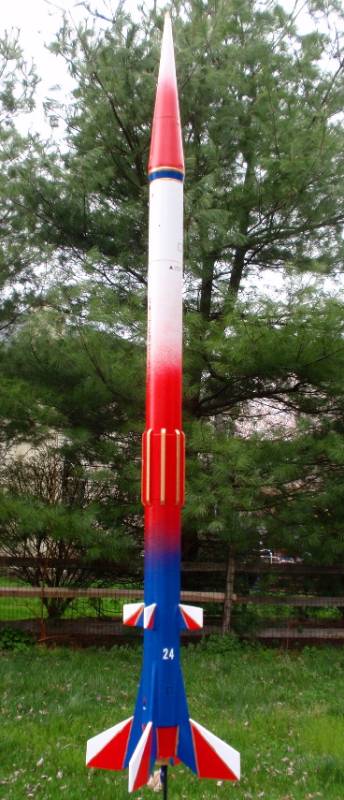
As shown in my picture, I was able to restore the tube to a structurally sound condition by covering the damaged area with paper, and glued eight basswood stringers along the length of the tube to add support and also add a unique detail to the rocket that is still pretty aerodynamic. It should look pretty cool when painted, possibly with a contrasting color. In this case I can use one of the strips for a standoff support for a launch lug. Another idea is to "hide" the launch lug in the group of strips by replacing a single strip with the lug cut to the same length - or better yet - consider using nothing but launch lugs. The only tricky part is cutting the paper (I used a heavy stock) to the exact width to wrap around once and not overlap itself. The seam does not have to be perfect - it is hidden under one of the basswood strips. The paper was glued on with a heavy dose of photo-mounting adhesive. I don't recommend wood or paper glue, the moisture can wrinkle the paper. I don't recommend CA glue either since it is brittle and expensive. Photo-mount adhesive is easily applied in a thin layer from a spray can, it's cheap, and I use it to paper-cover my balsa fins too. If you can see the picture, it's worth a thousand words. This will be my 'modified' version of the Quest Striker AGM. Here you can see the finished rocket with the repair, not too shabby, eh? And she flies well also.
Contributed by Rich DeAngelis
What You Can Do |
|||
|
|
Richard Holmes (August 25, 2012)