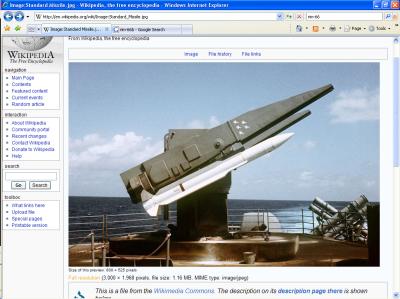
Using CADD to Scale Real Rockets & MissilesMany times people get frustrated with performing the various mathematical functions needed to scale down images of real rockets and missiles. With the correct software, the task is quite easy. Although the majority of builders probably wont have direct access to the required software, most of us can use some creative resources to find somebody that could spend a few minutes formatting the image for you. Additionally, with some additional steps, these tasks can be performed with some low-end shareware or "paint" programs. My instructions will be based on using AutoCAD 2006 based program called Architectural Desktop. Again, the same techniques can be employed by many other programs. Step 1: Insert the Image For this example, I’m going to scale down web-based images of a Raytheon RIM-66 Standard missile. Images and scale data for this was very easy to find using Google. With the best image and a few key dimensions, I can get started.
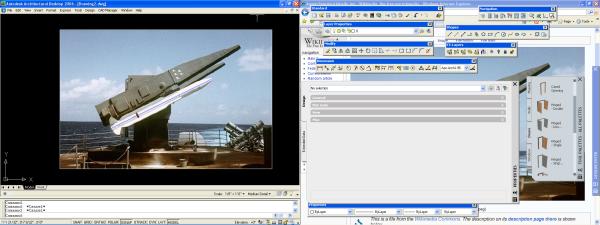
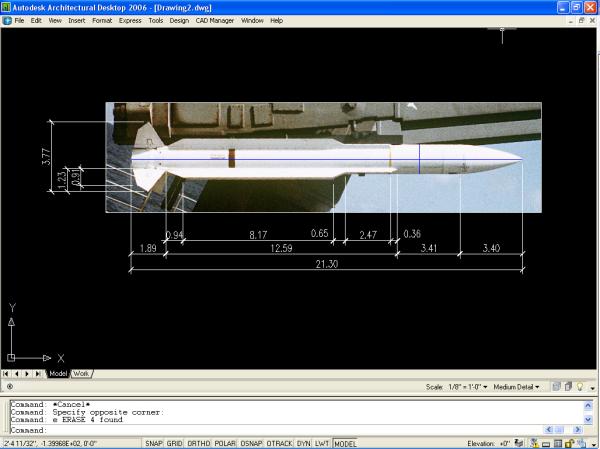
A new drawing is created in AutoCAD, and the image is inserted using "image manager". Don’t worry about a scale factor yet. Be sure your "image frame" is left on; otherwise changing the scale will be impossible.
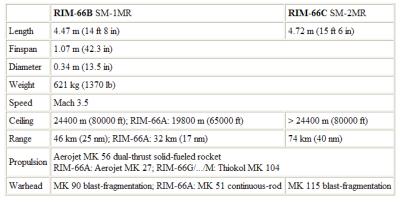
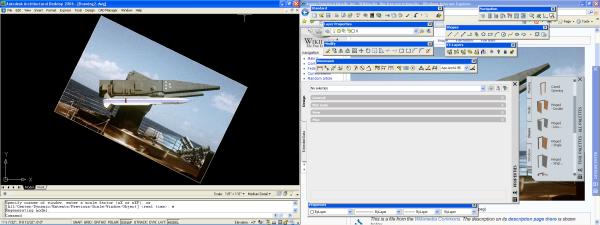
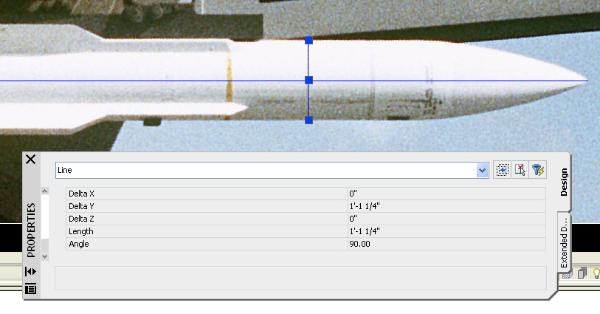
The RIM-66 is 14’-8" long, and 1’-1 ½" diameter. Draw a rectangle this size above the image. Now, grab a corner grip of the image and stretch it to about the right size. Don’t worry about being exact. Just close will be fine. Step 2: Scale the image to "real life" Draw a straight line from the tip of the nosecone to the back of the rocket. You may need to do some research to determine what the data considers "length". Query the line you have drawn for its "X delta" or length. Now we can do our math.
Converting to inches, 14’-8" is 176 inches. Our line measures 172 3/8" inches. So divide 176/172.375 to give a correction factor of 1.0210. Now scale the line and image by this number. Query the line again. It should be very close to 176. Some rounding error may occur. Now draw a line across the diameter of the rocket. Query it. It should be very close to 13 ½". Don’t be alarmed if it is not. Most photographs will have some distortion in their axis relationships. If you have Photoshop or similar raster imaging software available, you may chose to correct the image to a proper ratio.
If you have a significant error in you diameter measurement, you may want to consider using the scale correction method to get this dimension correct. Be aware that doing this will alter the length! Unless you correct the raster image, one dimension will be wrong! Step 3: Chose your scale Now its time to decide what scale your rocket will be. This is almost always determined by available body tube size. Typical outside diameter Estes body tube sizes are shown below:
Our actual diameter is 13.5". If we wanted to use BT-50 tubing for example, simple math gives us .976/13.5 – This yields a scale factor of 0.072 (or 7.2%). This would give us a rocket 12 5/8" long. Lets look at the other sizes: Tube Size Diameter Scale Factor Resulting Length (+/-)
Step 4: Print your image Now you have to make another decision. If you are doing this project yourself, you will probably want to scale a copy of your image by the exact factor decided upon in step 3. Now you could take some time and throw some general dimensions on it for the fins, paint scheme, and details. After you’re done you can plot your image at a one to one scale and proceed to construction.
If you have a buddy doing this for you as a quick favor, he probably wants to get rid of you at this point. Tell him to simply plot the image using the scale factor chosen. You now can use a ruler get your project going. Just when you thought you were done, don’t forget that sometimes your selected image may have fins and other details foreshortened! In our example, the fins are towards us at 45 degrees. Remembering your high school geometry, you will need to multiple the quick dimensions by about 1.4 to correct the problem! I would hesitate to use the techniques described above to produce a commercially available kit! There are too many opportunities for errors. But if you are looking to make a good representation of a real rocket or missile, this method will get you close. Good luck! Contributed by Dan Bihary
What You Can Do |
|||
|
|